
Amazon Echo Show 5 I/O Board Replacement

What you need

  1. Amazon Echo Show 5 I/O Board Replacement, Amazon Echo Show 5 Disassembly: step 1, image 1 of 3 Amazon Echo Show 5 I/O Board Replacement, Amazon Echo Show 5 Disassembly: step 1, image 2 of 3 Amazon Echo Show 5 I/O Board Replacement, Amazon Echo Show 5 Disassembly: step 1, image 3 of 3
    • Power off and unplug the Amazon Echo Show 5. Failure to do so could result in injury or damage to the device.

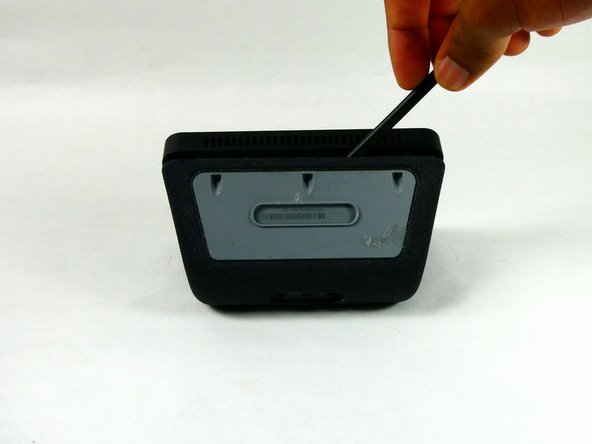
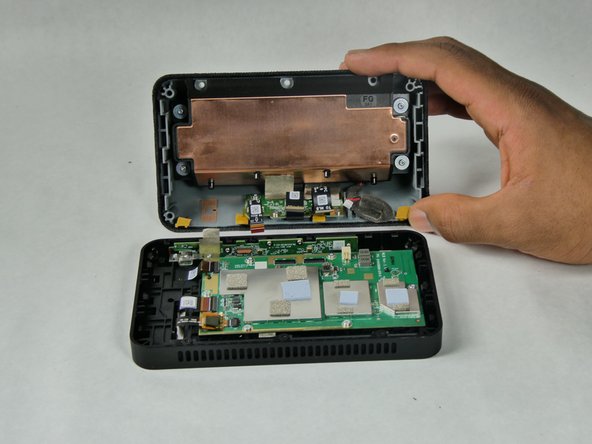
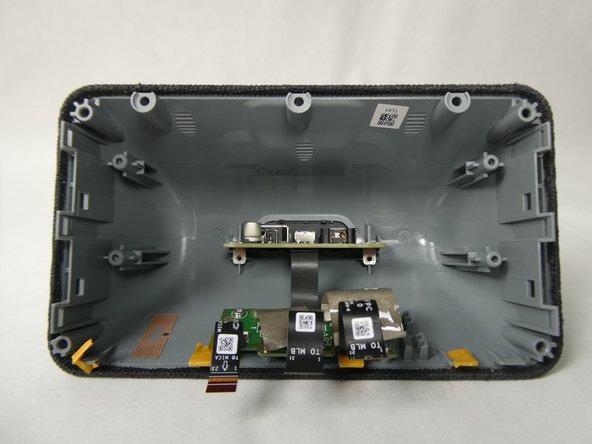
    • Orient the Amazon Echo Show 5 so that the display is face down.

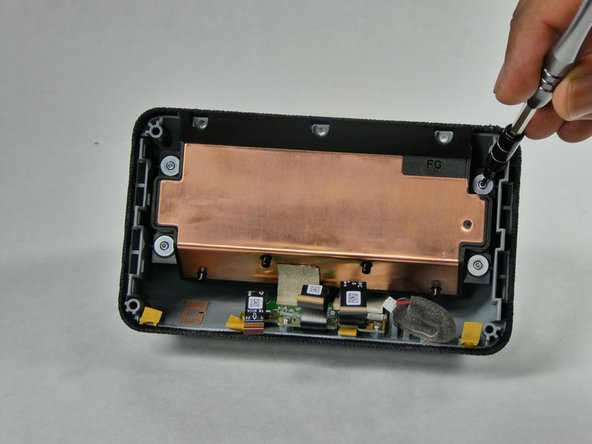
    • Use a spudger to remove the grey bottom cover.

    • During reassembly, adhesive needs to be applied to secure the bottom cover.

  2. Amazon Echo Show 5 I/O Board Replacement: step 2, image 1 of 2 Amazon Echo Show 5 I/O Board Replacement: step 2, image 2 of 2
    • Remove the three screws with a T6 Torx screwdriver.

  3. Amazon Echo Show 5 I/O Board Replacement: step 3, image 1 of 3 Amazon Echo Show 5 I/O Board Replacement: step 3, image 2 of 3 Amazon Echo Show 5 I/O Board Replacement: step 3, image 3 of 3
    • Use a spudger to release the six internal tabs lining the sides of the device.

    • There are fragile ribbon connectors along the side of the screen with the camera on it. So, do not stick the spudger more than a couple millimeters into the device.

  4. Amazon Echo Show 5 I/O Board Replacement: step 4, image 1 of 1
    • Carefully open the device by folding it open along the top edge where the camera is located.

    • Do not try to open the device from any other side as this would damage the ribbon connectors.

  5. Amazon Echo Show 5 I/O Board Replacement, Speaker: step 5, image 1 of 3 Amazon Echo Show 5 I/O Board Replacement, Speaker: step 5, image 2 of 3 Amazon Echo Show 5 I/O Board Replacement, Speaker: step 5, image 3 of 3
    • Carefully disconnect the red and black power connector.

  6. Amazon Echo Show 5 I/O Board Replacement: step 6, image 1 of 3 Amazon Echo Show 5 I/O Board Replacement: step 6, image 2 of 3 Amazon Echo Show 5 I/O Board Replacement: step 6, image 3 of 3
    • Remove the three ZIF connector ribbon cables that connect the speaker housing to the display housing.

    • Do not pull ribbon cables straight out, as this will damage the device. To safely remove ribbon cables, pull up on the tab where the cable is going into.

  7. Amazon Echo Show 5 I/O Board Replacement: step 7, image 1 of 3 Amazon Echo Show 5 I/O Board Replacement: step 7, image 2 of 3 Amazon Echo Show 5 I/O Board Replacement: step 7, image 3 of 3
    • Remove the four screws securing the speaker using a T6 Torx screwdriver.

  8. Amazon Echo Show 5 I/O Board Replacement: step 8, image 1 of 3 Amazon Echo Show 5 I/O Board Replacement: step 8, image 2 of 3 Amazon Echo Show 5 I/O Board Replacement: step 8, image 3 of 3
    • Pull back the silver tape.

  9. Amazon Echo Show 5 I/O Board Replacement: step 9, image 1 of 1
    • Carefully pull out the speaker housing from the black ledge.

  10. Amazon Echo Show 5 I/O Board Replacement, I/O Board: step 10, image 1 of 3 Amazon Echo Show 5 I/O Board Replacement, I/O Board: step 10, image 2 of 3 Amazon Echo Show 5 I/O Board Replacement, I/O Board: step 10, image 3 of 3
    Tool used on this step:
    Tweezers
    $4.99
    Buy
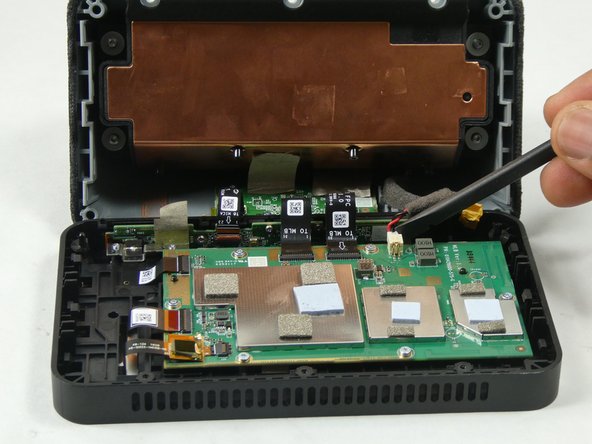
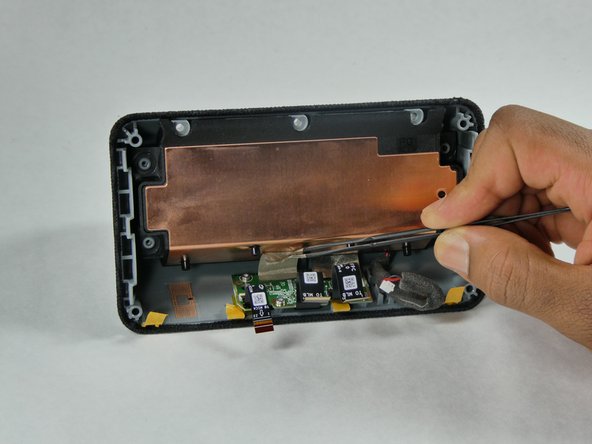
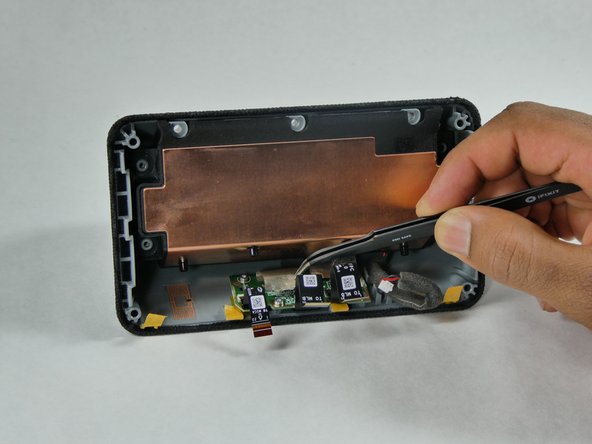
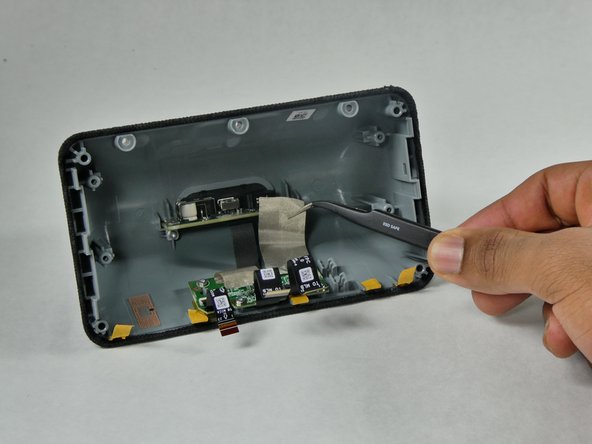
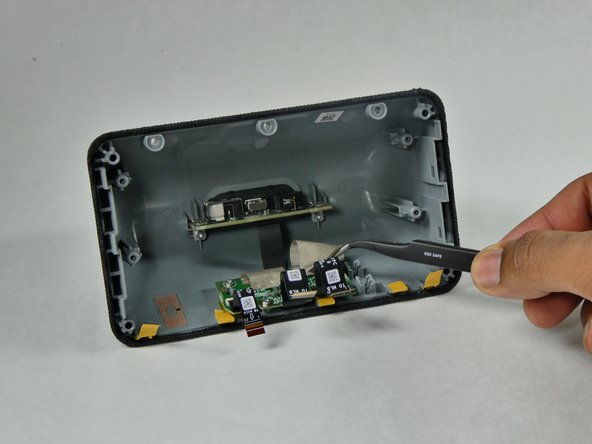
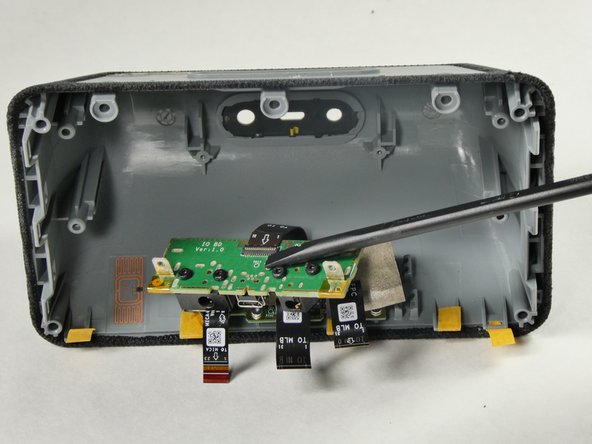
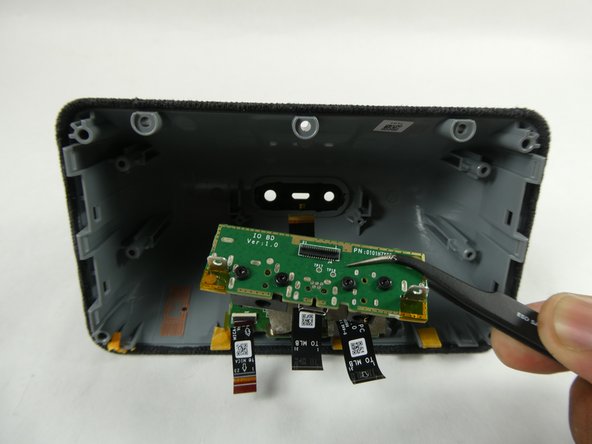
    • Use tweezers to peel off the metallic tape from the I/O board.

  11. Amazon Echo Show 5 I/O Board Replacement: step 11, image 1 of 3 Amazon Echo Show 5 I/O Board Replacement: step 11, image 2 of 3 Amazon Echo Show 5 I/O Board Replacement: step 11, image 3 of 3
    • Use the T6 Torx screwdriver to remove the two screws.

  12. Amazon Echo Show 5 I/O Board Replacement: step 12, image 1 of 2 Amazon Echo Show 5 I/O Board Replacement: step 12, image 2 of 2
    • Lift the board so that the ribbon cable is easily accessible.

    • Try not to use too much force as this may damage the ribbon cable.

  13. Amazon Echo Show 5 I/O Board Replacement: step 13, image 1 of 2 Amazon Echo Show 5 I/O Board Replacement: step 13, image 2 of 2
    • Disconnect the single ribbon cable.

    • Carefully pull out the I/O board.

Conclusion

To reassemble your device, follow these instructions in reverse order.

David Degbor

Member since: 10/26/22

277 Reputation

2 Guides authored

Team

UMass Dartmouth, Team 2-4, Petersen Fall 2022 Member of UMass Dartmouth, Team 2-4, Petersen Fall 2022

UMASSD-PETERSEN-F22S2G4

3 Members

7 Guides authored

0 Comments

Add Comment

View Statistics:

Past 24 Hours: 0

Past 7 Days: 9

Past 30 Days: 33

All Time: 367