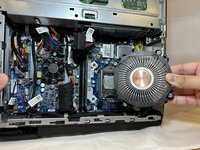
Introduction
If your Alienware X51 PC begins to shut down randomly or cannot fully process commands, you may need to replace the motherboard (refer to our Troubleshooting Guide for more details). Replacing the motherboard will help with any random shutdowns. Overall, the replacement can be complicated, but if done correctly, this guide will fix your PC.
What you need
-
-
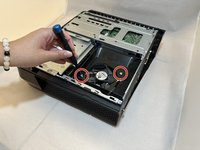
Place the PC so the name "Alienware" is on top and facing you.
-
Slide the front panel towards you and lift up.
 Ask FixBot
-
-
-
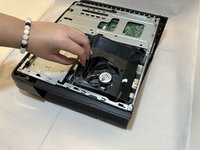
Fully disconnect the panel by unplugging the lighting cord going into the PC's internal system.
-
Remove the front panel from the rest of the device.
-
-
-
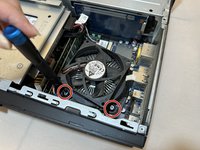
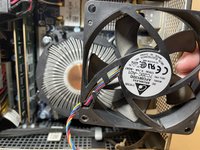
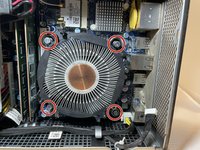
Remove the two 2.0 mm screws holding the fan protector in place using a Phillips #1 screwdriver.
-
Remove the protector holding the fan in.
-
-
-
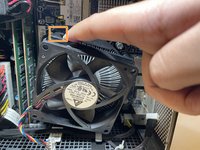
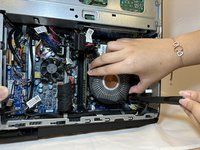
Use a Phillips #1 screwdriver to loosen the four spring screws around the fan until you hear a click.
-
Gently pull back the clips and remove the fan by pulling it out.
-
-
-
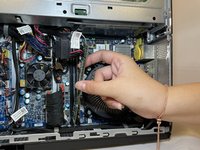
Remove the one 1.0 mm screw using a Phillips #1 screwdriver.
-
Remove the disc drive from the PC.
-
-
-
-
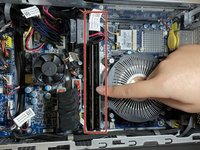
Pull apart the clips that hold the RAM sticks in place.
-
Remove the RAM sticks.
-
-
-
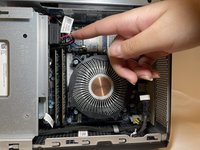
Loosen the four 10.0 mm screws around the heatsink with a Phillips #1 screwdriver until you hear a click.
-
Remove the heatsink by gently prying and lifting it up.
-
-
-
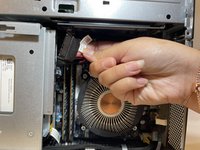
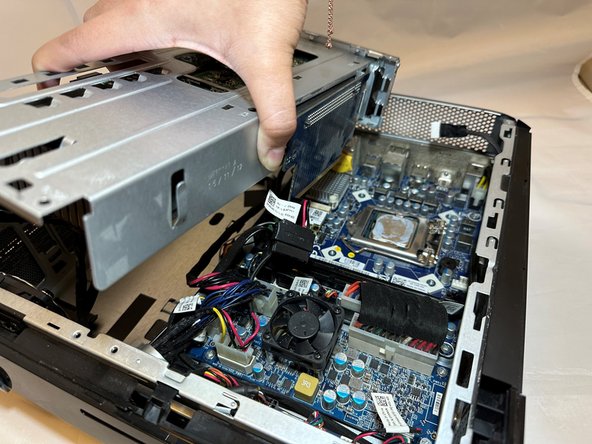
Remove the single 1.0 mm screw with a Phillips #1 screwdriver.
-
Firmly remove the internal PC system by lifting it out of the PC.
-
-
-
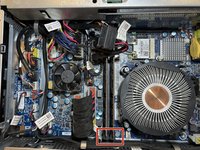
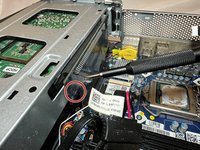
Loosen the four 1.0 mm screws holding down the motherboard using a Phillips #1 screwdriver.
-
-
-
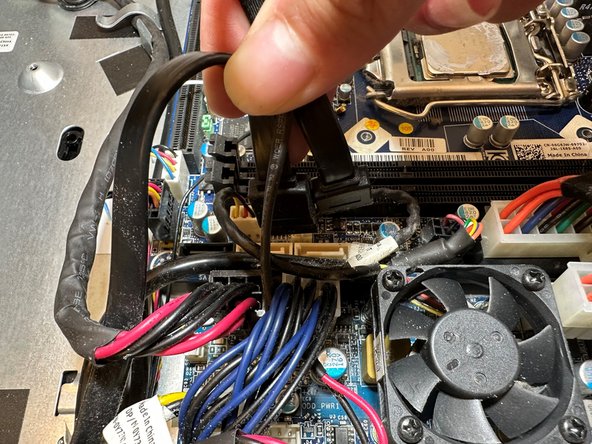
Disconnect the rectangular power supply plug from the motherboard into the other circuit board.
-
-
-
Disconnect the rectangular yellow bundled cable connector plug going into the motherboard.
-
-
-
Disconnect the rectangular white bundled cable connector going into the motherboard.
-


To reassemble your device, follow these instructions in reverse order.
Cancel: I did not complete this guide.
One other person completed this guide.

Team

Eastern Washington University, Team 1-2, Carnegie Fall 2023 Member of Eastern Washington University, Team 1-2, Carnegie Fall 2023
EWU-CARNEGIE-F23S1G2
4 Members
7 Guides authored