
Alienware P18G M14X R1 RAM Replacement

What you need

  1. Alienware P18G M14X R1 RAM Replacement, Back Cover: step 1, image 1 of 1
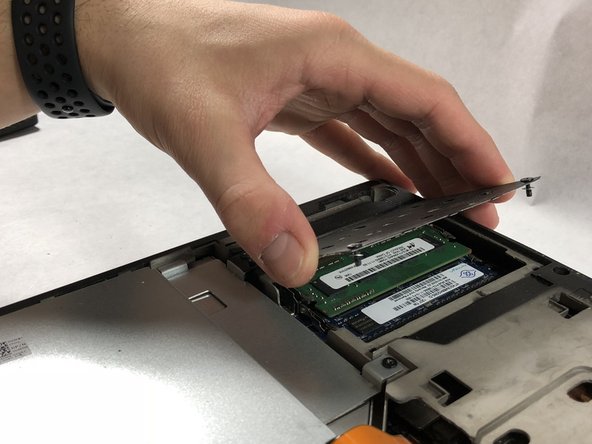
    • Loosen the top left and top right 6.5mm PH1 screws that hold down the back cover.

    • The screws will not be able to be removed from the back cover. They can only be loosened or tightened.

  2. Alienware P18G M14X R1 RAM Replacement: step 2, image 1 of 1
    • Slide back cover forward using your thumbs.

  3. Alienware P18G M14X R1 RAM Replacement: step 3, image 1 of 1
    • Lift up the cover and set aside exposing the internals of the computer.

  4. Alienware P18G M14X R1 RAM Replacement, RAM: step 4, image 1 of 1
    • Unscrew the two 6.35 mm using the PH1 screw driver.

  5. Alienware P18G M14X R1 RAM Replacement: step 5, image 1 of 2 Alienware P18G M14X R1 RAM Replacement: step 5, image 2 of 2
    • Lift the plate and remove it to uncover the RAM sticks.

  6. Alienware P18G M14X R1 RAM Replacement: step 6, image 1 of 1
    • Push outward on the prongs that secure the RAM stick in the slots.

    • After releasing the prongs the rams stick will rise up.

  7. Alienware P18G M14X R1 RAM Replacement: step 7, image 1 of 1
    • Be very gentle in this step, making sure to not damage anything.

    • Pull the RAM stick out of its housing.

  8. Alienware P18G M14X R1 RAM Replacement: step 8, image 1 of 1
    • Push outward on the prongs that secure the RAM stick in the slots.

    • After releasing the prongs the rams stick will rise up.

  9. Alienware P18G M14X R1 RAM Replacement: step 9, image 1 of 1
    • Be very gentle in this step, making sure to not damage anything.

    • Pull the second ram stick out of its housing.

Conclusion

To reassemble your device, follow these instructions in reverse order.

Andonaq Grozdani

Member since: 03/01/18

892 Reputation

5 Guides authored

Team

0 Comments

Add Comment

View Statistics:

Past 24 Hours: 0

Past 7 Days: 1

Past 30 Days: 8

All Time: 988