
Alienware Aurora Ryzen Edition R10 SSD Replacement

What you need

  1. Alienware Aurora Ryzen Edition R10 SSD Replacement, SSD: step 1, image 1 of 2 Alienware Aurora Ryzen Edition R10 SSD Replacement, SSD: step 1, image 2 of 2
    • Remove the single 4 mm, M3x4 screw using the Phillips #00 screwdriver.

    • Slide one of the two switches on the rear panel of the computer upwards to unlock the mechanism that allows the power supply to be elevated.

    • You should hear a slight "clunk" sound when unlocking this switch.

    • Repeat the previous bullet to unlock the second switch.

    • There are two switches that need to be undone, but they are identical. The switches are moved upwards to unlock, and downwards to lock again. There should be small, blue, lock icons on the switch to confirm this.

  2. Alienware Aurora Ryzen Edition R10 SSD Replacement: step 2, image 1 of 2 Alienware Aurora Ryzen Edition R10 SSD Replacement: step 2, image 2 of 2
    • Pull on the release latch on the back of the computer to release the lid's security. While doing so, tug gently on the computer lid to remove the lid.

    • The lid should come loose as shown in the second picture.

    • The rectangles represent the following—Orange: Hard drives; Yellow: Liquid cooling system; Green: Memory sticks; Blue: Power supply; Indigo: Graphics card

    • Elevating the power supply is not necessary to change/remove the hard drives. However, it will be necessary for almost everything else you may want to change.

  3. Alienware Aurora Ryzen Edition R10 SSD Replacement: step 3, image 1 of 2 Alienware Aurora Ryzen Edition R10 SSD Replacement: step 3, image 2 of 2
    • Push both of the tray's extremities, inwards, then gently pull towards you.

    • If you are removing a slot that already has a hard drive in it, be sure to unplug the cables before removing the tray. The tray will come out the same way, but you do not want to remove the tray with the disk plugged in!

  4. Alienware Aurora Ryzen Edition R10 SSD Replacement: step 4, image 1 of 2 Alienware Aurora Ryzen Edition R10 SSD Replacement: step 4, image 2 of 2
    • Insert the hard drive into the tray using the four small squares on the side of the disk as shown by the red circles. There should not be any movement if inserted correctly.

    • If you need to remove an old hard drive before inserting the new one, gently separate the blue tray from the hard drive. You will only need to pull enough for the tray to come out of the hard drive's tiny hole slots. Once one side is loose, the other side will come out on its own, then follow the red bullet to insert a new drive.

  5. Alienware Aurora Ryzen Edition R10 SSD Replacement: step 5, image 1 of 2 Alienware Aurora Ryzen Edition R10 SSD Replacement: step 5, image 2 of 2
    • Push the tray, with the hard drive inserted, back into its original position until you hear a small "click." Your hard drive is now inserted into the computer, but you still need to plug it in.

  6. Alienware Aurora Ryzen Edition R10 SSD Replacement: step 6, image 1 of 3 Alienware Aurora Ryzen Edition R10 SSD Replacement: step 6, image 2 of 3 Alienware Aurora Ryzen Edition R10 SSD Replacement: step 6, image 3 of 3
    • Hard drives require two individual cables in order for them to work as intended: a power supply, and a data cable. This particular computer comes with an additional power supply cable, but you may need to provide your own data, or SATA cable.

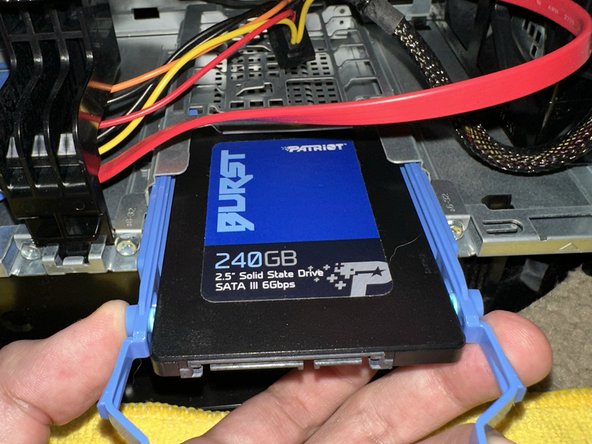
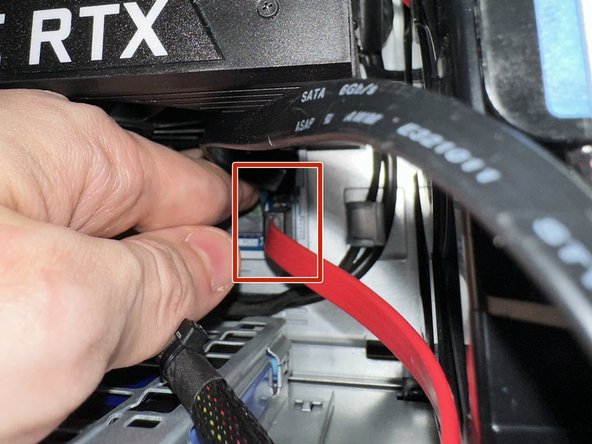
    • Plug the SATA cable into the computer and the hard drive. The SATA cable plugs into the smaller connector on the right side of the hard drive, and just beneath the graphics card inside the computer.

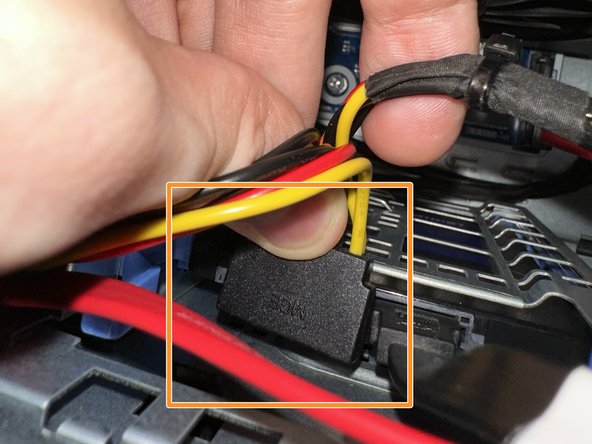
    • Plug the power supply cable into the hard drive. The power supply cable plugs into the larger connector on the left side of the hard drive.

    • You only need to plug in one end of the power supply cable, as the other end is already connected in the computer.

    • Once everything is done, close the computer by following the first two steps in reverse order. Your new hard drive is now ready to be used!

Conclusion

To reassemble your device, follow these instructions in reverse order.


Justin Weyn

Member since: 07/01/23

133 Reputation

1 Guide authored

0 Comments

Add Comment

View Statistics:

Past 24 Hours: 0

Past 7 Days: 7

Past 30 Days: 28

All Time: 395