Introduction
Before beginning this guide, refer to trouble shooting page: Alienware AW510H Microphone Does Not Pick Up Sound. If the microphone doesn't work after trouble shooting, consider replacing the microphone assembly.
To replace the microphone assembly on the Alienware AW510H gaming headset, first disassemble the left ear cup, as the retractable microphone is soldered directly to the internal assembly.
CAUTION: This process involves soldering. Review this soldering technique guide for guidance.
What you need
-
-
-
Hold the earcup with one hand and firmly grip the ear pad with the other.
 Ask FixBot
-
-
-
-
-
Remove the four 8.5mm screws found on the base of the left ear cup housing using a Phillips #0 screwdriver.
-
-
-
-
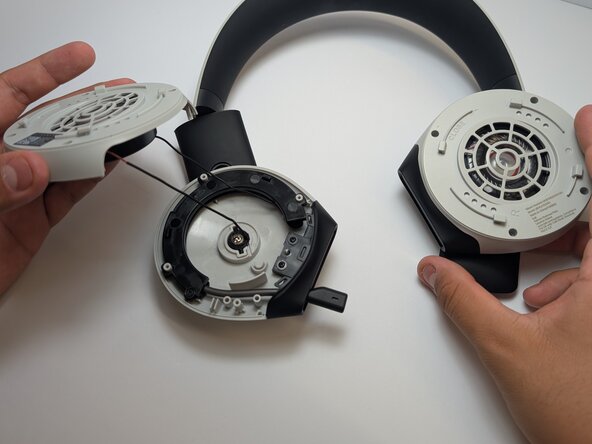
Gently lift the plastic shell, being cautious of the wire that is still attached.
-
-
-
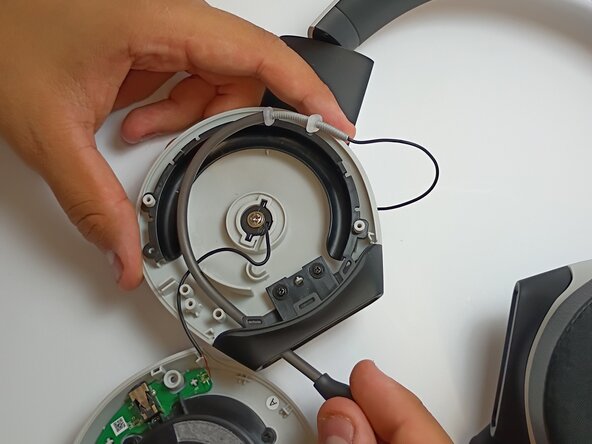
Remove the 5mm screw from the microphone cover using a Phillips #1 screwdriver.
-
Follow the microphone boom connection to the driver and motherboard.
-
-
-
If there is a protective plastic or glue coating on top of the solder, scrape it off using a metal spudger before desoldering.
-
-
-
Use a soldering iron to disconnect the wire connecting the microphone to the motherboard.
-
-






To reassemble your device, follow these instructions in reverse order.

Team

Austin Community College, Team 2-1, Watkins Spring 2026 Member of Austin Community College, Team 2-1, Watkins Spring 2026
AUSTINCC-WATKINS-S26S2G1
4 Members
60 Guides authored
