What you need
Video Overview
-
-
It is difficult to teardown the AirPods charging case because the charging case features 2 fixed points and the middle part is glued with adhesive. The charging case can easily be damaged by careless methods of dissasembly.
-
-
-
Make a pry piece with a 0.1mm steel plate. Firstly, cut the steel plate into the shape of a pry piece with a pair of scissors.
-
Grind the edges of the pry piece with a sheet of sandpaper.
-
-
Tool used on this step:Tweezers$4.99
-
Bend the pry piece with a cutting nipper.
-
Use tweezers to make a shielding plate.
-
-
-
To avoid damaging the charging case, wrap high-temperature tape around it.
-
Next, insert the pry piece into the seam of the two fixed points.
-
Use the pry knife to pry out a gap.
-
-
-
-
Wedge the special pry piece into the seam to pull out the docking tubes.
-
-
-
If you still cannot open the case, you can build an extractor tool with two pieces of cable gland and two screws.
-
-
-
Attach the charging case to the holder and dip a small amount of alcohol on the battery.
-
Pry up the battery with the pry knife and the battery connector with tweezers.
-
Then take out the battery flex cable.
-
-
-
Take out the battery.
-
Measured by the multimeter, the battery is found to have no voltage.
-
Get a new battery that has a stable voltage of 3.6v-4.0v.
-
-
-
Attach the double-sided tape to the new battery.
-
Put the new battery into the charging case and connect the battery flex cable.
-
-
-
Plug in the charging cable. The case should now charge normally once more.
-
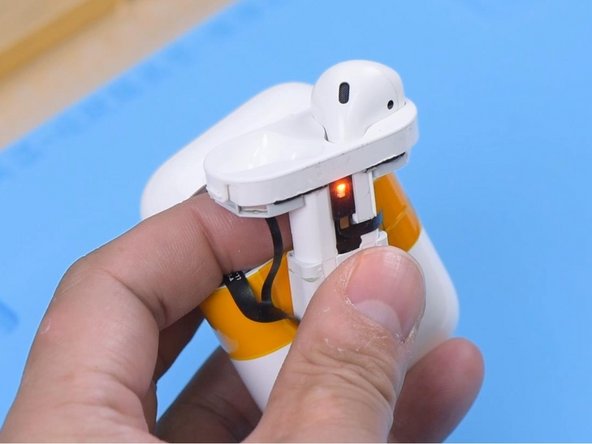
Put the earbuds in. The earbuds should charge normally too.
-
-
-
Peel off the double-sided tape and attach the battery to the case.
-
Install the docking tubes.
-
-
-
Connect the AirPods to the phone. Both the charging case and AirPods can now be charged and used normally again.
-


Cancel: I did not complete this guide.
12 other people completed this guide.

4 Guide Comments
I feel like this guide could be a lot more descriptive and helpful, especially including tips on what to do and not do for each step, rather than assume we know exactly what you mean when you give each step in one sentence bearing half a dozen words or so. Also, there's absolutely no need to build a pair of pry tools, plastic picks work fine, and won't risk damaging either the case or the battery inside. Metal tools and lithium batteries are a no-no! Geez. With a pick wedged in the seam on each side of the case, like it shows in the picture, one final pick to the front seam can then safely pry out the holder from the case. Only the last pick will be used to pry, the other two just separate the inner case and outer case keeping the clips/catches unengaged, allowing for easy lifting/prying up and removal of the inner case.
Great guideline. It helps me to replace the battery for my AirPods. Thank you.