
Acer Predator 17 G9-791 Display Replacement

What you need

  1. Acer Predator 17 G9-791 Display Replacement, Service Panel: step 1, image 1 of 1
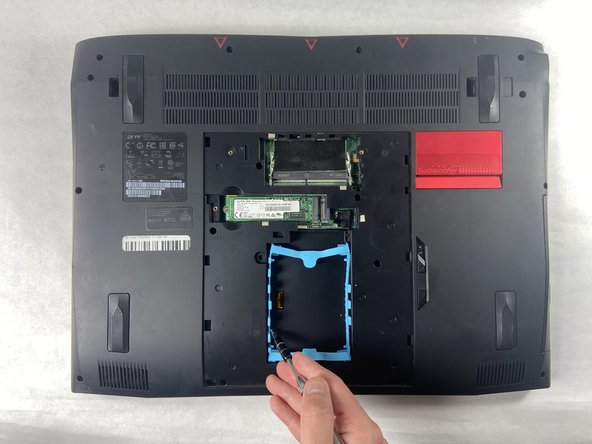
    • The service panel can be located on the bottom of the device. It is shown here as the panel located in the middle of the device, going from the upper vents to the bottom of the device.

  2. Acer Predator 17 G9-791 Display Replacement: step 2, image 1 of 2 Acer Predator 17 G9-791 Display Replacement: step 2, image 2 of 2
    • Loosen the two Phillips #0 screws.

    • Pull up slightly on the top of the panel to help fully separate the screws from the rest of the device.

  3. Acer Predator 17 G9-791 Display Replacement: step 3, image 1 of 1
    • Continue pulling up on the panel to separate it from the laptop and remove it.

  4. Acer Predator 17 G9-791 Display Replacement, Bottom Case: step 4, image 1 of 3 Acer Predator 17 G9-791 Display Replacement, Bottom Case: step 4, image 2 of 3 Acer Predator 17 G9-791 Display Replacement, Bottom Case: step 4, image 3 of 3
    • Remove the nine 4.5 mm Phillips #0 screws from the panel.

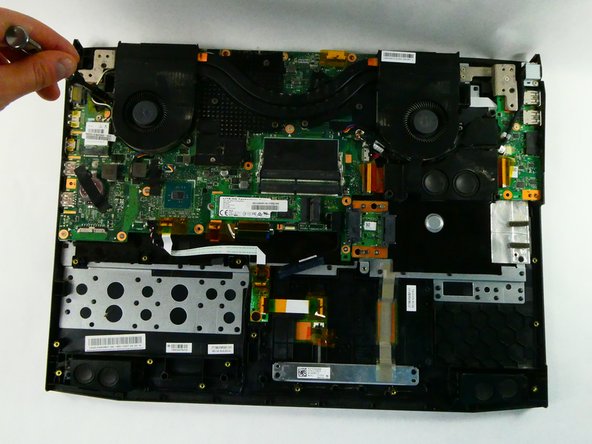
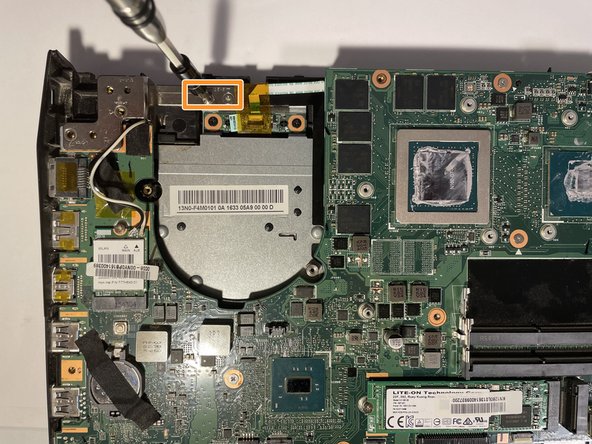
    • Remove four 14 mm Phillips #0 screws.

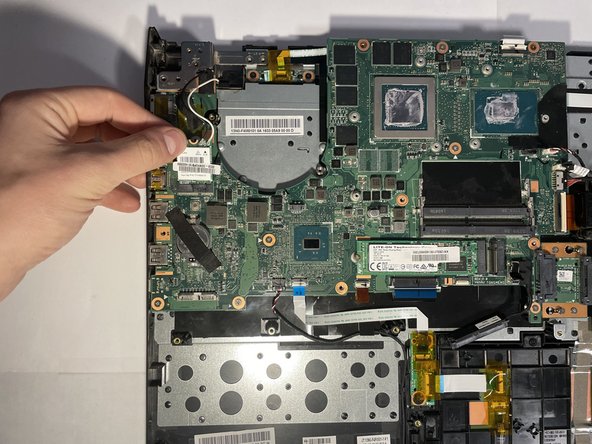
    • Remove six 7 mm Phillips #0 screws.

  5. Acer Predator 17 G9-791 Display Replacement: step 5, image 1 of 1
    • Slide the "unlock" slider up located to the right of the service panel and pull the disc tray out.

  6. Acer Predator 17 G9-791 Display Replacement: step 6, image 1 of 1
    • Remove the two 4.5 mm Phillips #0 screws located underneath the removed optical drive.

  7. Acer Predator 17 G9-791 Display Replacement: step 7, image 1 of 2 Acer Predator 17 G9-791 Display Replacement: step 7, image 2 of 2
    • Pry up on the edges of the bottom cover and lift the bottom case off of the device.

  8. Acer Predator 17 G9-791 Display Replacement, Battery: step 8, image 1 of 1
    • Remove the six 4 mm Phillips #0 screws from the battery.

  9. Acer Predator 17 G9-791 Display Replacement: step 9, image 1 of 2 Acer Predator 17 G9-791 Display Replacement: step 9, image 2 of 2
    • Disconnect the battery connector from the motherboard.

  10. Acer Predator 17 G9-791 Display Replacement: step 10, image 1 of 1
    • Gently lift the battery and remove it from the device.

  11. Acer Predator 17 G9-791 Display Replacement, Fan Assembly: step 11, image 1 of 2 Acer Predator 17 G9-791 Display Replacement, Fan Assembly: step 11, image 2 of 2
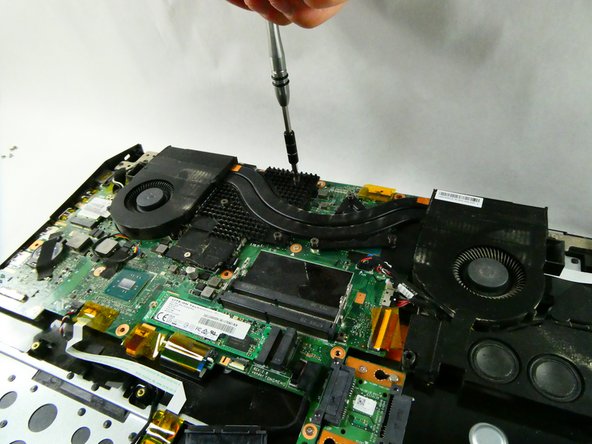
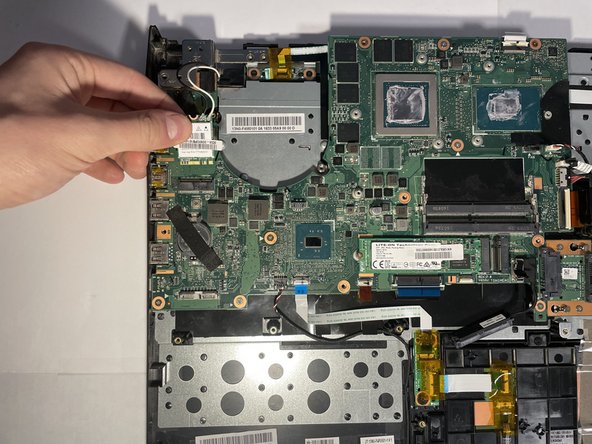
    • Remove the five 4.5 mm Phillips #0 screws located on the perimeter of the fans.

  12. Acer Predator 17 G9-791 Display Replacement: step 12, image 1 of 2 Acer Predator 17 G9-791 Display Replacement: step 12, image 2 of 2
    • Unscrew the six Phillips #0 screws enough to loosen the assembly from the motherboard.

  13. Acer Predator 17 G9-791 Display Replacement: step 13, image 1 of 3 Acer Predator 17 G9-791 Display Replacement: step 13, image 2 of 3 Acer Predator 17 G9-791 Display Replacement: step 13, image 3 of 3
    • Detach the left fan's cord from the motherboard.

  14. Acer Predator 17 G9-791 Display Replacement: step 14, image 1 of 3 Acer Predator 17 G9-791 Display Replacement: step 14, image 2 of 3 Acer Predator 17 G9-791 Display Replacement: step 14, image 3 of 3
    • Detach the right fan's cord from the motherboard.

  15. Acer Predator 17 G9-791 Display Replacement: step 15, image 1 of 3 Acer Predator 17 G9-791 Display Replacement: step 15, image 2 of 3 Acer Predator 17 G9-791 Display Replacement: step 15, image 3 of 3
    • Lift the fan assembly up and out.

  16. Acer Predator 17 G9-791 Display Replacement, Display: step 16, image 1 of 3 Acer Predator 17 G9-791 Display Replacement, Display: step 16, image 2 of 3 Acer Predator 17 G9-791 Display Replacement, Display: step 16, image 3 of 3
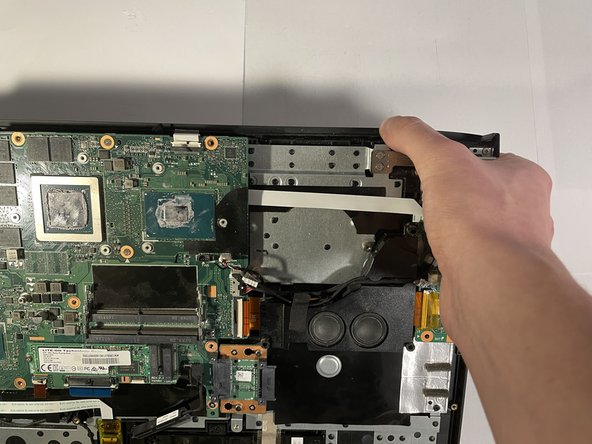
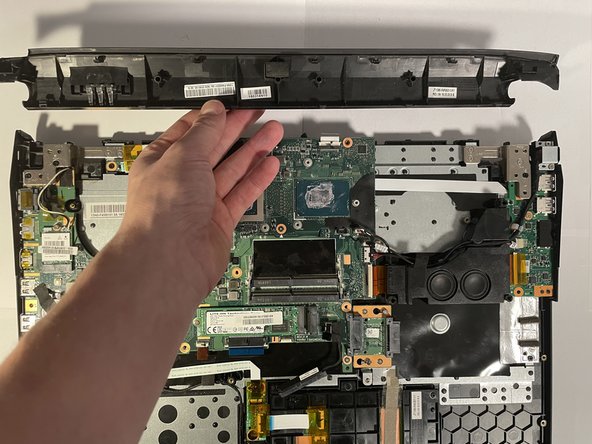
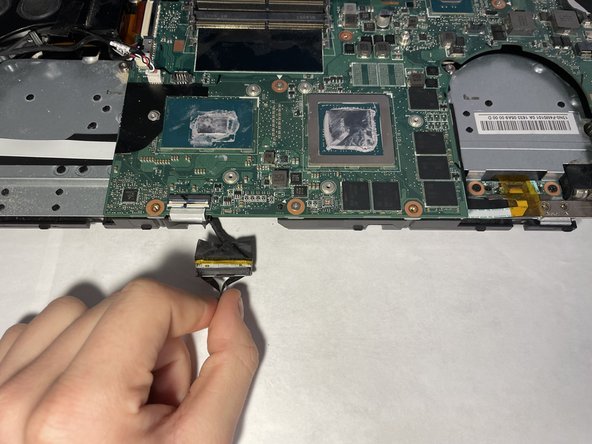
    • Push down on the back of the device to unclip this panel, removing it by pulling it out the back of the device.

  17. Acer Predator 17 G9-791 Display Replacement: step 17, image 1 of 2 Acer Predator 17 G9-791 Display Replacement: step 17, image 2 of 2
    • Remove two black 7 mm Phillips #0 screws from the left display bracket.

    • Remove the two silver 5 mm Phillips #0 screws from the left display bracket.

  18. Acer Predator 17 G9-791 Display Replacement: step 18, image 1 of 2 Acer Predator 17 G9-791 Display Replacement: step 18, image 2 of 2
    • Remove three silver 5 mm Phillips #0 screws from the right display bracket.

    • Remove one black 7 mm Phillips #0 screw from the right display bracket.

  19. Acer Predator 17 G9-791 Display Replacement: step 19, image 1 of 3 Acer Predator 17 G9-791 Display Replacement: step 19, image 2 of 3 Acer Predator 17 G9-791 Display Replacement: step 19, image 3 of 3
    • Remove one 4.5 mm Phillips #0 screw from the WLAN card.

    • Pull the WLAN card out.

  20. Acer Predator 17 G9-791 Display Replacement: step 20, image 1 of 2 Acer Predator 17 G9-791 Display Replacement: step 20, image 2 of 2
    • Turn the device around.

    • Pull the black tab to disconnect one wire from the bottom of the motherboard.

  21. Acer Predator 17 G9-791 Display Replacement: step 21, image 1 of 2 Acer Predator 17 G9-791 Display Replacement: step 21, image 2 of 2
    • Turn the device around.

    • Opening the cover slightly, pull the bottom half of the device towards you.

  22. Acer Predator 17 G9-791 Display Replacement: step 22, image 1 of 2 Acer Predator 17 G9-791 Display Replacement: step 22, image 2 of 2
    • Separate the wire that was unplugged two steps ago from the bottom of the device.

    • This wire runs in a track and pulling on it slightly will separate it from the bottom half of the device.

    • When reinstalling, ensure this wire in placed back in its track before attempting to put the new display on the device.

Conclusion

To reassemble your device, follow these instructions in reverse order.

Adeline Slocum

Member since: 10/25/22

298 Reputation

2 Guides authored

Team

0 Comments

Add Comment

View Statistics:

Past 24 Hours: 0

Past 7 Days: 2

Past 30 Days: 17

All Time: 311