
Acer Aspire Switch 10 SW5-011-18R3 Motherboard Replacement

What you need

  1. Acer Aspire Switch 10 SW5-011-18R3 Motherboard Replacement, Motherboard: step 1, image 1 of 3 Acer Aspire Switch 10 SW5-011-18R3 Motherboard Replacement, Motherboard: step 1, image 2 of 3 Acer Aspire Switch 10 SW5-011-18R3 Motherboard Replacement, Motherboard: step 1, image 3 of 3
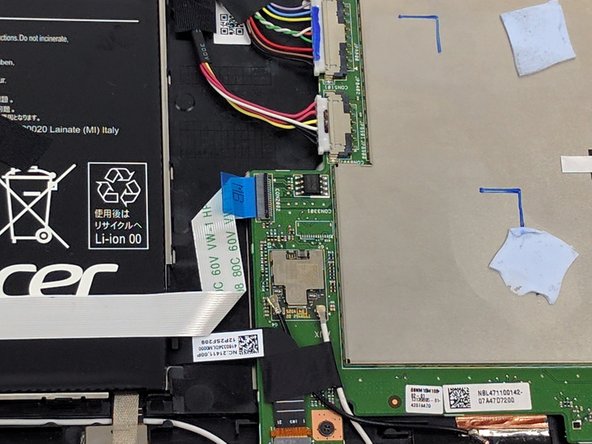
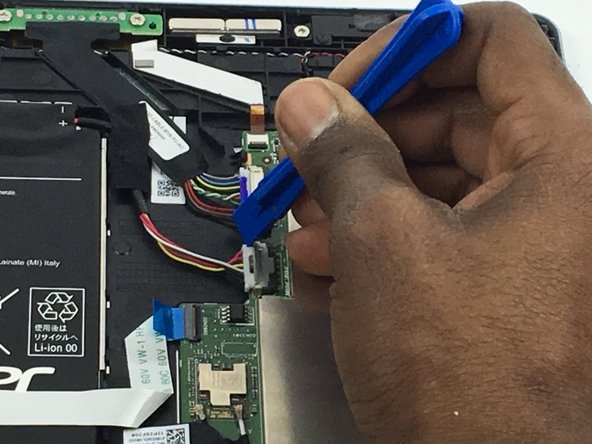
    • Wedge your plastic opening tool into the crevice between the volume button and casing to create space.

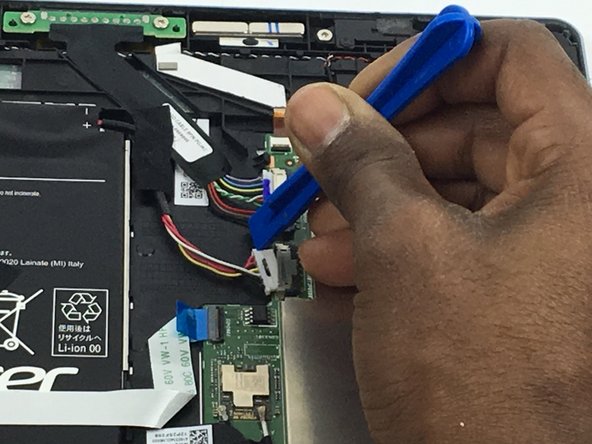
    • Slide the plastic opening tool along this crevice to pry apart the backing of the tablet.

  2. Acer Aspire Switch 10 SW5-011-18R3 Motherboard Replacement: step 2, image 1 of 3 Acer Aspire Switch 10 SW5-011-18R3 Motherboard Replacement: step 2, image 2 of 3 Acer Aspire Switch 10 SW5-011-18R3 Motherboard Replacement: step 2, image 3 of 3
    • There are four zero insertion force connectors that need to be removed.

    • Use your plastic opening tool to flip up the black clips that secure the ribbon cables to the motherboard.

    • Once the clips are flipped up, the ribbon cables will be safe to remove.

  3. Acer Aspire Switch 10 SW5-011-18R3 Motherboard Replacement: step 3, image 1 of 3 Acer Aspire Switch 10 SW5-011-18R3 Motherboard Replacement: step 3, image 2 of 3 Acer Aspire Switch 10 SW5-011-18R3 Motherboard Replacement: step 3, image 3 of 3
    • Use your plastic opening tool to pry up and lift the antenna cables from the motherboard.

    • The connectors are delicate so use a gentle touch when prying them.

  4. Acer Aspire Switch 10 SW5-011-18R3 Motherboard Replacement: step 4, image 1 of 3 Acer Aspire Switch 10 SW5-011-18R3 Motherboard Replacement: step 4, image 2 of 3 Acer Aspire Switch 10 SW5-011-18R3 Motherboard Replacement: step 4, image 3 of 3
    • To remove the four bundle cable connectors, push against the edges of the connector to loosen it up.

    • Pull the cable away from the connector.

  5. Acer Aspire Switch 10 SW5-011-18R3 Motherboard Replacement: step 5, image 1 of 2 Acer Aspire Switch 10 SW5-011-18R3 Motherboard Replacement: step 5, image 2 of 2
    • Use your screwdriver with the Phillips PH000 attachment to remove the three 4mm screws.

    • Remove the motherboard from the tablet.

Conclusion

To reassemble your device, follow these instructions in reverse order.

9 other people completed this guide.

Max Francois

Member since: 09/28/16

684 Reputation

2 Guides authored

Team

USF Tampa, Team 3-4, Passmore Fall 2016 Member of USF Tampa, Team 3-4, Passmore Fall 2016

USFT-PASSMORE-F16S3G4

4 Members

4 Guides authored

0 Comments

Add Comment

View Statistics:

Past 24 Hours: 0

Past 7 Days: 5

Past 30 Days: 22

All Time: 7,357