Introduction
Use this guide to replace or upgrade the RAM in the Acer Aspire One ZG5.
What you need
-
-
Turn the netbook upside down with the battery at the top, facing away from you.
 Ask FixBot
-
-
-
Unlock the battery by sliding the switch located near the left hinge to the left "unlocked" position.
-
-
-
Slide the latch located on the opposite hinge from the lock while pushing the battery up.
-
-
-
Gently loosen the two Phillips #0 screws in the small panel that covers the wireless card.
-
-
-
Remove the single 3.9 mm Phillips #1 screw from the bottom left of the wireless card.
-
-
-
Gently lift up the left side of the wireless card and slide the card out of its socket.
-
-
-
Turn the netbook over and open the display so that the keyboard is facing you.
-
-
-
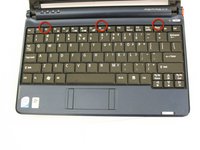
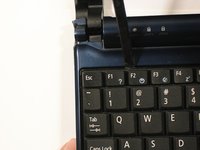
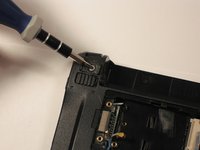
There are three tabs located on the top of the keyboard.
-
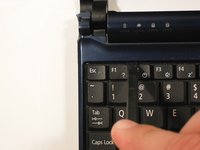
Start with the spudger pointing towards the display and pry up to push each tab off the keyboard.
-
As you move to the next tab, ensure the previous tab doesn't reset itself.
-
-
-
-
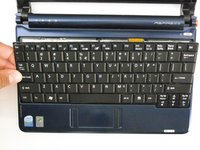
Lift top of keyboard up. If it doesn't lift easily, there may be tabs on the sides - use the tool to ease them aside and/or shift the keyboard from side to side.
-
-
-
Disconnect the ribbon by lifting the black plastic hinge and removing the clear blue cable.
-
-
-
Close the display and turn the ZG5 over so that the battery compartment faces away from you.
-
-
-
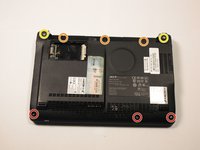
Remove three 5.8 mm Phillips #0 screws from the bottom of the case
-
Remove three 3.9 mm Phillips #1 screws from the battery compartment.
-
Remove two 5.8 mm Phillips #0 screws from underneath the feet near the hinges.
-
-
-
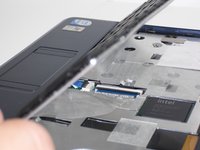
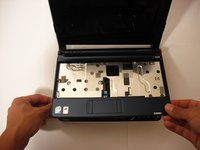
Turn the netbook back over and open the display with the keyboard cavity facing you.
-
-
-
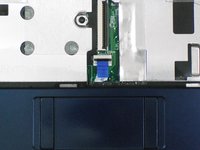
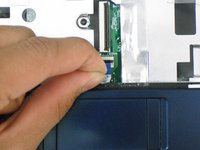
Flip up the retaining flap on the trackpad ribbon cable ZIF connector.
-
Using the blue tab, pull the trackpad ribbon cable from its socket on the motherboard.
-
-
-
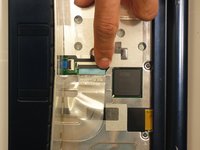
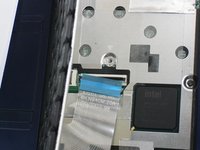
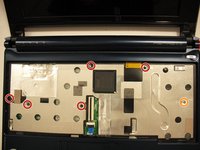
Remove the five black 4.7 mm Phillips #0 screws from the metal casing.
-
Remove the single silver 4.3 mm Phillips #00 screw from the right side of the metal casing.
-
-
-
Starting at the red rings along the hinge, insert a spudger or plastic opening tool into the seam between the two halves of the case.
-
Slide the spudger toward the front of the device, releasing the small clips that hold down the top case.
-
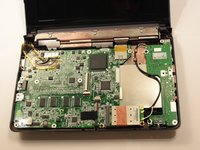
Gently lift off the top case.
-
-
-
Disconnect the two antenna cables from the right side of the wireless card.
-
-
-
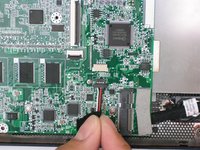
Disconnect the display cable from the top left of the motherboard.
-
-
-
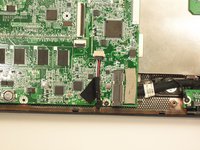
Remove three 3.9 mm Phillips #1 screws from the small I/O board.
-
Remove a single 3.9 mm Phillips #0 screw from the front of the motherboard.
-
-
-
Remove the two 4.7 mm Phillips #1 screws that connect the display to the motherboard.
-
-
-
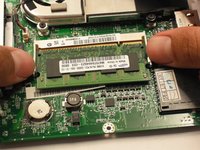
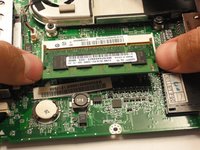
Simultaneously release both latches on opposing sides of the RAM.
-
The RAM should spring up.
-


To reassemble your device, follow these instructions in reverse order.
Cancel: I did not complete this guide.
64 other people completed this guide.
Team

Cal Poly, Team 7-49, Amido Fall 2010 Member of Cal Poly, Team 7-49, Amido Fall 2010
CPSU-AMIDO-F10S7G49
5 Members
34 Guides authored
24 Guide Comments
Thanks a lot!!
It worked for me!
This guide lacks important information and technical accuracy.
The ZG5 can handle a maximum of 1.5GiB RAM, and realistically, can handle only an extra 512MiB RAM on top of the 512MiB fixed RAM, because of variations in the actual amount of RAM on the card you install.
I followed the entire guide, I have no more available RAM, and the tracker pad no longer works.
Thanks a bunch! I now have a netbook that is no longer a functioning netbook.
Please remove this guide until it addresses these important issues.
You are unfair to the author. This guide worked absolutely fine, and the guide has nothing to do with how much capacity your Acer Aspire One has, it has to do with how to exchange the RAM...
IF you want to fix things like highly compressed technology / like a mini laptop / yourself, you need to be sensitive. The way I have seen 9 out of 10 persons, they do not have that sensitivity. It is not a fault on you, and does not make you wrong. But you must be conscious about if you do not have the necessary sensitivity to do this work.
IFF your pad is not working, then try to do the same operation once more and be aware of how the mini laptop is to be handled at the various parts. I would guess that we are missing a wire in your laptop or something like that.
And - if you want it put in another way - since you couldn\t master doing it - then the money you saved on that RAM exchange - you can now spend them on fixing that small pad problem - with a professional.
I am blaming you for blaming the author.
@Stone Forest - Come on, I followed this guide to upgrade my son's and my wife's friend's netbooks without problems at all. All you have to do is make sure you do the work on a static-free surface, wear your anti-shock/static wristband (do this ANY time you handle computer equipment!) and follow the steps. Voila!
I tried to install Kingston KVR667D2SO/2GB. the result is that doesn't work. did anybody try to install the 1GB?