Introduction
The keyboard of a laptop is a very easy component to become dysfunctional because it is constantly being used. If certain keys, clumps of keys, or the entire keyboard stops working, it needs to be replaced. Removing the keyboard requires that the battery and back cover be removed, along with a large number of screws, so be careful not to misplace any of the screws along the way.
What you need
-
-
Orient the ACER Aspire One to where the bottom of the laptop is facing upward as shown in the picture.
-
-
-
-
Locate the single 6 mm Phillips screw in the lower middle of the back plate.
-
Remove the screw using a Phillips #0 Screwdriver.
-
-
-
Locate the eighteen 6 mm Phillips screws that are required to remove the keyboard.
-
Remove all screws using a Phillips #0 screwdriver.
-
-
-
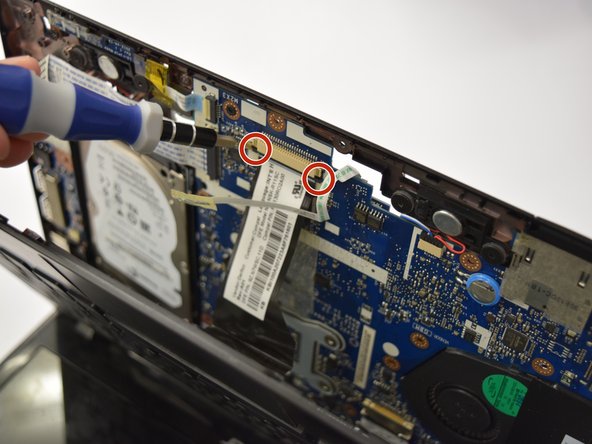
Remove the green dotted ribbon cable by sliding it straight out of the clamp holding it in using a plastic spudger.
-
Locate the two tabs that are holding the larger black ribbon cable in place.
-
Remove the larger black ribbon cable by pressing in the tabs and sliding it straight out of the clamp holding it in using a plastic spudger.
-
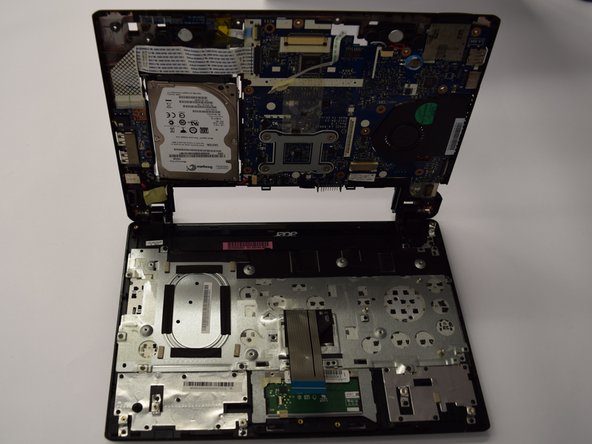
To remove the keyboard, lift the keyboard straight away from the rest of the laptop.
-
-
-
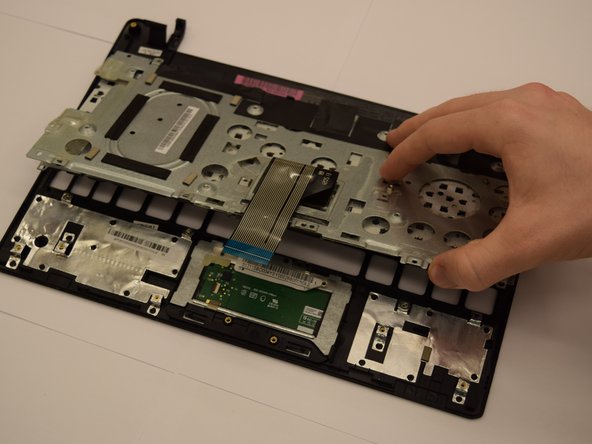
Locate the ten 6 mm Phillips screws that connect the keyboard to the rest of the laptop and remove them with a Phillips #0 Screwdriver.
-
Locate the four 6 mm Phillips screws hidden beneath black tape by lifting up the black tape and remove them with a Phillips #0 Screwdriver.
-
To remove keyboard from the rest of the laptop, pull keyboard straight up.
-


To reassemble your device, follow these instructions in reverse order.
To reassemble your device, follow these instructions in reverse order.
Cancel: I did not complete this guide.
One other person completed this guide.
Team

Clemson, Team 7-1, Benson Spring 2016 Member of Clemson, Team 7-1, Benson Spring 2016
CLEM-BENSON-S16S7G1
4 Members
14 Guides authored