
Acer Aspire One AO756-2623 Hard Drive Replacement

What you need

  1. Acer Aspire One AO756-2623 Hard Drive Replacement, Battery: step 1, image 1 of 1
    • Orient the ACER Aspire One to where the bottom of the laptop is facing upward as shown in the picture.

  2. Acer Aspire One AO756-2623 Hard Drive Replacement: step 2, image 1 of 1
    • Locate the circular slot positioned at the bottom right of the battery.

  3. Acer Aspire One AO756-2623 Hard Drive Replacement: step 3, image 1 of 3 Acer Aspire One AO756-2623 Hard Drive Replacement: step 3, image 2 of 3 Acer Aspire One AO756-2623 Hard Drive Replacement: step 3, image 3 of 3
    • Insert a spudger and slide the tab to the right.

    • When working with electronics, it's important to choose a tool that's ESD-safe to avoid accidental damage to the device. The regular black nylon spudger or a plastic opening tool should be used whenever possible.

    • Hold the tab in the right-hand position and firmly push or pull the battery upward to remove it from the laptop.

  4. Acer Aspire One AO756-2623 Hard Drive Replacement, Back Cover: step 4, image 1 of 1
    • Locate the single 6 mm Phillips screw in the lower middle of the back plate.

    • Remove the screw using a Phillips #0 Screwdriver.

  5. Acer Aspire One AO756-2623 Hard Drive Replacement: step 5, image 1 of 2 Acer Aspire One AO756-2623 Hard Drive Replacement: step 5, image 2 of 2
    • Slide the back plate downward to remove it from the laptop.

  6. Acer Aspire One AO756-2623 Hard Drive Replacement, Hard Drive: step 6, image 1 of 1
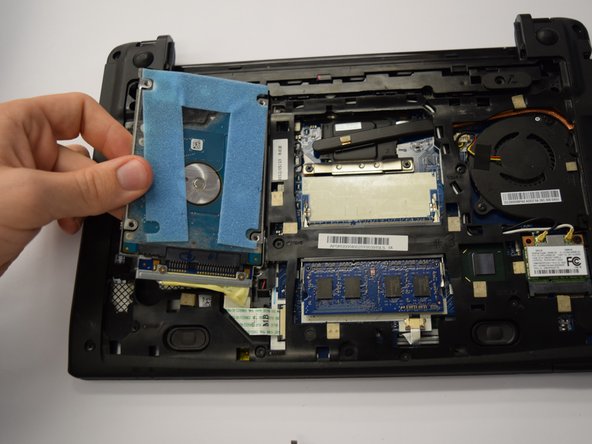
    • Locate the four 6 mm Phillips screws pictured necessary to remove the hard drive.

    • Remove all four of the screws using a Phillips #0 Screwdriver.

  7. Acer Aspire One AO756-2623 Hard Drive Replacement: step 7, image 1 of 2 Acer Aspire One AO756-2623 Hard Drive Replacement: step 7, image 2 of 2
    • Locate the two tabs that keep the hard drive ribbon cable connected to the laptop.

    • Using a spudger, gently push in the indicated tabs.

    • While holding down the tabs, slide the ribbon cable to the left to remove it from the laptop.

  8. Acer Aspire One AO756-2623 Hard Drive Replacement: step 8, image 1 of 1
    • Remove the hard drive by pulling it straight out.

Conclusion

To reassemble your device, follow these instructions in reverse order.

3 other people completed this guide.

Colin Rodwell

Member since: 03/21/16

373 Reputation

3 Guides authored

Team

Clemson, Team 7-1, Benson Spring 2016 Member of Clemson, Team 7-1, Benson Spring 2016

CLEM-BENSON-S16S7G1

4 Members

14 Guides authored

0 Comments

Add Comment

View Statistics:

Past 24 Hours: 0

Past 7 Days: 3

Past 30 Days: 10

All Time: 2,225