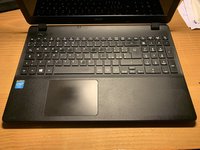
Acer Aspire ES1-512 Hard Drive Replacement

  1. Acer Aspire ES1-512 Hard Drive Replacement, Remove the back screws: step 1, image 1 of 2 Acer Aspire ES1-512 Hard Drive Replacement, Remove the back screws: step 1, image 2 of 2
    • Remove the 18 Phillips #0 screws.

  2. Acer Aspire ES1-512 Hard Drive Replacement, Remove the CD drive and lift the keyboard assembly: step 2, image 1 of 3 Acer Aspire ES1-512 Hard Drive Replacement, Remove the CD drive and lift the keyboard assembly: step 2, image 2 of 3 Acer Aspire ES1-512 Hard Drive Replacement, Remove the CD drive and lift the keyboard assembly: step 2, image 3 of 3
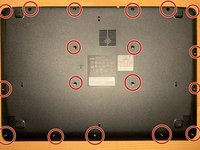
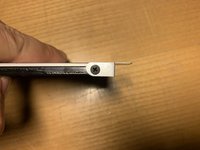
    • Remove the optical drive or its plastic slot.

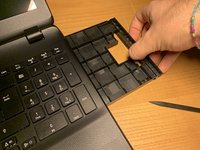
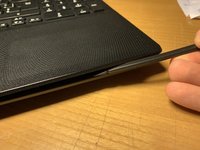
    • Gently lift the keyboard assembly.

  3. Acer Aspire ES1-512 Hard Drive Replacement, Disconnect the keyboard connectors: step 3, image 1 of 2 Acer Aspire ES1-512 Hard Drive Replacement, Disconnect the keyboard connectors: step 3, image 2 of 2
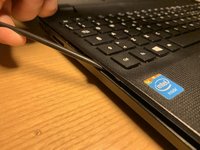
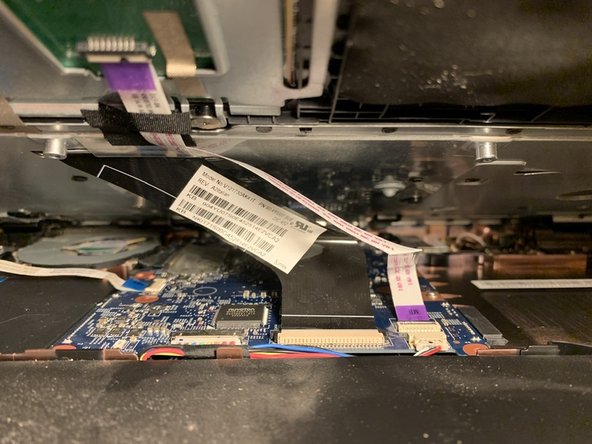
    • Gently lift the top case, paying attention to the two connectors.

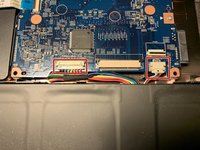
    • Disconnect the two connectors.

  4. Acer Aspire ES1-512 Hard Drive Replacement, Disconnect the battery: step 4, image 1 of 3 Acer Aspire ES1-512 Hard Drive Replacement, Disconnect the battery: step 4, image 2 of 3 Acer Aspire ES1-512 Hard Drive Replacement, Disconnect the battery: step 4, image 3 of 3
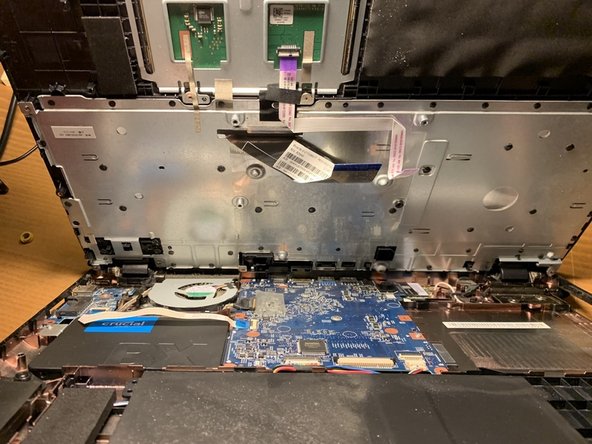
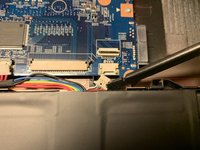
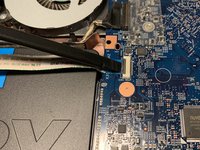
    • Disconnect the battery by removing the two connectors located next to the motherboard.

  5. Acer Aspire ES1-512 Hard Drive Replacement, Remove the power supply, power button, and HDMI port: step 5, image 1 of 3 Acer Aspire ES1-512 Hard Drive Replacement, Remove the power supply, power button, and HDMI port: step 5, image 2 of 3 Acer Aspire ES1-512 Hard Drive Replacement, Remove the power supply, power button, and HDMI port: step 5, image 3 of 3
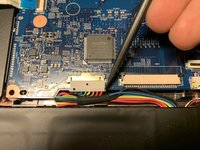
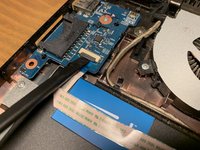
    • Disconnect the connectors of the power input, power button, and HDMI port.

  6. Acer Aspire ES1-512 Hard Drive Replacement, Remove the hard drive: step 6, image 1 of 3 Acer Aspire ES1-512 Hard Drive Replacement, Remove the hard drive: step 6, image 2 of 3 Acer Aspire ES1-512 Hard Drive Replacement, Remove the hard drive: step 6, image 3 of 3
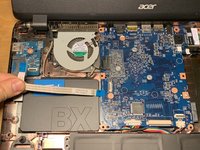
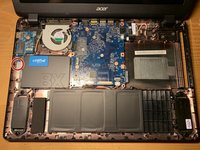
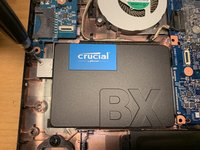
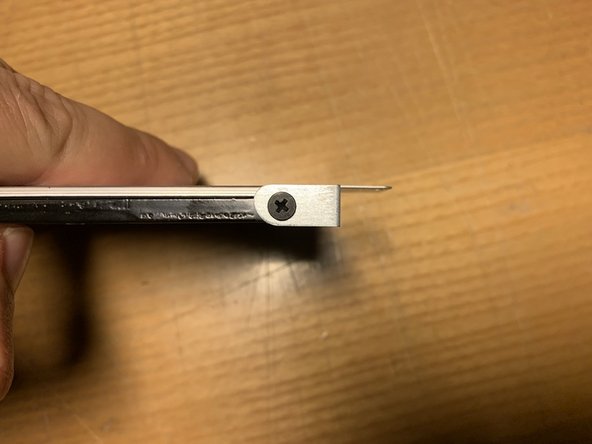
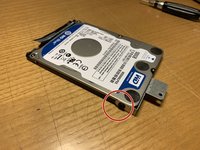
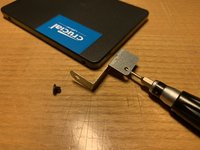
    • Remove the Phillips #0 screw from the hard drive mounting bracket.

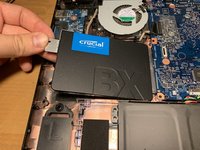
    • Gently disconnect the hard disk by moving it outward.

  7. Acer Aspire ES1-512 Hard Drive Replacement, Mounting plate removal: step 7, image 1 of 3 Acer Aspire ES1-512 Hard Drive Replacement, Mounting plate removal: step 7, image 2 of 3 Acer Aspire ES1-512 Hard Drive Replacement, Mounting plate removal: step 7, image 3 of 3
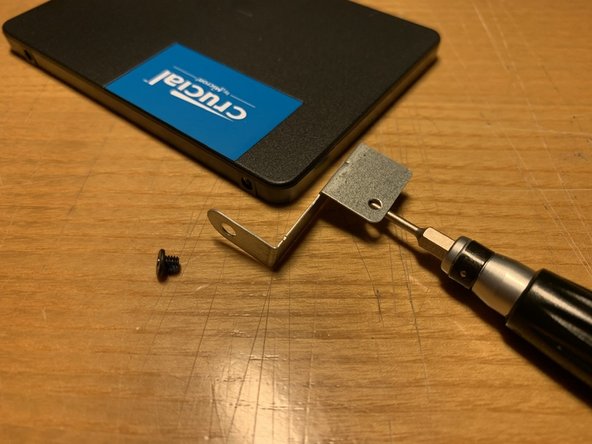
    • Remove the mounting plate by unscrewing the Phillips #0 screw.

Conclusion

To reassemble your device, follow these instructions in reverse order.

2 other people completed this guide.

Special thanks to these translators:

it en

100%

These translators are helping us fix the world! Want to contribute?
Start translating ›

Davide Andreoli

Member since: 06/21/16

181 Reputation

1 Guide authored

0 Guide Comments

Add Comment

View Statistics:

Past 24 Hours: 2

Past 7 Days: 20

Past 30 Days: 51

All Time: 646