
Acer Aspire 5740-5780 Hard Drive Replacement

What you need

  1. Careful: steps 1-4 are sourced from a guide that's marked as in-progress.

    Acer Aspire 5740-5780 Hard Drive Replacement, Prepare Acer Aspire 5740-5780 for Disassembly: step 1, image 1 of 2 Acer Aspire 5740-5780 Hard Drive Replacement, Prepare Acer Aspire 5740-5780 for Disassembly: step 1, image 2 of 2
    • Turn the laptop off and remove the power cord.

  2. Acer Aspire 5740-5780 Hard Drive Replacement: step 2, image 1 of 2 Acer Aspire 5740-5780 Hard Drive Replacement: step 2, image 2 of 2
    • Press in the SD Card or the SD Card Dummy if no SD Card is there. Remove card when it pops out.

  3. Acer Aspire 5740-5780 Hard Drive Replacement: step 3, image 1 of 1
    • Flip the laptop over on its face, so that the back is showing.

  4. Acer Aspire 5740-5780 Hard Drive Replacement: step 4, image 1 of 1
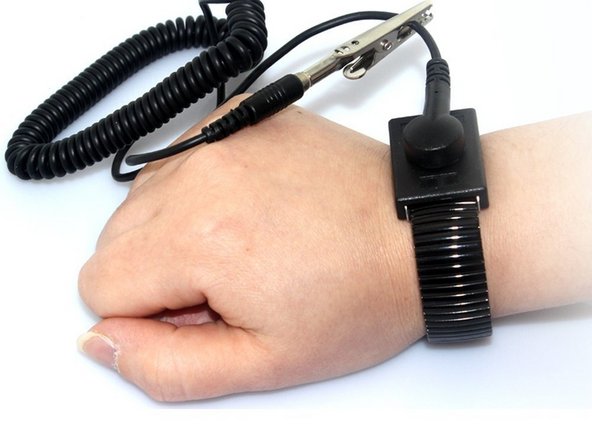
    • Put grounding strap on one of your wrists and attach the other end to a large metal object (recommended method).

    • If you don't have a grounding strap an alternative approach is to touch a metal object that is either large or connected to the earth. Then avoid doing things that would accumulate static electricity on your body.

    • Touching the internals of your device while you aren't grounded could destroy your laptop.

  5. Acer Aspire 5740-5780 Hard Drive Replacement, Battery: step 5, image 1 of 2 Acer Aspire 5740-5780 Hard Drive Replacement, Battery: step 5, image 2 of 2
    • Unlock the battery by flipping a switch near the release latch.

  6. Acer Aspire 5740-5780 Hard Drive Replacement: step 6, image 1 of 1
    • Slide the release latch to the left to release the battery from the PC.

  7. Acer Aspire 5740-5780 Hard Drive Replacement: step 7, image 1 of 2 Acer Aspire 5740-5780 Hard Drive Replacement: step 7, image 2 of 2
    • Use your hands to pry the battery free of the computer.

  8. Acer Aspire 5740-5780 Hard Drive Replacement, Back Cover: step 8, image 1 of 2 Acer Aspire 5740-5780 Hard Drive Replacement, Back Cover: step 8, image 2 of 2
    • Unscrew the 2 captive screws and 3 M2.5 x L8 screws holding back cover in place.

  9. Acer Aspire 5740-5780 Hard Drive Replacement: step 9, image 1 of 2 Acer Aspire 5740-5780 Hard Drive Replacement: step 9, image 2 of 2
    • Use spudger to pry open the back panel.

    • Then lift panel off of the computer.

  10. Acer Aspire 5740-5780 Hard Drive Replacement, Hard Drive: step 10, image 1 of 1
    • Remove the one M2 x L4 screw that secures the hard drive in place.

    • Screw not shown in picture.

  11. Acer Aspire 5740-5780 Hard Drive Replacement: step 11, image 1 of 1
    • Using an opening tool or your hands, slide the hard drive out of its connector.

  12. Acer Aspire 5740-5780 Hard Drive Replacement: step 12, image 1 of 1
    • Lift the hard drive out of the computer.

Conclusion

To reassemble your device, follow these instructions in reverse order.

4 other people completed this guide.

Dwyer Deighan

Member since: 03/25/18

358 Reputation

3 Guides authored

Team

0 Comments

Add Comment

View Statistics:

Past 24 Hours: 2

Past 7 Days: 5

Past 30 Days: 21

All Time: 1,351