Introduction
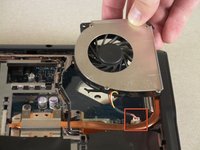
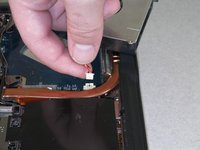
Over time, your Acer Aspire 5100 laptop’s fan may stop working. Laptops without working fans may overheat, damaging internal hardware such as the CPU, hard drive, and motherboard. You may have a broken fan if your laptop regularly feels hot or crashes, your fan makes abnormal or no noise, or your vents lack airflow. If these problems occur, you will need a replacement fan to keep your laptop regulated and running smoothly.
This guide will help you replace your broken fan in four simple steps. Before starting, be sure to unplug your laptop and remove the battery for your personal safety.
What you need


To reassemble your device, follow these instructions in reverse order.
Cancel: I did not complete this guide.
4 other people completed this guide.
Team

Cal Poly, Team 14-39, Forte Fall 2010 Member of Cal Poly, Team 14-39, Forte Fall 2010
CPSU-FORTE-F10S14G39
5 Members
10 Guides authored