Introduction
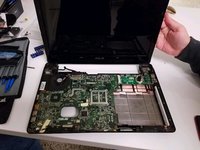
The screen is one of the most important parts of a laptop, as you won't be able to see anything you're doing without it, which is kind of the point. The disassembly isn't too complicated, there's just a lot of screws that need to be removed.
What you need
-
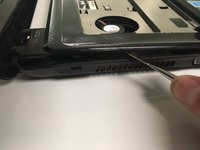
Tool used on this step:Metal Spudger$2.99
-
Using a Spudger, gently pry up the keyboard.
 Ask FixBot
-
-
Tool used on this step:Nylon Tipped Tweezers$4.99
-
Rotate the keyboard to face downward.
-
Pull out the blue wiring connection. Use tweezers to make it easier to remove.
-
-
-
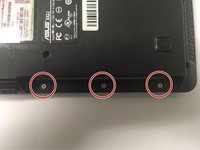
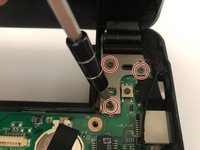
Use the Phillips #0 screwdriver to remove the two screws on the back of the laptop.
-
-
-
-
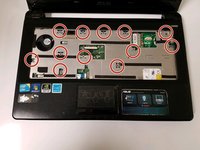
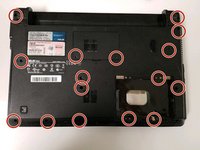
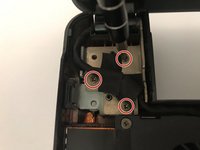
Using the Philips screwdriver, unscrew the screws shown in the pictures.
-
Unplug the wire connecting the screen to the motherboard.
-


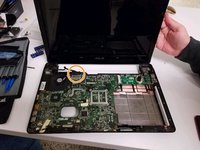

To reassemble your device, follow these instructions in reverse order.
Cancel: I did not complete this guide.
One other person completed this guide.
Team

University of North Texas, Team S6-G2, Thompson Fall 2018 Member of University of North Texas, Team S6-G2, Thompson Fall 2018
UNT-THOMPSON-F18S6G2
4 Members
6 Guides authored