Introduction
If having problems with your ASUS ROG Strix GL503VD-DB71 laptop display screen staying solid black when turning on, screen flickering, or even a cracked display screen you may need to replace the screen. Display symptoms can be found in our [[ASUS ROG Strix GL503VD-DB71 Troubleshooting#|troubleshooting]] page. In this guide we will show you how to fix these issues by replacing the display in your ASUS ROG Strix GL503VD-DB71 laptop. The display of a laptop shows all the images and content on your screen of your laptop. When replacing the display make sure the laptop is turned off and unplugged from any power source. When handling the display use caution if there is any cracks in the screen and handle with care.
What you need
-
-
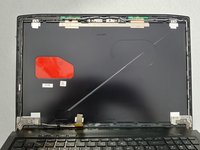
Open the laptop where the screen is now showing
-
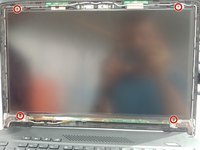
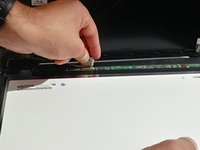
Find the two stickers on the bottom of the display and remove them
-
Use the Phillips #1 screwdriver to take out the two screws at the bottom of the display.
-
-


To reassemble your device, follow these instructions in reverse order.
Cancel: I did not complete this guide.
One other person completed this guide.
Team

Embry-Riddle Aeronautical University, Team S17-G8, Lamothe Spring 2020 Member of Embry-Riddle Aeronautical University, Team S17-G8, Lamothe Spring 2020
ERAU-LAMOTHE-S20S17G8
4 Members
5 Guides authored