
ASUS ROG G46VW Screen Replacement

What you need

  1. ASUS ROG G46VW Screen Replacement, Speaker Cover: step 1, image 1 of 1
    • Gently pry the back hinge cover piece away from the device.

  2. ASUS ROG G46VW Screen Replacement: step 2, image 1 of 1
    • Disconnect the speaker cable from the motherboard.

  3. ASUS ROG G46VW Screen Replacement, RAM: step 3, image 1 of 2 ASUS ROG G46VW Screen Replacement, RAM: step 3, image 2 of 2
    • Lift the screw cover and remove the screw using a Phillips #0 screwdriver.

  4. ASUS ROG G46VW Screen Replacement: step 4, image 1 of 1
    • Remove the RAM cover by lifting the screw cover and pulling away firmly.

  5. ASUS ROG G46VW Screen Replacement: step 5, image 1 of 2 ASUS ROG G46VW Screen Replacement: step 5, image 2 of 2
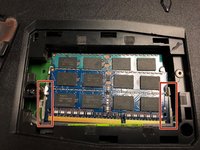
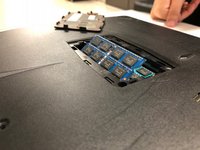
    • Push outwards on the clips to release the RAM stick. The stick should pop up at an angle.

  6. ASUS ROG G46VW Screen Replacement: step 6, image 1 of 1
    • Pull out the RAM stick carefully.

    • Do not use a prying motion as this will damage the hardware. Be careful not to damage the gold section of the RAM stick.

  7. ASUS ROG G46VW Screen Replacement: step 7, image 1 of 1
    • Repeat steps 3-4 to remove the second RAM stick.

  8. ASUS ROG G46VW Screen Replacement, Keyboard: step 8, image 1 of 1
    • Remove the two screws from underneath the RAM cover.

  9. ASUS ROG G46VW Screen Replacement: step 9, image 1 of 1
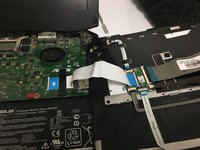
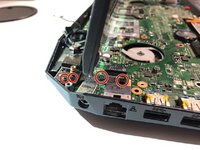
    • Remove all of the screws from the bottom of the case.

    • If replacing the screen, remove the rubber feet to reveal two more screws.
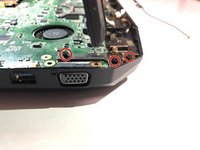
  10. ASUS ROG G46VW Screen Replacement: step 10, image 1 of 1
    • Turn the laptop over and remove the screws as shown

  11. ASUS ROG G46VW Screen Replacement: step 11, image 1 of 1
    • Carefully pry the keyboard away using your spudger and the opening tools.

    • Be sure not to damage the clips holding the keyboard to the bottom case.

  12. ASUS ROG G46VW Screen Replacement: step 12, image 1 of 2 ASUS ROG G46VW Screen Replacement: step 12, image 2 of 2
    • Detach the ribbon cable by releasing the clip

  13. ASUS ROG G46VW Screen Replacement, Screen: step 13, image 1 of 2 ASUS ROG G46VW Screen Replacement, Screen: step 13, image 2 of 2
    • Remove screws from silver braces.

  14. ASUS ROG G46VW Screen Replacement: step 14, image 1 of 1
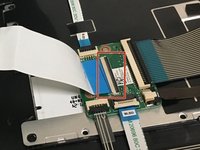
    • Use tweezers to remove golden screw caps.

  15. ASUS ROG G46VW Screen Replacement: step 15, image 1 of 1
    • Remove tape and gently pull up on golden cap connectors to disconnect them.

  16. ASUS ROG G46VW Screen Replacement: step 16, image 1 of 1
    • Gently pull the white connector until it comes loose.

Conclusion

To reassemble your device, follow these instructions in reverse order.

2 other people completed this guide.

0 Comments

Add Comment

View Statistics:

Past 24 Hours: 1

Past 7 Days: 2

Past 30 Days: 3

All Time: 476