Introduction
Removing the back cover of your laptop gives you access to key internal components like the SSD, RAM, and battery. This guide walks you through the safe removal of those parts.
⚠️ Before you begin:
Make sure the laptop is powered off and unplugged. To avoid damaging sensitive components, ground yourself with an anti-static wrist strap or touch a grounded metal object before handling internal hardware.
A standard screwdriver may not fit all internal components. Use appropriate precision tools and maintain meticulous organization throughout the process to avoid losing screws or damaging delicate parts. I recommend a precision driver set with Torx T5/T6 and Phillips #000–#1 bits to fit the variety of screws you may encounter, depending on your model.
What you need
-
-
Tool used on this step:Magnetic Project Mat$19.95
-
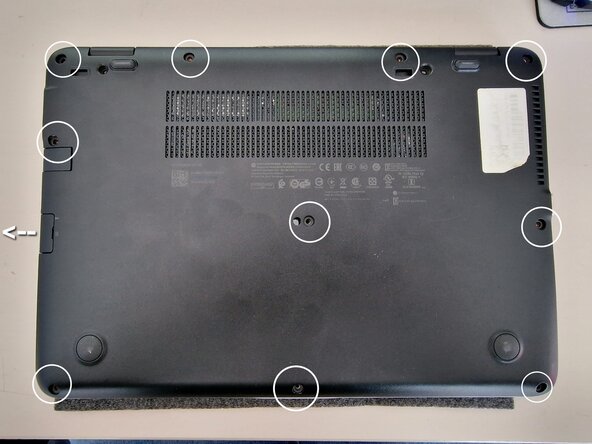
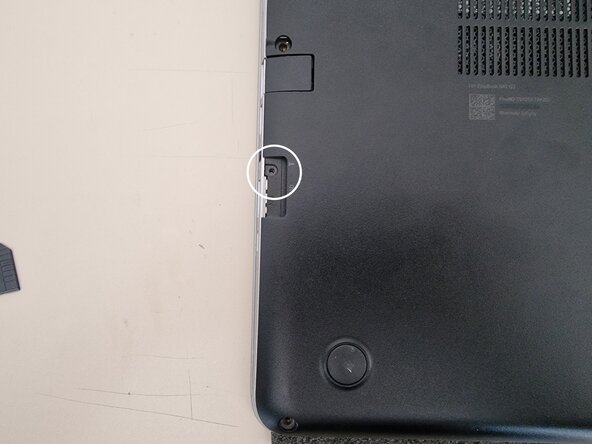
Remove the 11 screws securing the back panel.
-
Screw lengths may vary. Keep track of their original positions using a magnetic project mat or labeled containers.
 Ask FixBot
-
-
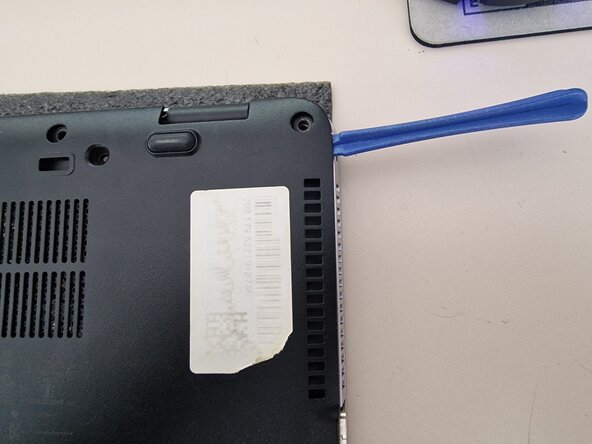
Tool used on this step:iFixit Opening Tool$1.99
-
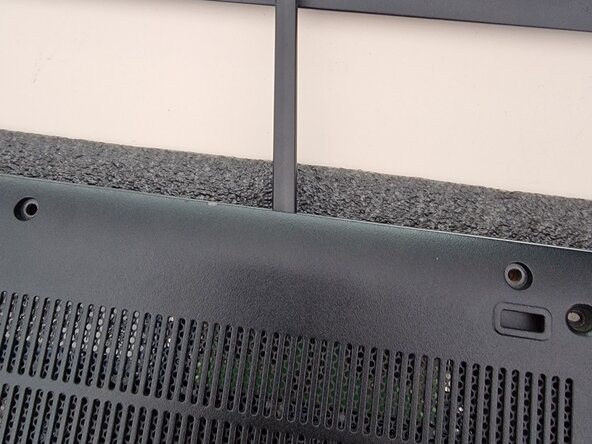
Use a plastic opening tool to gently separate the back cover from the chassis.
-
Start on one side (left or right) and carefully work your way around the entire perimeter.
-
Take your time to avoid damaging clips or scratching the surface.
-
-
-
-
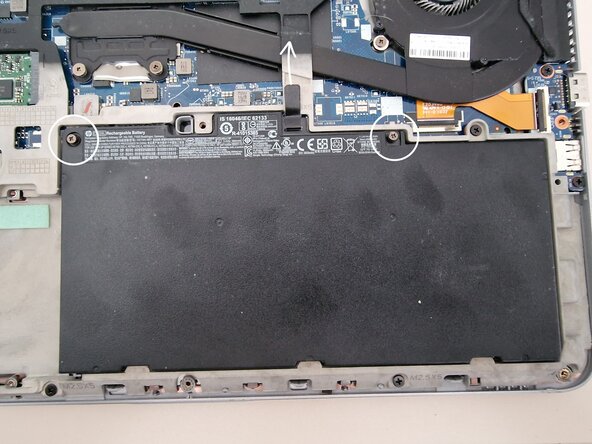
Locate the two screws securing the battery.
-
These screws won’t come out completely — just loosen them until they turn freely.
-
Lift the small black tab upward to disconnect the battery from the motherboard.
-
Gently remove the battery and set it aside.
-
-
-
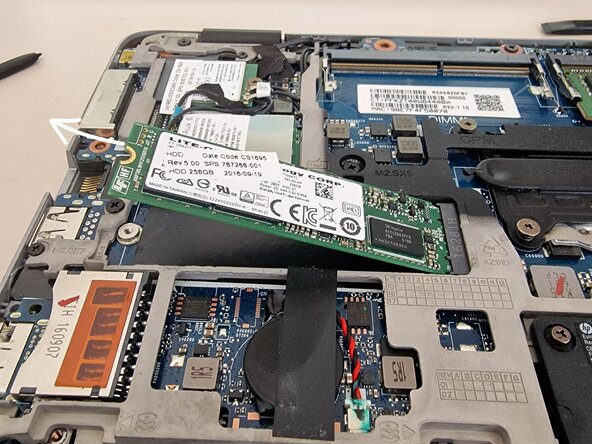
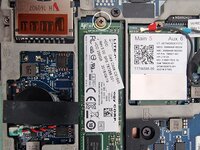
Remove the single screw holding the SSD in place.
-
Pull the SSD out in the direction it’s facing (usually upward at a slight angle).
-
Avoid bending or twisting the drive during removal.
-
-
-
Locate the metal retaining tabs on each side of the memory stick.
-
Pull the left tab to the left and the right tab to the right.
-
The RAM will pop up at an angle.
-
Gently slide it out of the slot.
-
-
-
To reassemble your device, follow the steps in reverse order, carefully reconnecting each component. Pay close attention to:
-
Proper alignment of connectors (especially the battery tab and SSD)
-
Returning each screw to its original position — screw lengths may vary
-
Gently snapping the back cover into place before tightening screws
-
-




If your laptop doesn’t power on after reassembly or shows unusual behavior, don’t worry — it may just be a loose connector or unseated component.
- Double-check all connections, especially the battery and RAM
- Make sure no screws are missing or stuck under the motherboard
- Refer to iFixit’s troubleshooting guides for common issues with ASUS laptops
- Still stuck? Post your question in the iFixit Answers forum — the iFixit community is happy to help!

