Introduction
The back-facing camera is somewhat exposed on the device and therefore is susceptible to damage. Cameras are somewhat of a luxury on a device and may not be a crucial for extending the device's life, but a simple replacement is well worth the time.
What you need
-
-
Use T5 Torx Screwdriver to remove two 4.5 millimeter T5 screws on either side of the port on the bottom of the tablet.
 Ask FixBot
-
-
-
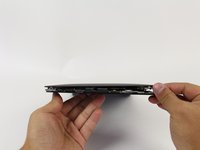
Use the Plastic Opening Tool to pry between the main tablet body and the outer rim casing. Remove the outer rim casing by prying all the way around the device and pulling the rim upward.
-
-
-
Remove the four 2 millimeter Phillips #00 screws at the corners of the tablet.
-
-
-
-
Use a Phillips #00 Screwdriver to remove the three 3 millimeter screws securing the front panel to the back panel found above the camera area, on the top portion of the tablet.
-
-
-
Use a Phillips #00 Screwdriver to remove the three 3 millimeter screws securing the front panel to the back panel found on the bottom portion of the tablet near the port.
-
-
Tool used on this step:Tweezers$4.99
-
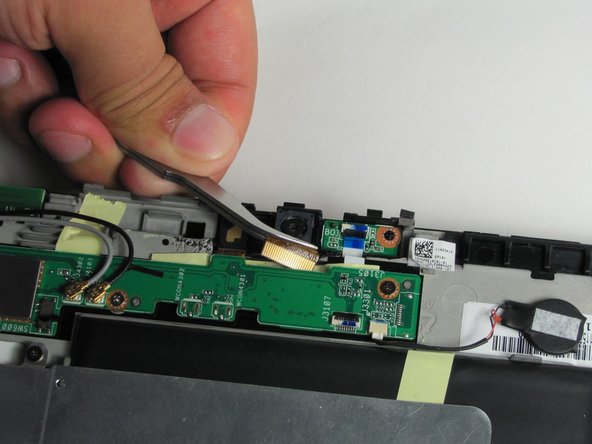
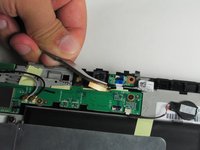
Use Tweezers to pull out gold flap connected to bottom of camera.
-
Pull the gold flap to take out the camera.
-


To reassemble your device, follow these instructions in reverse order.
Cancel: I did not complete this guide.
One other person completed this guide.
Team

Cal Poly, Team 13-9, Forte Fall 2014 Member of Cal Poly, Team 13-9, Forte Fall 2014
CPSU-FORTE-F14S13G9
5 Members
12 Guides authored