
8BitDo Ultimate Wireless D-Pad Replacement

Alexander Garcia and one other contributor
Last updated on Jun 1, 2026
Views: 559
View statistics:
- Past 24 Hours:
- 7
- Past 7 Days:
- 39
- Past 30 Days:
- 183
- All Time:
- 559
Comments: 0
No one has left comments on this guide. Will you be first?
Go to guide commentsCompleted: 1 2
1 person has marked this guide "completed." Will you be next?
2 people have marked this guide "completed." Including you — great job!
Favorites: 0 1
No one has favorited (and subscribed to) this guide. Will you be the first?
1 person has favorited (and subscribed to) this guide — and that's you!
Introduction
Go to step 1 ↓Do you need to replace the D-pad on your 8BitDo Ultimate Wireless? If so, this guide will show you how to correctly and safely do so!
With that said, please make sure to check our Troubleshooting Guides first. Often times, there is no need to go as far as replacing the D-pad entirely.
Before beginning, turn off the controller and ensure it will not accidentally reconnect during the repair.
What you need
Tools


-
-
-
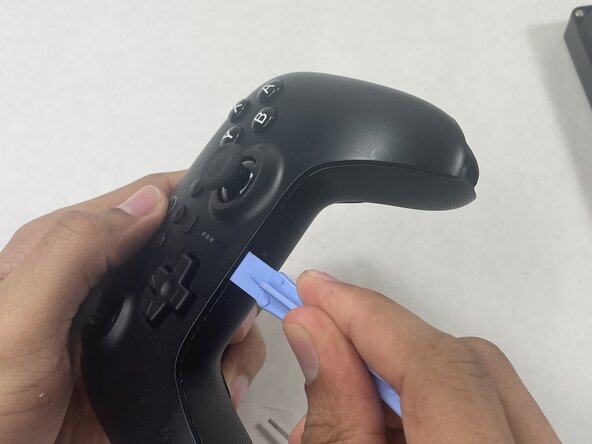
Insert an opening pick into the seam between the left controller grip and main controller body.
-
Pry the grip off.
-
Repeat for the right grip.
 Ask FixBot
-
-
-
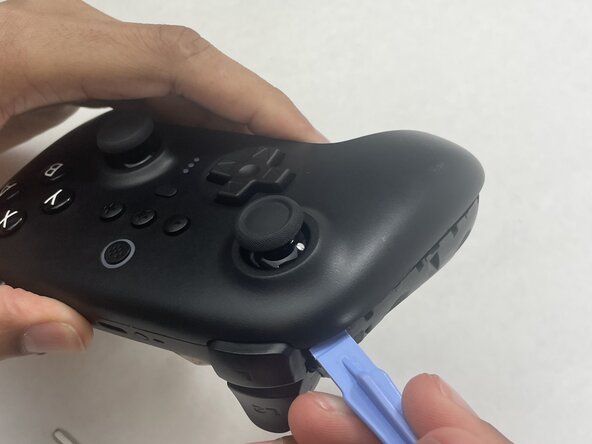
Insert an opening tool into seam at the bottom of the device and carefully pry the front and back shells apart.
-
Set the halves next to each other with care not to strain the connected ribbon cables.
-
-
-
-
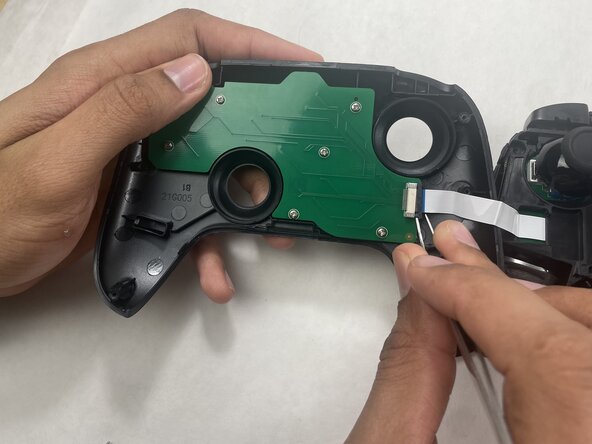
The ribbon cable is secured with a locking tab connector.
-
Use tweezers to unlock the locking tab on the ribbon cable connector, then gently disconnect the ribbon cable.
-
-
-
-
-
Remove the seven 5 mm Phillips #00 screws securing the PCB to the top shell, then lift the board out.
-
-








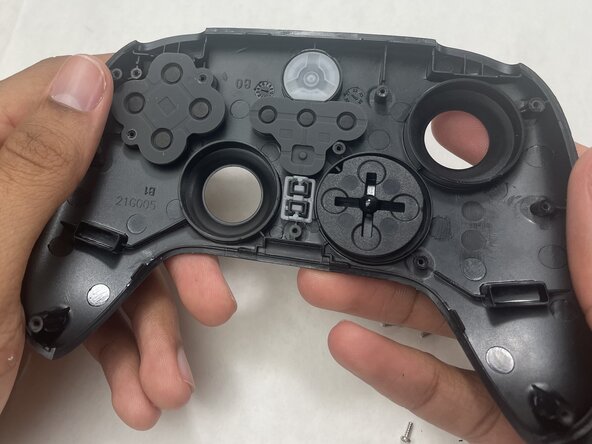


To reassemble your device, follow the above steps in reverse order.
Repair didn’t go as planned? Try some basic troubleshooting or ask our Answers community for help.
Cancel: I did not complete this guide.
One other person completed this guide.

Team

UMass Dartmouth, Team 1-3, Biswokarma Spring 2026 Member of UMass Dartmouth, Team 1-3, Biswokarma Spring 2026
UMASSD-BISWOKARMA-S26S1G3
5 Members
60 Guides authored
