
3DR Solo Leg Replacement

What you need

  1. 3DR Solo Leg Replacement, Propeller: step 1, image 1 of 1
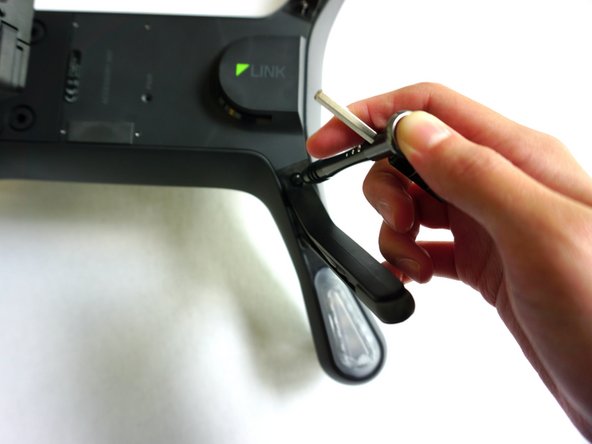
    • Grip the arm, which is located underneath the propeller, with one hand, and with your dominant hand grip the center of the propeller.

  2. 3DR Solo Leg Replacement: step 2, image 1 of 1
    • Twist the propeller from the locked to unlocked position as indicated by the images of the lock.

    • You will need to twist in this direction for 2-3 full rotations before the propeller will detach.

  3. 3DR Solo Leg Replacement: step 3, image 1 of 1
    • Lift the propeller off the motor.

    • To remove the silver-top propellers, repeat these steps, turning the propellers in the opposite direction of the black-top propellers.

  4. 3DR Solo Leg Replacement, Leg: step 4, image 1 of 1
    • Place the controller on a flat surface with the battery side down.

  5. 3DR Solo Leg Replacement: step 5, image 1 of 3 3DR Solo Leg Replacement: step 5, image 2 of 3 3DR Solo Leg Replacement: step 5, image 3 of 3
    • Locate the leg and remove the two 10mm screws that hold the leg in place.

  6. 3DR Solo Leg Replacement: step 6, image 1 of 1
    • Gently pull the leg up to remove it from its position.

    • Leg should be connected by a black wire.

  7. 3DR Solo Leg Replacement: step 7, image 1 of 3 3DR Solo Leg Replacement: step 7, image 2 of 3 3DR Solo Leg Replacement: step 7, image 3 of 3
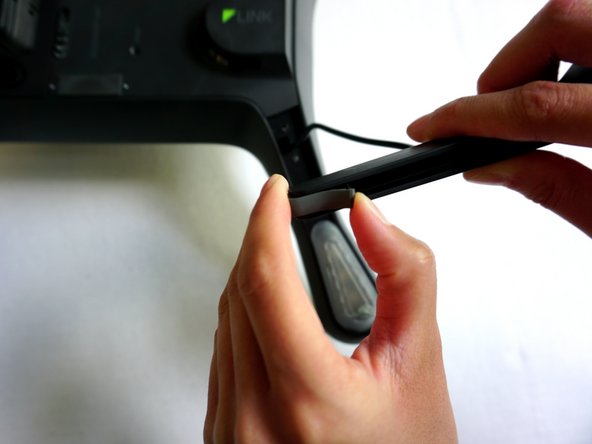
    • Locate the rubber grip at the end of the leg and, with your thumb, peel it back and pull it off.

  8. 3DR Solo Leg Replacement: step 8, image 1 of 2 3DR Solo Leg Replacement: step 8, image 2 of 2
    • Leg type 1 will contain a 1mm screw at the base of the leg.

    • Unscrew the 1mm screw located at the end of the leg.

  9. 3DR Solo Leg Replacement: step 9, image 1 of 1
    • Gently pull the black cord up to release it from the leg.

  10. 3DR Solo Leg Replacement: step 10, image 1 of 3 3DR Solo Leg Replacement: step 10, image 2 of 3 3DR Solo Leg Replacement: step 10, image 3 of 3
    • Leg type 2 will contain the antenna wire.

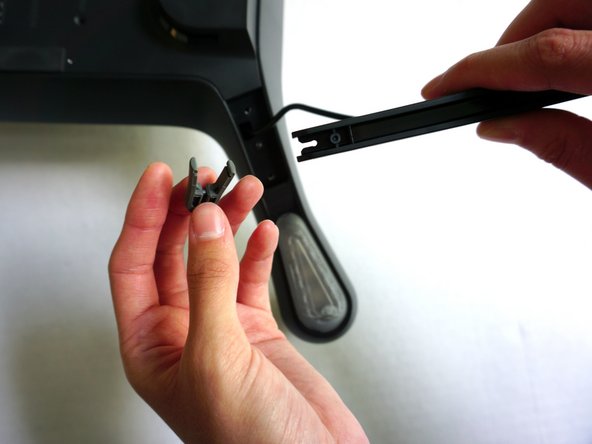
    • Gently pull up on and remove the plastic covering labeled "solo antenna".

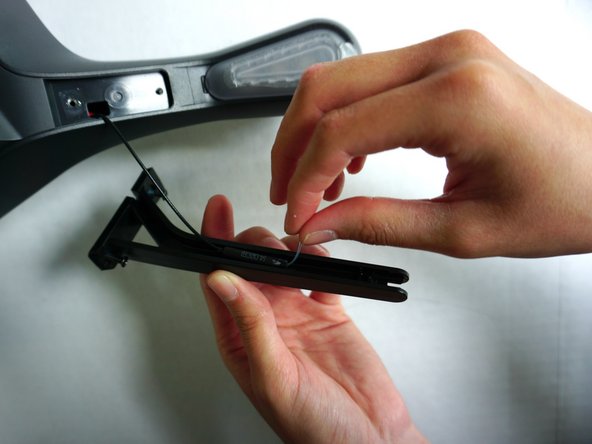
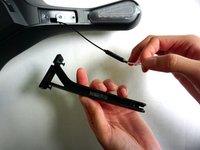
    • Locate the antenna wire and carefully pull up and remove it.

    • The antenna wire is flimsy so use caution upon removal.

Conclusion

To reassemble your device, follow these instructions in reverse order.

Leia Harlow

Member since: 09/11/17

101 Reputation

1 Guide authored

Team

0 Comments

Add Comment

View Statistics:

Past 24 Hours: 0

Past 7 Days: 0

Past 30 Days: 2

All Time: 321