Introduction
Printed parts needed:
None
What you need
-
-
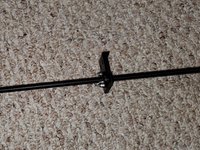
Using 1x M5x8 button head screw and 1x M5 T-nut fasten the bottom stopper block on the bottom of the rail. Make sure its flat against the bottom face of the MGN rail.
-
Using a1xM5x8 button head screw and 1x M5 T-nut fasten the Top stopper block on the top face of the linear rail. Make sure it sits flush on the face of the MGN rail.
-
Do this for both sides. You might need to move the linear rail up or down to get the placement correct. The important thing as long as the top of the linear rail sits flush the bottom stopper will be in the correct position
-
Once the top and bottom stoppers are in place you can remove the masking tape.
 Ask FixBot
-
-
-
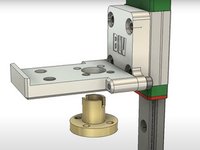
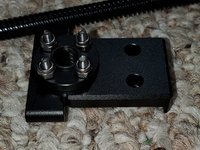
Using 4x M3x8 socket head screws attach the Z MGN block to the MGN carriage. Make sure the block is as straight as possible.
-
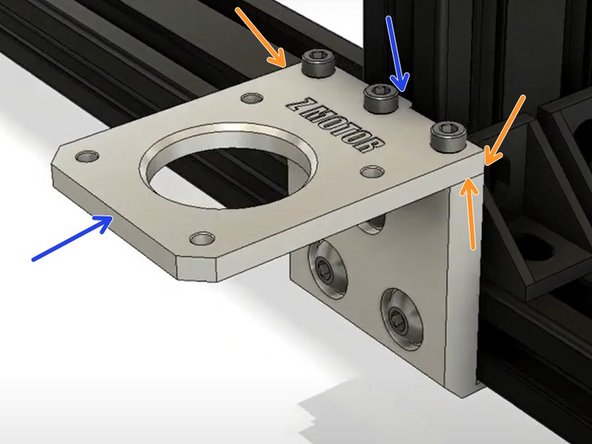
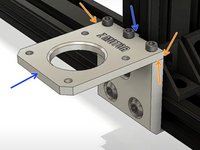
Using 3x M3x12 socket head screws mount the Z stepper mount top plate to the bottom plate. Snug the bolts down but expect to loosen them later
-
-
-
-
Loosen the 3x M3x12 screws enough so the top plate can move.
-
Slide the stepper mount assembly on to the frame so the T-nuts slide into the channels on the extrusion. When tightening the M5x8 screws, keep pressure on the bottom of the mount so when tight it will sit flush with the bottom of the 2040
-
Pressing the top plate mount towards the frame make sure the sides of the top plate are flush with the bottom plate. Tighten down the 3x M3x12mm Socket Head screws.
-
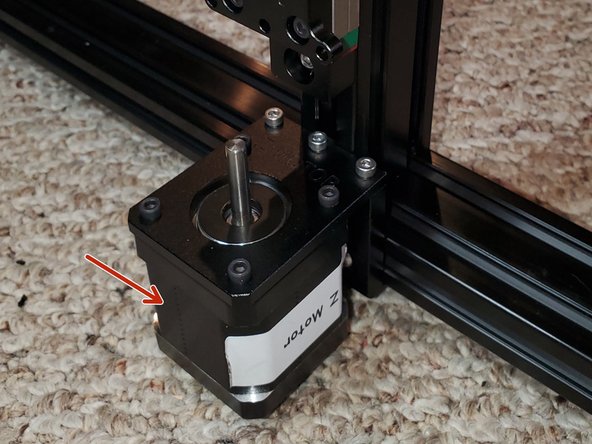
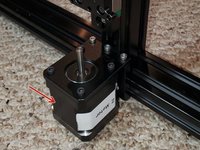
Mount the Z stepper motor with 4x M3x8 socket head screws. The wire plug should face the back of the printer.
-
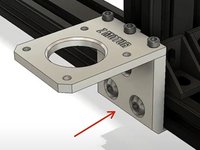
This should be done for both sides
-
-
-
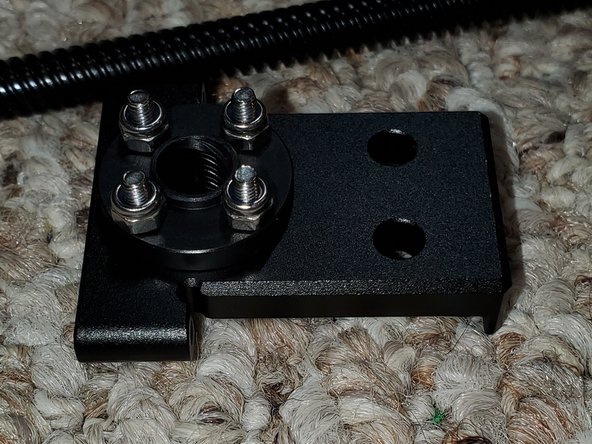
Insert the POM TR8 nut in the bed mount. Make sure the lip of the nut is on the bottom of the bed mount.
-
Using 4x M3x12 button head screws and 4x M3 nylon nuts secure the POM TR8 nut to the bed mount with the nylon nuts on the bottom. Do not tighten completely.
-
Thread the leadscrew into the TR8 nut
-
-
-
Using 2x M3x16 socket head screws mount the bed mount to the Z MGN block. Make sure it's straight.
-
Insert the stepper shaft into the bottom of the leadscrew coupler and tighten the M3.
-
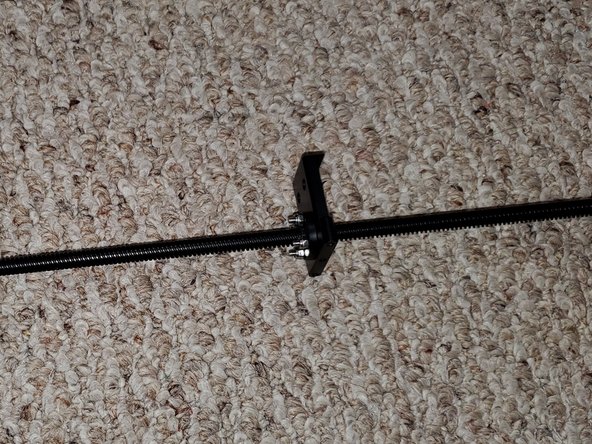
At this point you should be able to move the leadscrew and the POM TR8 nut in the hole for the bed mount. Move the Z bed mount down by twisting the lead screw until the bottom touches the coupler.
-
Center the POM TR8 nut and tighten down the M3x12 screws. You'll want to use a pair of pliers are a 5.5mm socket/wrench to hold the NYLOC nut.
-


I wasn’t paid to write these guides. Ben asked me to do it as a favor to him. Considering all that he’s done for our community I felt it was the least I could do. To be honest even though it took about 2 months to build and document, I had a lot of fun doing it. It forced me to write guides in a manner that was easy for everyone to understand and cleanup my Github so I could share any files that were used that aren’t part of the original download. You’re not obligated but if you would like, feel free to donate.
Cancel: I did not complete this guide.
11 other people completed this guide.