Free Shipping on Domestic Orders $75+

2015-2019 Dodge Charger Tail Light Replacement

What you need

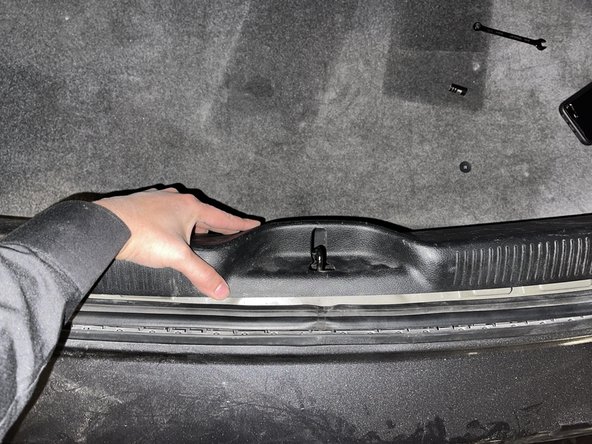
    1. 2015-2019 Dodge Charger Tail Light Replacement, Tail Light: step 1, image 1 of 1
      • Remove the rear plastic panel cover located inside the trunk by pushing the panel towards the center of the car.

      Ask FixBot

      Add Comment

    2. 2015-2019 Dodge Charger Tail Light Replacement: step 2, image 1 of 2 2015-2019 Dodge Charger Tail Light Replacement: step 2, image 2 of 2
      • Remove the plastic screw securing the inner lining of the trunk by pulling outwards.

      • Do not use excess force as it can damage the screw.

      Ask FixBot

      Add Comment

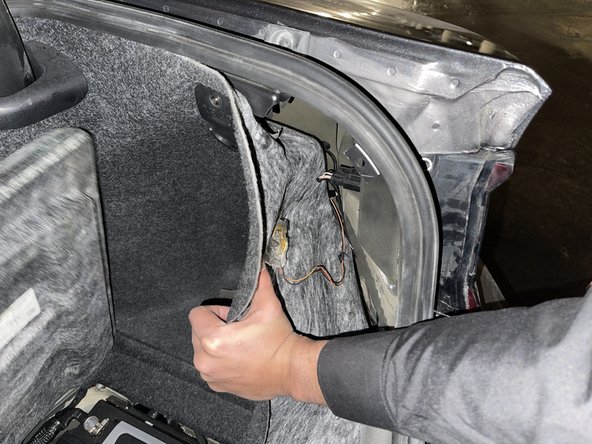
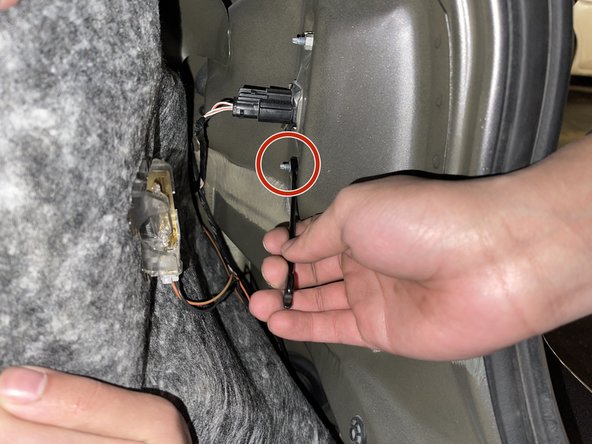
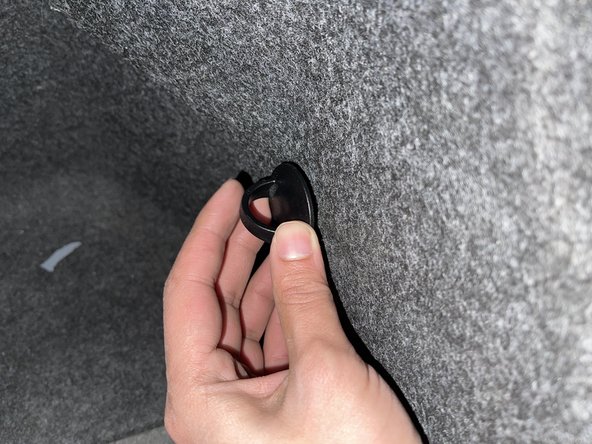
    3. 2015-2019 Dodge Charger Tail Light Replacement: step 3, image 1 of 2 2015-2019 Dodge Charger Tail Light Replacement: step 3, image 2 of 2
      • Remove the plastic pin by prying it outwards using a pry bar to free the inner lining.

      • Pull back the inner lining to gain access to the screws securing the tail lights in place.

      Ask FixBot

      Add Comment

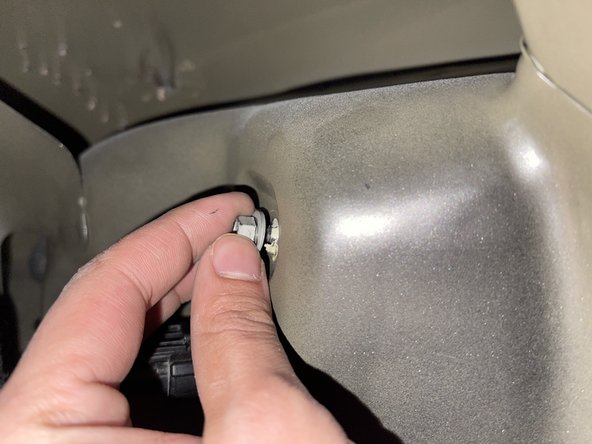
    4. 2015-2019 Dodge Charger Tail Light Replacement: step 4, image 1 of 3 2015-2019 Dodge Charger Tail Light Replacement: step 4, image 2 of 3 2015-2019 Dodge Charger Tail Light Replacement: step 4, image 3 of 3
      • Remove both 8 mm nuts securing the tail lights in place using an 8 mm wrench.

      • Remove the nuts carefully as they may fall between the gaps which can be difficult to reach.

      Ask FixBot

      Add Comment

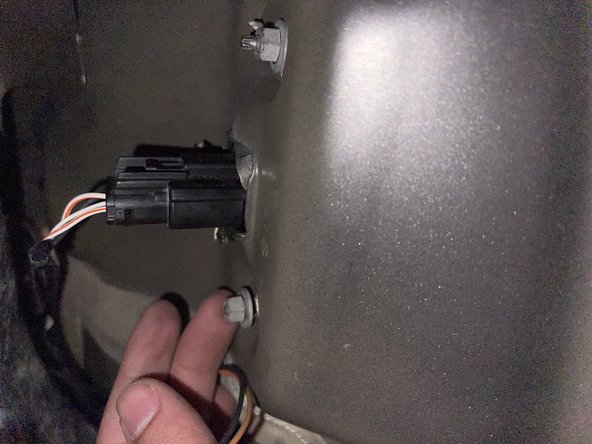
    5. 2015-2019 Dodge Charger Tail Light Replacement: step 5, image 1 of 1
      • Remove the connector by squeezing both sides and pulling outwards.

      Ask FixBot

      Add Comment

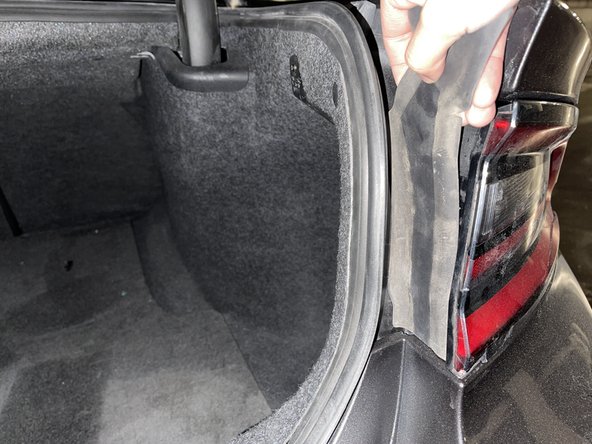
    6. 2015-2019 Dodge Charger Tail Light Replacement: step 6, image 1 of 2 2015-2019 Dodge Charger Tail Light Replacement: step 6, image 2 of 2
      • Remove the plastic cover by pulling outwards so that the tail light can slide out.

      Ask FixBot

      Add Comment

    7. 2015-2019 Dodge Charger Tail Light Replacement: step 7, image 1 of 2 2015-2019 Dodge Charger Tail Light Replacement: step 7, image 2 of 2
      • Grab both sides of the tail light firmly and pull it out.

      Ask FixBot

      Add Comment

    8. 2015-2019 Dodge Charger Tail Light Replacement: step 8, image 1 of 1
      • Slide the replacement tail light back in firmly.

      Ask FixBot

      Add Comment

    9. 2015-2019 Dodge Charger Tail Light Replacement: step 9, image 1 of 3 2015-2019 Dodge Charger Tail Light Replacement: step 9, image 2 of 3 2015-2019 Dodge Charger Tail Light Replacement: step 9, image 3 of 3
      • Insert the connector back to the tail light.

      • Screw the 8 mm nuts onto the bolts by hand before tightening with a 8 mm wrench.

      Ask FixBot

      Add Comment

    10. 2015-2019 Dodge Charger Tail Light Replacement: step 10, image 1 of 3 2015-2019 Dodge Charger Tail Light Replacement: step 10, image 2 of 3 2015-2019 Dodge Charger Tail Light Replacement: step 10, image 3 of 3
      • Push the plastic pin back into the hole to secure the side inner lining.

      • Push the plastic screw back into the hole to secure the bottom inner lining.

      • Push the rear plastic panel cover back on.

      Ask FixBot

      Add Comment

    11. 2015-2019 Dodge Charger Tail Light Replacement: step 11, image 1 of 1
      • Start the vehicle to test if the tail light works.

      Ask FixBot

      Add Comment

Conclusion

Repeat the same steps to replace the other tail light.

Cancel: I did not complete this guide.

One other person completed this guide.

Asad Raza

Member since: 01/17/22

217 Reputation

1 Guide authored

Team

0 Guide Comments

Add Comment

View Statistics:

Past 24 Hours: 3

Past 7 Days: 14

Past 30 Days: 63

All Time: 6,494