Free Shipping on Domestic Orders $75+

2011 Hyundai Elantra Tail Light Replacement

What you need

  1. 2011 Hyundai Elantra Tail Light Replacement, Tail Light: step 1, image 1 of 1
    • Open the trunk.

    • Lift the latch built into the carpet liner on the right side. Remove the cover in order to see the bulb covers.

    • Be careful to not rip the carpet upon removal.

    Ask FixBot

    Add Comment

  2. 2011 Hyundai Elantra Tail Light Replacement: step 2, image 1 of 3 2011 Hyundai Elantra Tail Light Replacement: step 2, image 2 of 3 2011 Hyundai Elantra Tail Light Replacement: step 2, image 3 of 3
    • You will then use your 10mm socket to remove three nuts, careful not to strip the screw to ensure easy replacement.

    Ask FixBot

    Add Comment

  3. 2011 Hyundai Elantra Tail Light Replacement: step 3, image 1 of 2 2011 Hyundai Elantra Tail Light Replacement: step 3, image 2 of 2
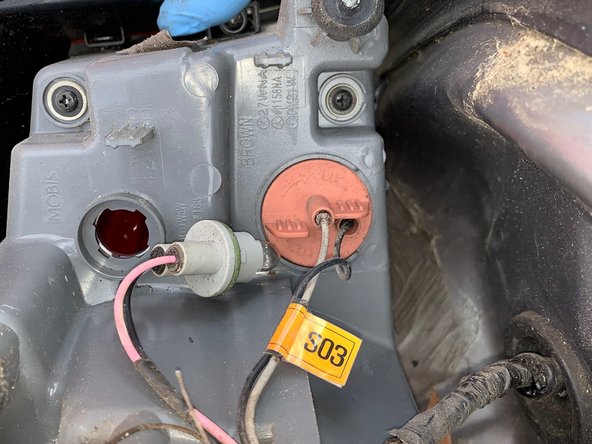
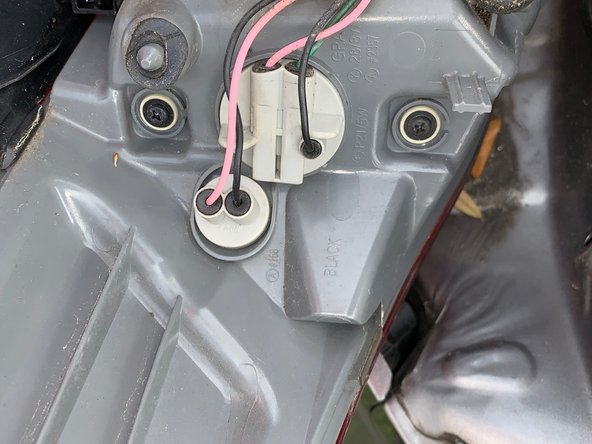
    • Once the bolts are removed, you will need to remove the wires connected to the bulb casing. Firmly push in on the center piece at the base of the wire and pull directly out to remove.

    Ask FixBot

    Add Comment

  4. 2011 Hyundai Elantra Tail Light Replacement: step 4, image 1 of 2 2011 Hyundai Elantra Tail Light Replacement: step 4, image 2 of 2
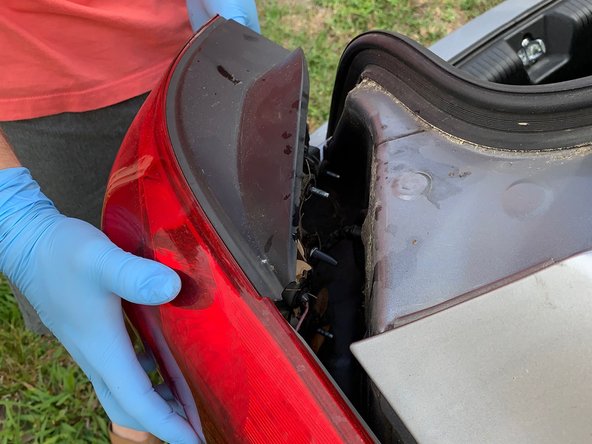
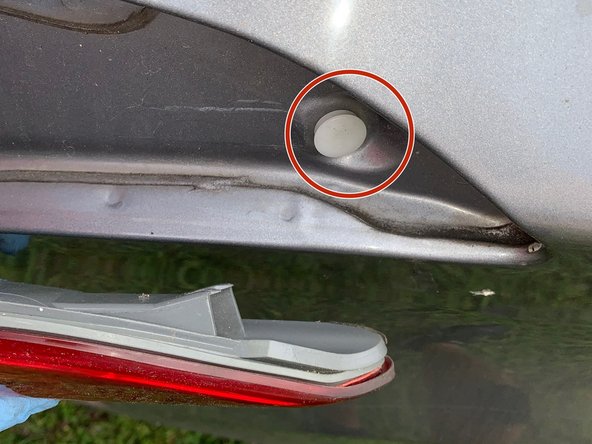
    • Once the wires are disconnected facing the bumper, firmly grasp the entire plastic casing of the tail light and pull directly towards your hips in order to not catch the hidden clip located on the side of the car near the end of the tail light casing.

    Ask FixBot

    Add Comment

  5. 2011 Hyundai Elantra Tail Light Replacement: step 5, image 1 of 3 2011 Hyundai Elantra Tail Light Replacement: step 5, image 2 of 3 2011 Hyundai Elantra Tail Light Replacement: step 5, image 3 of 3
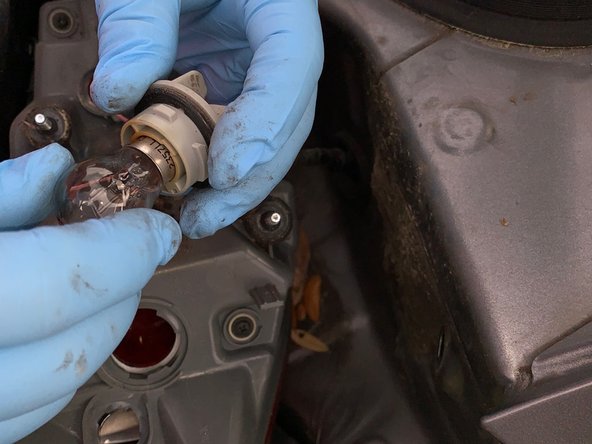
    • In order to remove the main brake/tail light, remove small light first. This is the same process for the main light. Using pliers grip the plastic and pull while rotating counterclockwise 30 degrees and remove the bulb from the socket.

    • Repeat this step to remove main bulb as well.

    Ask FixBot

    Add Comment

  6. 2011 Hyundai Elantra Tail Light Replacement: step 6, image 1 of 2 2011 Hyundai Elantra Tail Light Replacement: step 6, image 2 of 2
    • Put a new Sylvania long life bulb into the socket until you hear it click.

    Ask FixBot

    Add Comment

  7. 2011 Hyundai Elantra Tail Light Replacement: step 7, image 1 of 2 2011 Hyundai Elantra Tail Light Replacement: step 7, image 2 of 2
    • You can now begin the re assembly of parts. Start by re assembling the plastic cap to create a water proof seal.

    Ask FixBot

    Add Comment

  8. 2011 Hyundai Elantra Tail Light Replacement: step 8, image 1 of 2 2011 Hyundai Elantra Tail Light Replacement: step 8, image 2 of 2
    • After you seal the bulb, you will then place the entire casing back into the bumper ensuring that the hidden clip mentioned earlier is attached. Then, re attach the wires, you should hear a clicking sound when wire is properly placed in socket.

    Ask FixBot

    Add Comment

  9. 2011 Hyundai Elantra Tail Light Replacement: step 9, image 1 of 2 2011 Hyundai Elantra Tail Light Replacement: step 9, image 2 of 2
    • Next you will need to screw on the three bolts used previously with a 10 mm socket making sure they are tight and secure.

    Ask FixBot

    Add Comment

  10. 2011 Hyundai Elantra Tail Light Replacement: step 10, image 1 of 3 2011 Hyundai Elantra Tail Light Replacement: step 10, image 2 of 3 2011 Hyundai Elantra Tail Light Replacement: step 10, image 3 of 3
    • Reattach the carpet liner and close the trunk.

    • Test your bulb and make sure it is running properly.

    Ask FixBot

    Add Comment

Conclusion

To reassemble your device, follow these instructions in reverse order.

Cancel: I did not complete this guide.

One other person completed this guide.

Wade Carter

Member since: 01/23/19

205 Reputation

1 Guide authored

0 Guide Comments

Add Comment

View Statistics:

Past 24 Hours: 0

Past 7 Days: 10

Past 30 Days: 84

All Time: 6,061