
2003-2009 (2nd Gen) Toyota Prius 12V Battery Replacement

What you need

  1. 2003-2009 (2nd Gen) Toyota Prius 12V Battery Replacement, 12V Battery: step 1, image 1 of 3 2003-2009 (2nd Gen) Toyota Prius 12V Battery Replacement, 12V Battery: step 1, image 2 of 3 2003-2009 (2nd Gen) Toyota Prius 12V Battery Replacement, 12V Battery: step 1, image 3 of 3
    • Open the trunk.

    • Unlock the carpet cover by turning both knobs.

  2. 2003-2009 (2nd Gen) Toyota Prius 12V Battery Replacement: step 2, image 1 of 3 2003-2009 (2nd Gen) Toyota Prius 12V Battery Replacement: step 2, image 2 of 3 2003-2009 (2nd Gen) Toyota Prius 12V Battery Replacement: step 2, image 3 of 3
    • Pull the tabs up to remove all the covers leading to the spare tire compartment.

  3. 2003-2009 (2nd Gen) Toyota Prius 12V Battery Replacement: step 3, image 1 of 3 2003-2009 (2nd Gen) Toyota Prius 12V Battery Replacement: step 3, image 2 of 3 2003-2009 (2nd Gen) Toyota Prius 12V Battery Replacement: step 3, image 3 of 3
    • Pull up on the battery cover to reveal the 12 V battery.

  4. 2003-2009 (2nd Gen) Toyota Prius 12V Battery Replacement: step 4, image 1 of 3 2003-2009 (2nd Gen) Toyota Prius 12V Battery Replacement: step 4, image 2 of 3 2003-2009 (2nd Gen) Toyota Prius 12V Battery Replacement: step 4, image 3 of 3
    • Pull off the red casing by lifting the side flaps out and off the black plastic case,

  5. 2003-2009 (2nd Gen) Toyota Prius 12V Battery Replacement: step 5, image 1 of 3 2003-2009 (2nd Gen) Toyota Prius 12V Battery Replacement: step 5, image 2 of 3 2003-2009 (2nd Gen) Toyota Prius 12V Battery Replacement: step 5, image 3 of 3
    • Disconnect the three connectors from the boxes.

    • Firmly squeeze the connectors' tabs and pull away from the connection box.

    • Remove the connector in the same manner, or proceed to the next step and disconnect it from the unbolted control box for easier access.

  6. 2003-2009 (2nd Gen) Toyota Prius 12V Battery Replacement: step 6, image 1 of 2 2003-2009 (2nd Gen) Toyota Prius 12V Battery Replacement: step 6, image 2 of 2
    • Use a socket wrench to remove the two 12 mm bolts holding down the control box.

    • Some cars might contain a third bolt on the top of the box.

  7. 2003-2009 (2nd Gen) Toyota Prius 12V Battery Replacement: step 7, image 1 of 3 2003-2009 (2nd Gen) Toyota Prius 12V Battery Replacement: step 7, image 2 of 3 2003-2009 (2nd Gen) Toyota Prius 12V Battery Replacement: step 7, image 3 of 3
    • Use a socket wrench to remove the two 10 mm bolts holding the battery exhaust pipe.

    • Pull out the exhaust pipe and the battery vent.

    • In these pictures, the back bolt is missing, if present, use an extension on the socket wrench in order to reach the bolt. The bolt is different from the rest and has a pointed end.

  8. 2003-2009 (2nd Gen) Toyota Prius 12V Battery Replacement: step 8, image 1 of 2 2003-2009 (2nd Gen) Toyota Prius 12V Battery Replacement: step 8, image 2 of 2
    • Disconnect the terminal connectors from the battery using a socket wrench.

    • Remove the negative connection held by a 10 mm bolt.

    • Loosen the 10 mm bolt so that the positive terminal brackets open up.

  9. 2003-2009 (2nd Gen) Toyota Prius 12V Battery Replacement: step 9, image 1 of 3 2003-2009 (2nd Gen) Toyota Prius 12V Battery Replacement: step 9, image 2 of 3 2003-2009 (2nd Gen) Toyota Prius 12V Battery Replacement: step 9, image 3 of 3
    • Remove the two 10 mm bolts.

    • Pull away the battery bracket.

  10. 2003-2009 (2nd Gen) Toyota Prius 12V Battery Replacement: step 10, image 1 of 1
    • Pull out the battery.

Conclusion

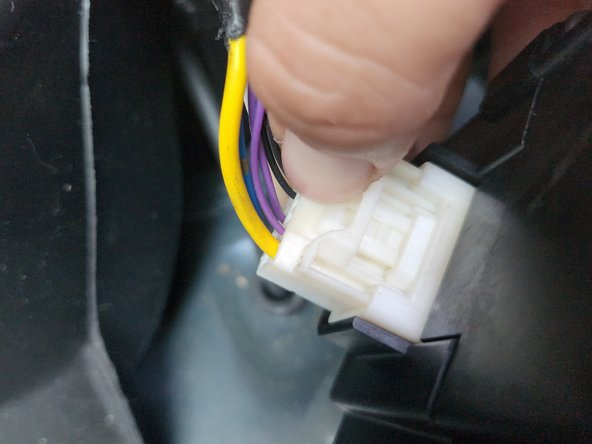
To reassemble your device, follow these instructions in reverse order.

4 other people completed this guide.

0 Comments

Add Comment

View Statistics:

Past 24 Hours: 41

Past 7 Days: 321

Past 30 Days: 1,204

All Time: 8,107