Free Shipping on Domestic Orders $75+

1980 -1990 Honda XR80R Carburetor Disassembly

What you need

    1. 1980 -1990 Honda XR80R Carburetor Disassembly, 1980 -1990 Honda XR80R Carburetor Disassembly: step 1, image 1 of 3 1980 -1990 Honda XR80R Carburetor Disassembly, 1980 -1990 Honda XR80R Carburetor Disassembly: step 1, image 2 of 3 1980 -1990 Honda XR80R Carburetor Disassembly, 1980 -1990 Honda XR80R Carburetor Disassembly: step 1, image 3 of 3
      • The Carburetor is located to the rear of the engine block, right under the gas tank.

      Ask FixBot

      Add Comment

    2. 1980 -1990 Honda XR80R Carburetor Disassembly: step 2, image 1 of 2 1980 -1990 Honda XR80R Carburetor Disassembly: step 2, image 2 of 2
      • Before beginning the disassembly process, first turn your fuel off by turning the dial located on the left side of the motorcycle, to the off position.

      • Disconnect the fuel line from the gas tank located on the the fuel dial.

      • Disconnecting fuel line may require prying with a flat head screwdriver.

      Ask FixBot

      Add Comment

    3. 1980 -1990 Honda XR80R Carburetor Disassembly: step 3, image 1 of 3 1980 -1990 Honda XR80R Carburetor Disassembly: step 3, image 2 of 3 1980 -1990 Honda XR80R Carburetor Disassembly: step 3, image 3 of 3
      • Remove the rear plastic panels, one on either side, by unscrewing the two 8 mm screws located at the bottom of each panel, by using the 8 mm socket wrench.

      • Anytime screws are removed, they should be placed in container so they are not lost.

      • After the screws are removed, the panels can be easily pulled off with hands.

      Ask FixBot

      Add Comment

    4. 1980 -1990 Honda XR80R Carburetor Disassembly: step 4, image 1 of 3 1980 -1990 Honda XR80R Carburetor Disassembly: step 4, image 2 of 3 1980 -1990 Honda XR80R Carburetor Disassembly: step 4, image 3 of 3
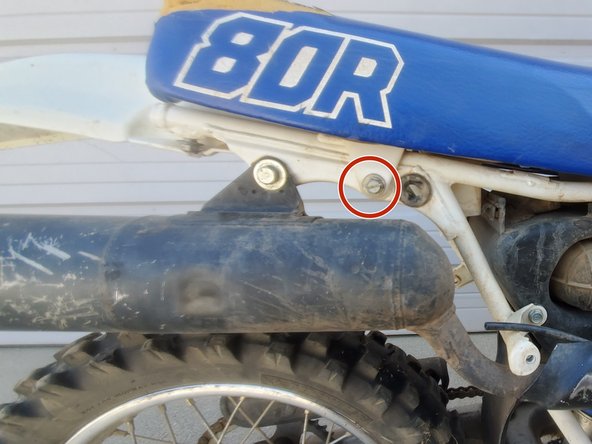
      • Remove the seat by unscrewing the two 8 mm screws located 2/3 to the rear of the seat, on either side.

      • One screws are removed, the seat can be easily lifted off the motorcycle.

      Ask FixBot

      Add Comment

    5. 1980 -1990 Honda XR80R Carburetor Disassembly: step 5, image 1 of 2 1980 -1990 Honda XR80R Carburetor Disassembly: step 5, image 2 of 2
      • Unhook the elastic strap located on the backside of the gas tank.

      Ask FixBot

      Add Comment

    6. 1980 -1990 Honda XR80R Carburetor Disassembly: step 6, image 1 of 3 1980 -1990 Honda XR80R Carburetor Disassembly: step 6, image 2 of 3 1980 -1990 Honda XR80R Carburetor Disassembly: step 6, image 3 of 3
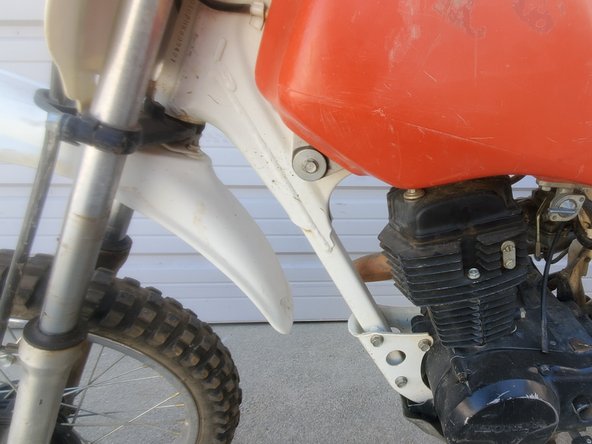
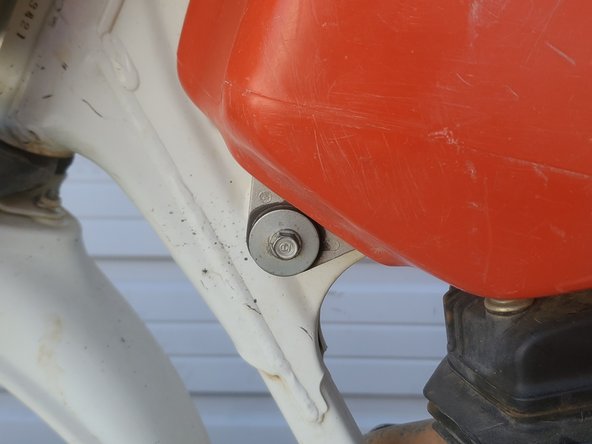
      • Remove the gas tank by unscrewing the two 8 mm screws located on both sides, by using the socket wrench.

      • Once screws are removed, the gas tank can be easily taken off the motorcycle.

      • Be careful to keep the gas tank upright in order to prevent the gas spillage.

      Ask FixBot

      Add Comment

    7. 1980 -1990 Honda XR80R Carburetor Disassembly: step 7, image 1 of 3 1980 -1990 Honda XR80R Carburetor Disassembly: step 7, image 2 of 3 1980 -1990 Honda XR80R Carburetor Disassembly: step 7, image 3 of 3
      • Loosen screw, located to the left of the carburetor, using Philip head screw driver.

      • The Air intake now can be pulled off from the Carburetor.

      Ask FixBot

      Add Comment

    8. 1980 -1990 Honda XR80R Carburetor Disassembly: step 8, image 1 of 3 1980 -1990 Honda XR80R Carburetor Disassembly: step 8, image 2 of 3 1980 -1990 Honda XR80R Carburetor Disassembly: step 8, image 3 of 3
      • Remove the two 8 mm nuts that hold the carburetor to the engine block.

      • The carburetor can now be freely removed from the engine block.

      • Make sure to plug the Carburetor-Engine Block pipe with a clean rag so no damaging dirt can get into the engine.

      Ask FixBot

      Add Comment

    9. 1980 -1990 Honda XR80R Carburetor Disassembly: step 9, image 1 of 3 1980 -1990 Honda XR80R Carburetor Disassembly: step 9, image 2 of 3 1980 -1990 Honda XR80R Carburetor Disassembly: step 9, image 3 of 3
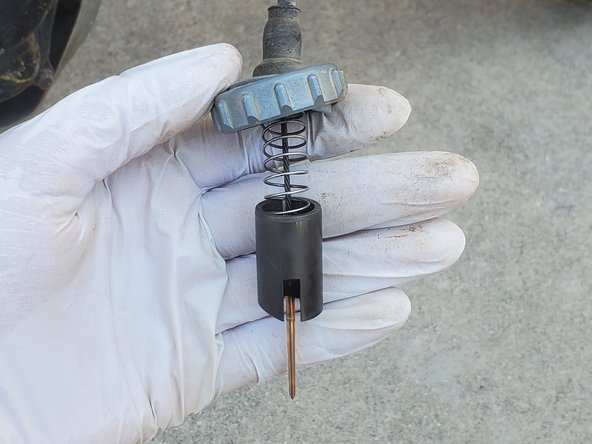
      • Unscrew the the top of the carburetor and pull out the wire that is connected to the fuel needle. Set the top aside.

      • If the motorcycle was recently ran, there might be fuel still trapped in the carburetor, so be careful of spillage.

      Ask FixBot

      Add Comment

    10. 1980 -1990 Honda XR80R Carburetor Disassembly: step 10, image 1 of 2 1980 -1990 Honda XR80R Carburetor Disassembly: step 10, image 2 of 2
      • Using the Phillips head screwdriver, remove the two 10 mm screws located on the underside of the carburetor.

      • Once the screws are removed, the two carburetor halves can then be taken apart.

      Ask FixBot

      Add Comment

    11. 1980 -1990 Honda XR80R Carburetor Disassembly: step 11, image 1 of 2 1980 -1990 Honda XR80R Carburetor Disassembly: step 11, image 2 of 2
      • On the bottom half of the carburetor, remove the pin that is holding together the fuel bubbler and fuel pin by using needle nose plyers.

      Ask FixBot

      Add Comment

    12. 1980 -1990 Honda XR80R Carburetor Disassembly: step 12, image 1 of 3 1980 -1990 Honda XR80R Carburetor Disassembly: step 12, image 2 of 3 1980 -1990 Honda XR80R Carburetor Disassembly: step 12, image 3 of 3
      • In order to remove the Pilot Jets, you will use the Flathead screwdriver to unscrew the two jets from the top.

      Ask FixBot

      Add Comment

    13. 1980 -1990 Honda XR80R Carburetor Disassembly: step 13, image 1 of 1
      • Once fully disassembled, use carburetor cleaner and a rag to fully clean the interior and components of the carburetor, or replace any damaged parts.

      Ask FixBot

      Add Comment

Conclusion

To reassemble your device, follow these instructions in reverse order.

Cancel: I did not complete this guide.

7 other people completed this guide.

0 Guide Comments

Add Comment

View Statistics:

Past 24 Hours: 1

Past 7 Days: 42

Past 30 Days: 178

All Time: 9,165