Free Shipping on Domestic Orders $75+

(New) iPhone 15 Microphone Installation

Prerequisite Only
This is a prerequisite-only guide! This guide is part of another procedure and isn’t meant to be used alone.
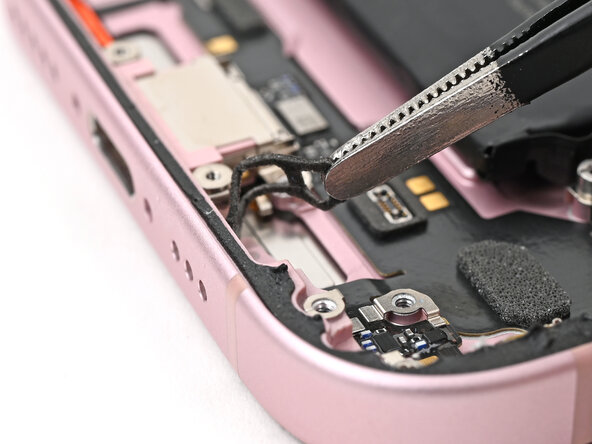
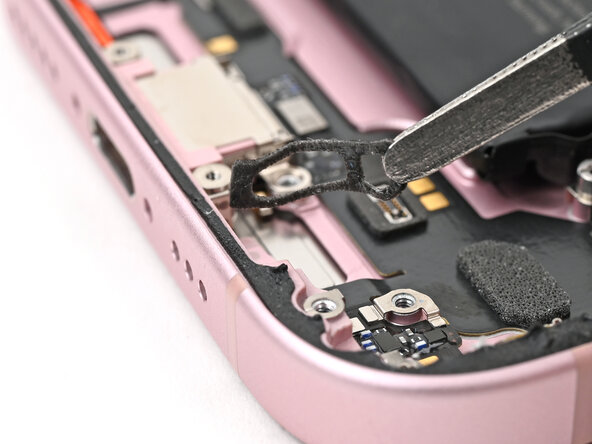
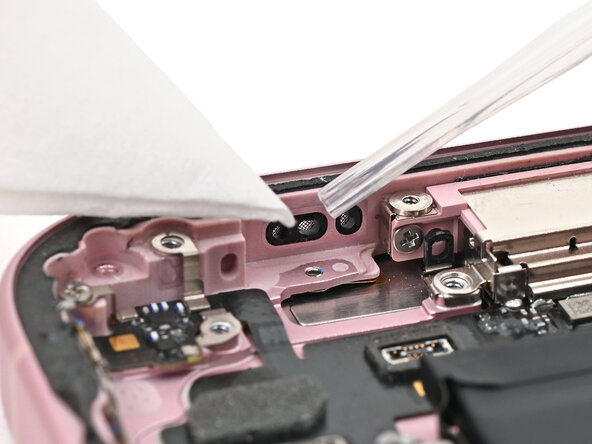
    1. (New) iPhone 15 Microphone Installation, Remove the old adhesive: step 1, image 1 of 3 (New) iPhone 15 Microphone Installation, Remove the old adhesive: step 1, image 2 of 3 (New) iPhone 15 Microphone Installation, Remove the old adhesive: step 1, image 3 of 3
      • Use tweezers or your fingers to remove the old adhesive from the bottom of the frame.

      • If there's adhesive residue on the frame, use high concentration isopropyl alcohol (greater than 90%) and a coffee filter or lint-free cloth to clean it.

      Ask FixBot

      Add Comment

    2. (New) iPhone 15 Microphone Installation, Remove the white liner: step 2, image 1 of 2 (New) iPhone 15 Microphone Installation, Remove the white liner: step 2, image 2 of 2
      • If your microphone comes with adhesive installed, skip the next two steps.

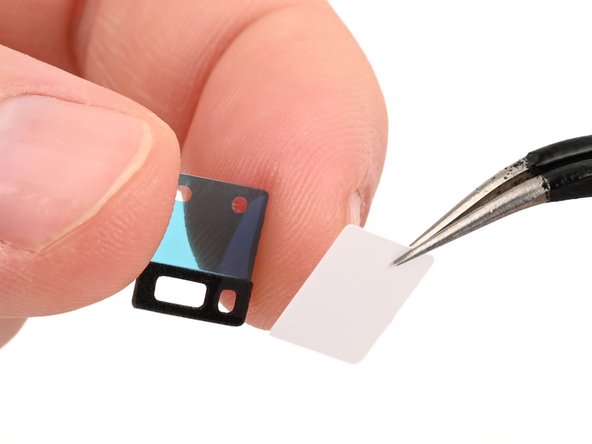
      • While holding the microphone adhesive with one hand, use your fingers or a pair of tweezers to remove the white liner from the adhesive.

      Ask FixBot

      Add Comment

    3. (New) iPhone 15 Microphone Installation, Apply the adhesive to the microphone: step 3, image 1 of 3 (New) iPhone 15 Microphone Installation, Apply the adhesive to the microphone: step 3, image 2 of 3 (New) iPhone 15 Microphone Installation, Apply the adhesive to the microphone: step 3, image 3 of 3
      • Hold the microphone so the metal side is facing up.

      • Apply the adhesive to the microphone with the pull tab pointing up.

      Ask FixBot

      Add Comment

    4. (New) iPhone 15 Microphone Installation: step 4, image 1 of 2 (New) iPhone 15 Microphone Installation: step 4, image 2 of 2
      • Remove the blue liner from the microphone adhesive.

      Ask FixBot

      Add Comment

    5. (New) iPhone 15 Microphone Installation, Install the microphone: step 5, image 1 of 3 (New) iPhone 15 Microphone Installation, Install the microphone: step 5, image 2 of 3 (New) iPhone 15 Microphone Installation, Install the microphone: step 5, image 3 of 3
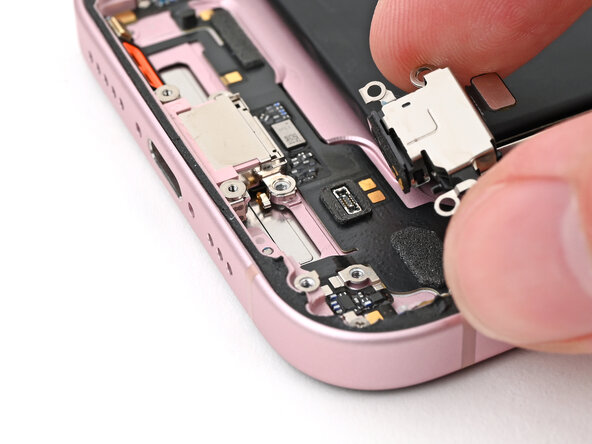
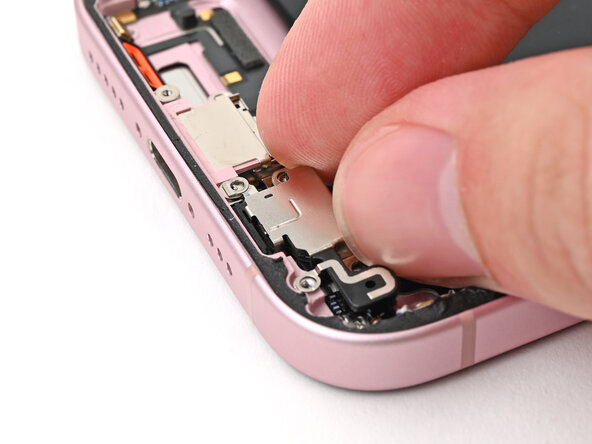
      • Insert the microphone at a downward angle so the adhesive adheres firmly to the frame around the sound channel.

      • Press the microphone firmly into place.

      Ask FixBot

      Add Comment

    6. (New) iPhone 15 Microphone Installation, Install the microphone screws: step 6, image 1 of 1
      Tool used on this step:
      Standoff Screwdriver for iPhones
      $5.49
      Buy
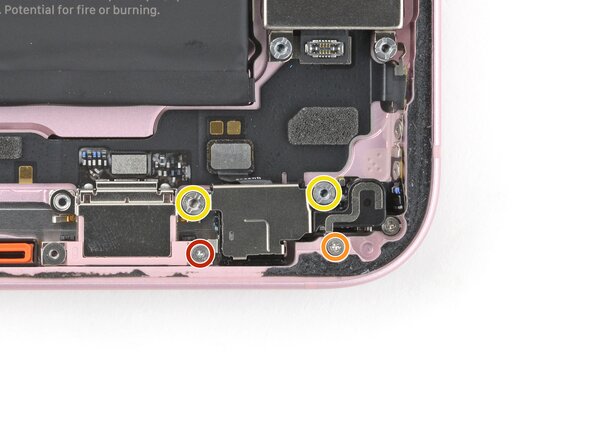
      • Use a tri-point Y000 driver to install the 1.3 mm screw securing the grounding clip and microphone.

      • Use a Phillips #000 driver to install the 1.3 mm screw securing the bottom right of the microphone.

      • Use a standoff driver to install the two 3 mm standoff screws securing top of the microphone.

      • If you don't have a standoff driver, you may use a thin flathead driver—but be careful not to strip the shallow notches in the screw heads.

      Ask FixBot

      Add Comment

    7. (New) iPhone 15 Microphone Installation, Connect the microphone: step 7, image 1 of 1
      • Use the flat end of a spudger or your finger to connect the microphone press connector.

      Ask FixBot

      Add Comment

Conclusion

To reassemble your device, follow these instructions in reverse order.

Cancel: I did not complete this guide.

Alex Diaz-Kokaisl

Member since: 01/16/22

250,047 Reputation

1,203 Guides authored

0 Guide Comments

Add Comment

View Statistics:

Past 24 Hours: 0

Past 7 Days: 7

Past 30 Days: 17

All Time: 112