-
-
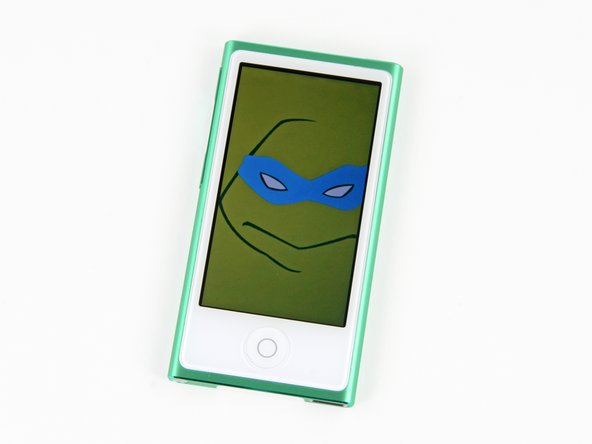
What's lean, new, and green? The iPod Nano 7th Generation. The Nano is available in several colors, but we decided green was the way to go.
-
Completely redesigned, the 7th Generation Nano takes after its iPod Touch and iPhone brethren.
-
Tech Specs:
-
16 GB storage capacity
-
2.5-inch (diagonal) widescreen Multi-Touch display
-
Built-in accelerometer
-
Bluetooth 4.0
-
-
-
We're beginning to think that Apple doesn't trust us with unboxing their precious gadgets — so we tried it their way.
-
Their unboxing procedure was neither comfortable nor ergonomic.
-
We are happy, however, that there is minimal packaging between us and our new green friend.
-
-
-
Amidst the greenery we find the Nano's new model number: A1446.
-
With the slow phasing out of the iPod Shuffle and iPod Classic, it seems that Apple is gravitating towards a line of products based solely on how large of a device you want around your home button.
-
Cowabunga, dude! What do you do with twice the screen size of the old Nano? You load minimalist illustrations of Ninja Turtles, duh.
-
-
-
Just how much bigger is it than the previous Nano? Oodles.
-
The 6th Generation Nano came in at 1.48 x 1.68 x 0.35 inches, and weighed 0.74 ounces.
-
The new 7th Generation is just over twice as tall, while also a little thinner and more narrow at 3.01 x 1.56 x 0.21 inches.
-
At 1.1 ounces, the newest Nano only gained an extra third of an ounce.
-
Reverting to the tall design utilized in previous generations makes the iPod easier to grip, and thereby easier to use. The designers threw the 6th Generation's clip out the window, so the new Nano is that much thinner.
-
Switching to the Lightning connector might have saved a little space in the iPhone 5, but its impact on the iPod Nano is pretty profound.
-
-
-
Guided by the
swordplastic opening tool of our father, we were led to theknottab that opened the pit of despair. -
Hiding beneath the tab we find the Bluetooth antenna, which sneakily covers two Phillips screws that unlock the magic lurking within the Nano.
-
-
-
-
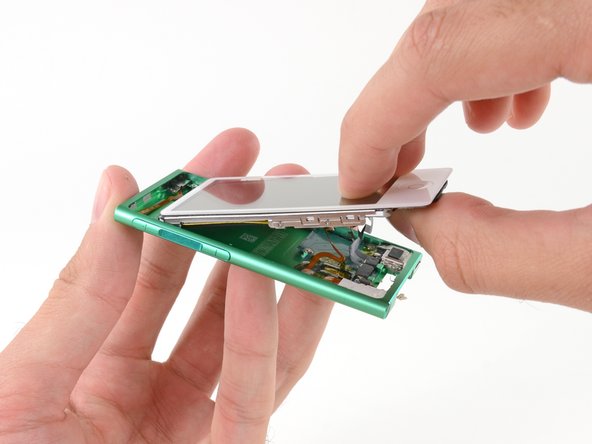
Two quick flicks disconnect the LCD and digitizer cables, leaving only the battery cable as a final umbilical cord between the two halves of the device.
-
The battery is both adhered to the back of the display assembly and soldered to the logic board.
-
Unfortunately, the connivance and cost savings of adhesive come at the cost of repairability.
-
-
-
Pop goes the digitizer!
-
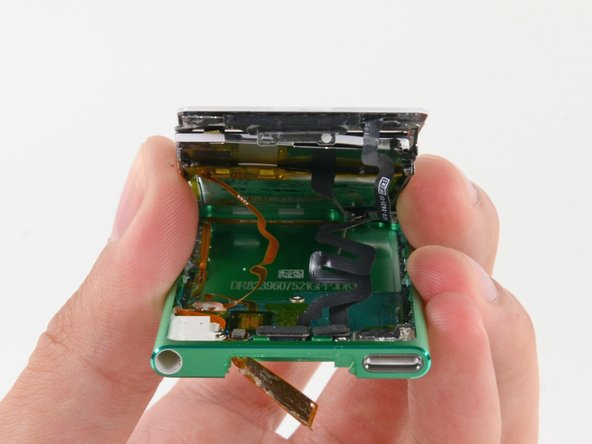
We've got a full house in our hand with the bezel, logic board and battery assembly, and the rear case.
-
We hope that the minds at Apple aren't as twisted as their cables. Cables with this much form probably come out of engineering efforts to make this iPod as thin as possible.
-
-
-
There's an adorable plastic pull tab underneath the battery. It's likely there for battery removal, but we aren't sure it's up to the task.
-
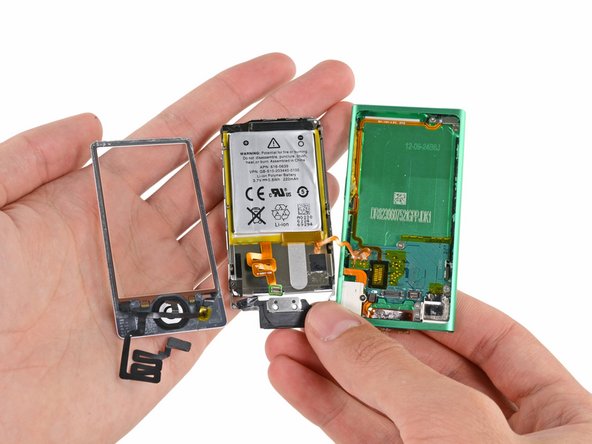
Forgoing the tab in favor of some spudgering, we're able to pry the 3.7 V, 0.8 Wh, 220 mAh battery off the back of the display assembly.
-
0.8 Wh is more than twice that of the iPod Nano 6th Generation's 0.39 Wh rating.
-
-
-
By now, we are getting pretty anxious to pull out the logic board and get a look at what makes this Nano tick.
-
Alas, with all of the peripherals both soldered to the board and adhered/screwed to the case, we're still a couple steps away.
-
We're able to unscrew the bracket securing the volume buttons to the rear case and pull out the button cable.
-
-
-
Putting Bluetooth 4.0 in the iPod Nano means putting a Bluetooth 4.0 antenna in the iPod Nano.
-
We found this Nano's Bluetooth antenna easy to remove with a plastic opening tool—provided you've already got the case open.
-
Bluetooth connectivity in the Nano allows you to access your music wirelessly with Bluetooth-enabled speakers, headphones, and car stereos.
-
-
-
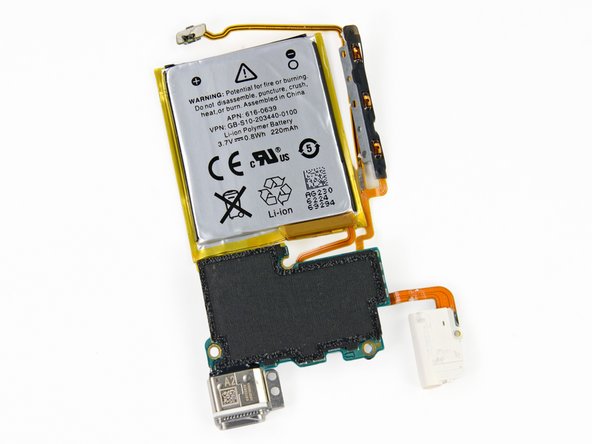
After enough poking and prying to earn ourselves certification as plastic surgeons, we finally gently yank out the logic board!
-
As in the iPod Touch 5th Generation, many of the important components—including the battery, Lightning connector, and volume controls—are soldered to the logic board.
-
With the logic board gone, the rear case is left all alone with no friends to keep it company. It's not easy being green, you know.
-
-
-
Pulling out the logic board really feels like pulling out the entire iPod—the battery, button cable, Lightning connector, and headphone jack all come with it.
-
On the flip-side we found an intriguing fibrous tape covering the EMI shields on the ICs. It's probably there to insulate against contact with the rear case.
-
-
-
iPod Nano 7th Generation Repairability: 5 out of 10 (10 is easiest to repair).
-
An easy-to-open case only requires unscrewing two screws and a plastic opening tool.
-
Only standard Phillips #00 screws are used—no security or pentalobe.
-
The LCD and digitizer glass are not fused together, allowing replacement of either component separately.
-
"External" screws hidden behind the antenna mean less adhesive holding down the display assembly.
-
The battery, Lightning connector, button cable, and headphone jack are all soldered to the logic board.
-
The battery is adhered to the back of the display assembly.
-


23 Comments
As usual, iFixit has decided that any integration, thinness, beauty or functionality is low on the list of importance. The most important thing is Lego like snap together and bulk.
I'd recommend you to read the iFixIt mission statement, but you'd figure out they're right soon enough when your first iProduct breaks one way or the other 1 month after the warranty expires..
Using screws and clips does not imply that a product cannot be slim and beautiful, btw.
denmike -
Tried to replace a broken digitizer and ended up breaking the LCD. These instructions don't make clear in Step #6 how deep you need to get the opening tool in order to pull out the ENTIRE DISPLAY ASSEMBLY. The picture indicates, quite wrongly, that you only need to get the tip of the opening tool under the glass. This will result in separating the digitizer from the screen prematurely, and then breaking the LCD screen. The reality is that you must get the tool deep under the metal base of the assembly and pry the whole thing out with much force (it's glued on both sides). Frustrating.
True, I broke the LCD screen with this method. Glue is everywhere in this device.
Axel -