Introduction
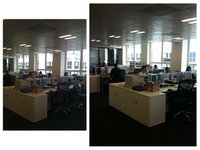
To get all the latest updates as we're doing the teardown, follow us on twitter! We also have some video clips uploaded through the iPhone 3GS courtesy of our fellow friend Richard Lai. Many thanks to our friends at MacWorld UK, who let us use their office and equipment for the teardown.
What you need
-
-
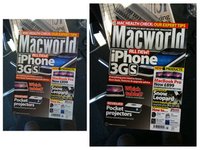
We have the iPhone in hand!
-
We didn't have to travel quite as far as last year to get it. This year, it was only 5,400 miles away.
-
We lost the corporate jet due to the economic downturn. Our CEO had to settle for an Italian bi-plane. 47 hours later he was in London.
-
[Apple claims the iPhone 3GS is "up to 2x faster." Why is the 3GS faster? We'll find out soon enough. According to rumors, the 3GS has a 600 MHz processor, 50% faster than the processor in the iPhone 3G.
-
-
-
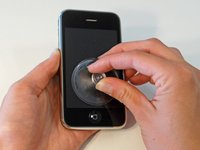
A small suction cup is your friend. A large suction cup may also be a fun toy.
-
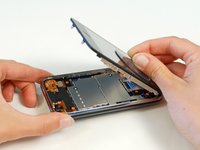
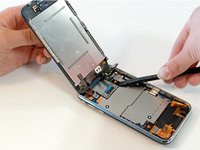
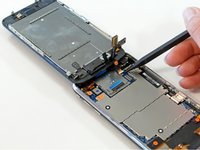
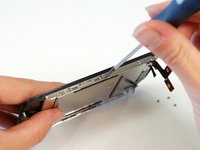
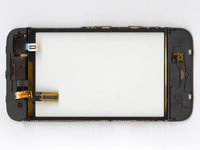
There are seven numbered connectors on the 3GS, up from six on the 3G. Connector number seven is in the lower right corner, just above the dock connector.
-
-
-
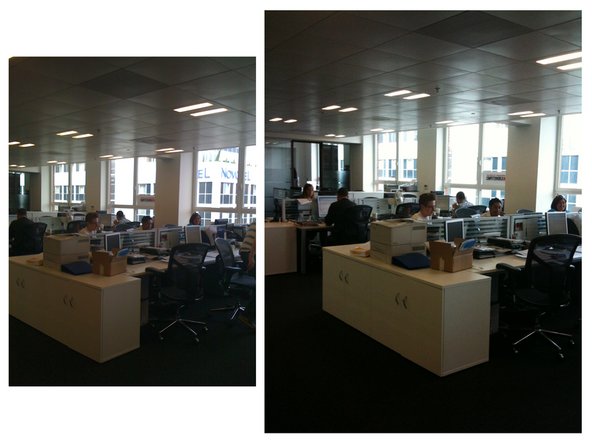
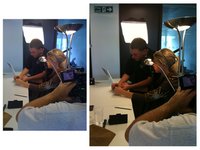
We're looking forward to the improved 3 megapixel camera on the 3GS. According to our good friend Richard Lai, "Camera quality is much improved from the 3G one, close up shots were possible down to about 5cm, brightness adjusts well when picking focus area."
-
Fortunately, as in both the original and 3G iPhones, the camera's a separate component, so removal is possible if necessary for security purposes.
-
In each image, the left photo is from the iPhone 3G, the right photo is from the iPhone 3GS.
-
-
-
-
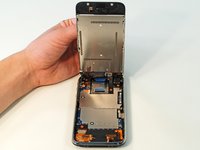
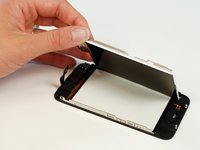
Just like the iPhone 3G, the LCD is pretty easy to replace. After removing 6 screws, the LCD simply lifts out.
-
On the iPhone 3G, we see a lot more cracked digitizers than cracked LCDs. Replacing the digitizer is a little more work, and requires breaking out a heat gun or hair dryer.
-
-
-
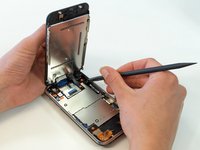
The main logic board. There's a lot packed in here.
-
The Apple-logo chip is the primary Samsung ARM processor.
-
The 16 GB of Toshiba flash are now on the front of the board, just below the Samsung ARM.
-
phoneWreck sent us a great component diagram (second picture). They performed a thorough chip analysis of the iPhone 3GS, so check out their site!
-
-
-
Video recording is a long-overdue feature of the iPhone 3GS. The 3GS records video at 640x480 resolution and 30 fps.
-
The video recording quality appears acceptable, although not exceptional. You can see a video (taken using another iPhone 3GS) of us opening the phone.
-
-
-
The 3GS offers Voice Control. We're not sure yet why this feature couldn't be added via software to earlier iPhones. Perhaps the voice recognition requires a better microphone than in earlier iPhones or a lot of processing power, or maybe Apple just wanted to differentiate the 3GS.
-
According to Richard Lai, the "Chinese (Cantonese) voice control works, but took a while to work out the magic words as there is no guide released yet (not out in Hong Kong until early July)." He also tested the "Chinese (Mandarin) and Chinese (Taiwanese), although the latter didn't work as well since [he doesn't] do the accent well."
-
- LCD and front glass are not fused and can be replaced individually.
- Standard Phillips screws used throughout.
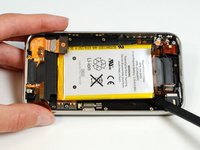
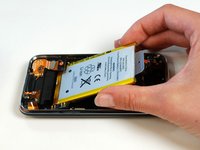
- Battery is buried under the logic board, making it difficult to replace.


Final Thoughts
Repairability Score


(10 is easiest to repair)
13 Guide Comments
i love my 3G and now im dying to get the 3GS but its a bit out of my budget. please help me find a site which sell the unlocked 3GS for cheaper than this... http://www.puremobile.com/apple-iphone-3...
thank you in advance.
personally i think the 3GS is a bit overrated. the 3G is a better phone in my opinion, but if you want to get some..i got mine off gsmallover.com. they sell both the 3G and the 3GS fully unlocked.
Sammy77 -
Hi mack123, unfortunately the link is no longer valid but if your still looking for a 3gs try looking here https://goo.gl/f5DmJJ
Quote from mack123:
i love my 3G and now im dying to get the 3GS but its a bit out of my budget. please help me find a site which sell the unlocked 3GS for cheaper than this... http://www.puremobile.com/apple-iphone-3...
thank you in advance.
hey u can find in youtube.com i send u the link.....
Quote from mack123:
i love my 3G and now im dying to get the 3GS but its a bit out of my budget. please help me find a site which sell the unlocked 3GS for cheaper than this... http://www.puremobile.com/apple-iphone-3...
thank you in advance.
you can get a 32gb 3gs from at&t for 500 bucks without a contract. then unlock it yourself. 800 bucks is way too much.