Introduction
Join us as we take a look into Samsung's 7-inch Android tablet! Serious props to Richard Lai and Engadget for helping us get our hands on this out-of-this-world hardware. Thanks, guys!
It's time to stand up for our right to repair. We're taking action against made-for-obsolescence devices with our Self-Repair Manifesto!
What you need
-
-
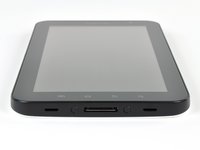
The Samsung Galaxy Tab has landed in the hands of iFixit.
-
Long rumored to be the "iPad Killer," join us as we assess this rumor and once and for all determine where the Galaxy Tab stands in the realm of tablets.
-
Tech Specs:
-
1 GHz ARM Cortex-A8 Hummingbird Multimedia Applications Processor based on the ARMv7 architecture.
-
16 or 32 GB internal storage capacity + microSD external expandable storage.
-
512 MB total DDR RAM
-
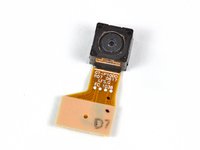
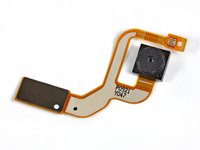
3.2 MP rear facing camera and 1.3 MP front facing camera.
-
Android 2.2 (Froyo) + Samsung TouchWiz
-
-
-
Differentiating the look of all-screen devices has become a challenge, but Samsung pulled it off by making the white back cover stand out against the iPad-esque front face.
-
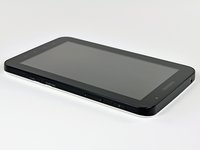
The capacitive controls along the bottom edge of the front panel are standard Android controls found on mostly all touchscreen phones.
-
The 3.2 MP rear facing camera with an LED flash is a bit sub-par for a device of this caliber, seeing how a much smaller device like the Droid 2 is packed with a 5 MP imager.
-
-
-
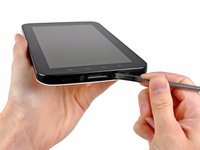
Enough ogling. Let's search for some screws.
-
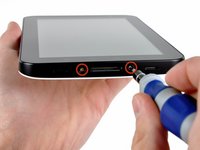
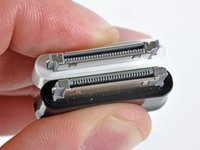
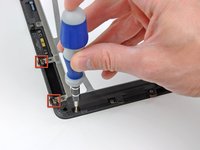
Prying off a plastic pad on both sides of the Apple-esque dock connector reveals two tri-wing screws.
-
Tri-wing screws are a pretty low level solution to tamper proofing a product. We have a 26 piece bit driver kit (that includes the tri-wing bit) on hand to continue the carnage.
-
How Apple-esque is the dock connector? Check out a side-by-side comparison of the USB cables and see for yourself.
-
-
-
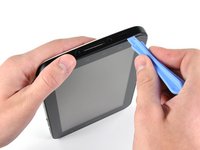
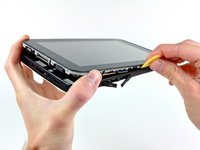
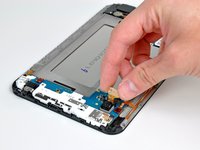
Using a combination of plastic opening tools and guitar picks, the front panel is pried upward around its perimeter to release it from the plastic rear case.
-
Luckily, the Galaxy Tab doesn't use any self destructing copper retaining clips like the iPad.
-
-
-
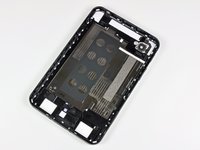
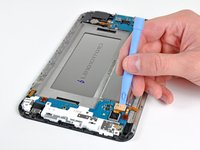
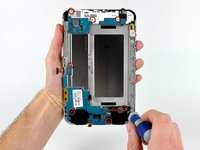
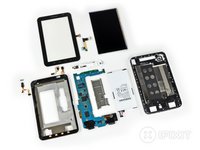
After all the plastic tabs have been released, the rear case can be removed from the Galaxy Tab.
-
The inner face of the rear case has a heavy strip of EMI shielding where it rests against the processor and memory chips on the motherboard.
-
The rear case's plastic construction will no doubt aid in wireless reception. Using plastic allowed Samsung to bypass the creative measures used by Apple's iPad designers to aid in signal transmission.
-
-
-
-
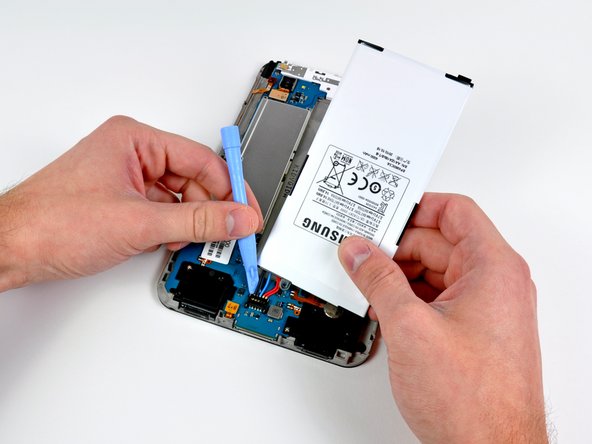
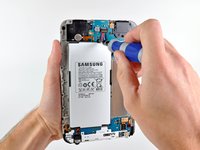
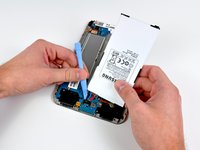
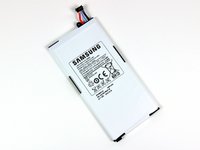
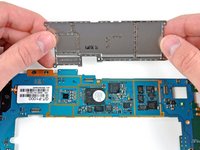
The 3.7V Li-Ion battery inside the Galaxy Tab lists a capacity of 14.8 Watt-hours or 4000 mAh.
-
Samsung claims that the battery provides enough juice to watch seven hours of movies.
-
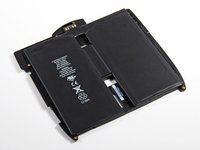
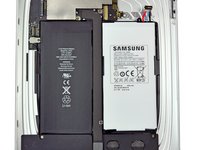
Weighing in at 81 grams, the Galaxy Tab's battery is about 55% the weight and 60% the capacity of the iPad's hulk of a battery.
-
As highlighted in the third picture, the Galaxy Tab's battery is approximately half the size of the iPad's battery.
-
-
-
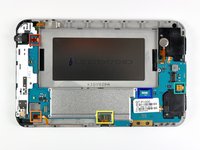
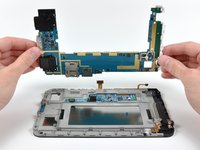
Removing the motherboard requires disconnecting several connectors:
-
Headphone jack/microphone cable
-
Volume control cable
-
Touchscreen cable
-
Control button LED cable
-
Display data cable
-
The motherboard is secured the rear panel by seven Phillips screws.
-
Removing the motherboard requires lifting it away from the rear panel.
-
-
-
Let's examine the lineup:
-
SanDisk SDIN4C2-16G (MLC NAND Flash 16 GB)
-
Maxim 8998 (Power Management IC)
-
Samsung S5PC110A01 + Samsung KB100D100YM (1GHz Hummingbird Multimedia Applications Processor + 8 Gb of MLC Flex OneNAND, 1 Gb of OneDRAM, and 3 Gb of mobile DDR).
-
Infineon PM9801 (X-GOLD 616 HSDPA/HSUPA/EDGE Modem Solution)
-
Wolfson Microelectronics WM8994 (Audio Codec)
-
Infineon PMB5703 (RF Transceiver)
-
-
-
Back side of the motherboard.
-
Chip lineup continued:
-
Broadcom BCM4329 (Bluetooth/FM/WLAN receiver)
-
STMicroelectronics L3G4200D (Gyroscope)
-
ATMEL MXT224 (touchscreen controller)
-
Broadcom BCM4751 (GPS receiver)
-
Two loudspeakers near the dock connector provide on-board audio for the Galaxy Tab.
-
-
-
So what makes the Samsung Galaxy Tab a true iPad competitor? The answer lies in the processor.
-
The Galaxy Tab is powered by the Samsung S5PC110A01 Multimedia Applications Processor.
-
Much like the iPad's A4 processor, the 1 GHz Hummingbird processor is an ARM processor featuring package-on-package construction to improve the speed and efficiency of internal processes.
-
Samsung takes advantage of the Package-on-Package architecture by embedding 8Gb of MLC Flex OneNAND, 1 Gb of OneDRAM and 3Gb of Mobile DDR into the processor.
-
The iPad's A4 processor embeds two layers of RAM (Samsung K4X1G323PE) into the processor's three layers.
-
-
-
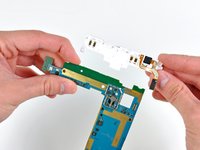
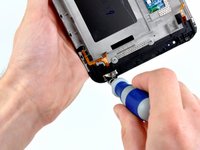
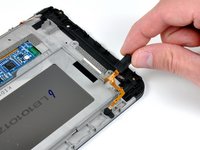
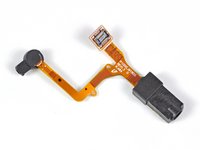
One Phillips screw secures the headphone jack/microphone assembly to the rear panel.
-
After lifting it off some adhesive, it can be removed from the Galaxy Tab.
-
Luckily, the headphone jack is completely separate from the motherboard, making replacement trivial if you happen to break it when you drop your Galaxy Tab with the headphones plugged in.
-
-
-
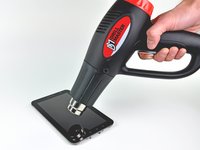
Unfortunately, a fair amount of heat is required to remove the front panel.
-
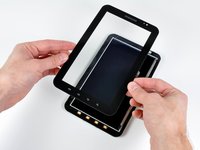
After a few blasts with a heat gun and some nervous prying, the front panel can be separated from the chassis.
-
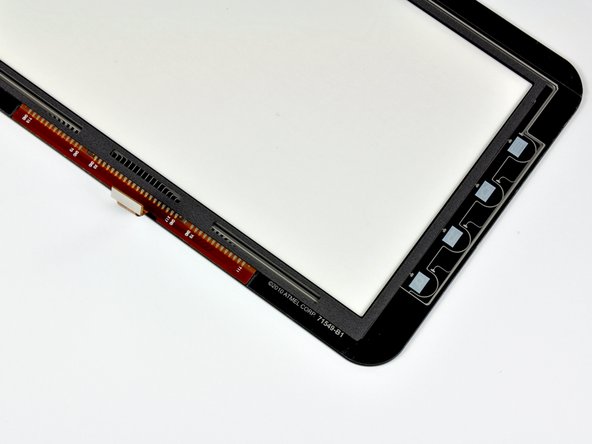
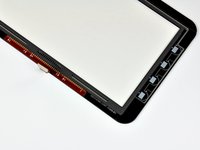
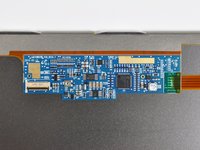
The digitizer element was produced by Atmel and is bonded to a Corning Gorilla Glass front panel.
-
-
-
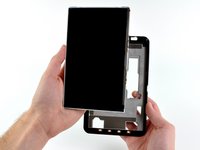
The screen on the Galaxy Tab is a Super TFT LCD, allowing for better image quality and viewing angle than a typical LCD.
-
Although the resolution of the Galaxy Tab's screen (1024x600) is less than the resolution of the iPad (1024 x 768), the Galaxy Tab has a more pixels-per-inch (169 for Galaxy Tab vs 132 for the iPad).
-
169 ppi is nice, but nowhere near dense enough for us. We vastly prefer the iPhone 4's 326 ppi retina display.
-
-
-
Samsung Galaxy Tab Repairability: 6 out of 10 (10 is easiest to repair)
-
All of the components are accessible without soldering.
-
The battery is user-replaceable.
-
Tri-wing screws were used to deter would-be repairers, but can be easily thwarted with one of iFixit's bit driver kits.
-
A heat gun is required to access the LCD.
-
Getting the Galaxy Tab open is quite a chore; plastic opening tools alone are not enough to do the trick.
-
Much like its competitor, the iPad 3G, the Samsung Galaxy Tab didn't stand a chance against iFixit's crafty handywork.
-
That's it! Thanks again to Richard Lai @ Engadget for getting us the hardware.
-


13 Guide Comments
Just a Quick Question:
The Camera seems easy to remove. Is it a Standard Camera Module that can be SWAPPED for a higher Mega Pixel Version that can be sourced readily? This VERY Poor camera seems to be holding the Tab Back!
Did you actually take the chip stack apart to confirm that there is 4tb (512MB) total RAM? If you look at the kernel log output from dmesg the Galaxy Tab reports 640MB total RAM which would be 5tb. It is also listed as having 640MB RAM on some spec sheets, for example T-Mobile.
Great article, I always like seeing what is inside all of devices but don't wanna tear apart my own. I want a tablet and I think the Tab is the one I am going with. I work at DISH Network and already use the DISH Remote Access app to watch live streaming content on my G2. Think how it will look on a bigger screen. Check out DISH.com for more information.
Hi guys m looking to buy the galaxy tab. but for ma car. i hate the nowadays touch screen and GUI for in car entertainment. M thinking of buying the G Tab and looking to dismantle the camera that is there at the back use that camera as a reverse in camera. so wht i need is to remove it and assemble it on the back of my car near ma number plate. can any body help as to how to do it!?
Thanks
This is Galaxy tab 10 teardown from Taiwan http://www.wretch.cc/blog/KisPlay/185340..., FYI