Introduction
The future of thermostats has a name, and that name is Nest. The 2nd Generation Nest Learning Thermostat is the thermostat that never stops learning. With hardware this smart, it's important for us to keep a watchful eye on it, so we naturally had to open it up!
Keep learning along with us as we tear into exciting new devices by following us on Twitter and liking our page on Facebook for the latest updates!
What you need
-
-
Some impressive tech specs are nested in this learning thermostat, or learn-o-stat, as we lovingly call it:
-
24 bit color LCD Screen with 320 x 320 pixel resolution
-
Built-in rechargeable lithium-ion battery
-
Various sensors (temperature, humidity, far-field activity, near-field activity, ambient light)
-
802.11b/g/n and 802.15.4 Wi-Fi support (both at 2.4 Ghz)
-
Compatible with 95% of 24V heating and cooling systems, including gas, electric, forced air, heat pump, radiant, oil, hot water, solar, and geothermal
-
-
-
As we open up the box, we find a Nest thermostat, an installation guide, a welcome guide, a concierge card, a screwdriver, screws, and trim kit.
-
The Nest is made up of two primary components: a wall-mounted base that connects to the signal lines from your HVAC system(s), and the snap-on display unit that houses the LCD and controls.
-
Nest advertises ease of installation for its thermostat. According to Nest, "three out of four customers install Nest in 30 minutes or less."
-
-
-
The base unit is home to ten spring-loaded connectors that let you easily route signal lines from all of your heating and cooling systems into the Nest:
-
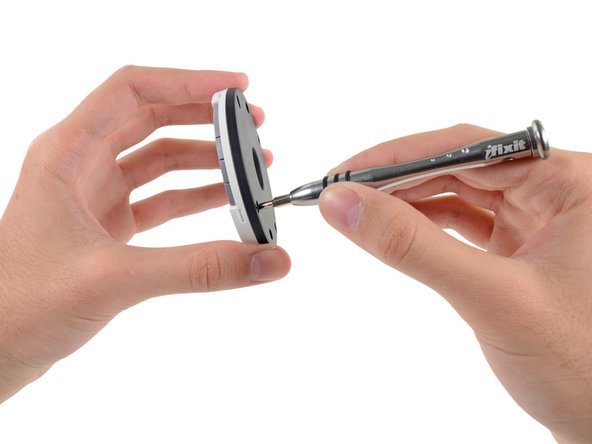
Responsible for both the wiring and the mounting of the Nest, this component is fitted with two oblong screw holes and a built-in bubble level to aid in a neat and tidy installation.
-
A few screws stand between us and the base motherboard—a quick turn of the screwdriver, and we see the green.
-
-
-
With only light adhesive holding the base motherboard to its case, it doesn't take us long to pull it out for a closer look.
-
We rarely see circular circuit boards. It's quite refreshing and alliterates nicely.
-
The base motherboard is equipped with a surprising amount of hardware for an auxiliary board:
-
ST Microelectronics STM32L151VB ultra-low-power 32 MHz ARM Cortex-M3 MCU
-
Sensirion SHT20 humidity and temperature sensor
-
Texas Instruments LW051A 8-channel CMOS analog multiplexer/demultiplexer
-
-
-
The back of the Nest display has two ports: a micro USB port that can be used for charging (and possibly hacking the Nest's software), and a proprietary 20-pin connector that fits onto the base unit's matching plug.
-
Removing a few screws allows us to separate the Nest display's rear panel from the rest of the unit and continue our exploration.
-
-
-
-
At the other end of the rear panel's 'Pull' tab, we have a push option.
-
This ribbon cable-mounted button turns the whole display assembly into the menu navigator, allowing users to scroll with the exterior ring and select with a press of the display.
-
The cable is very securely adhered to the rear panel, but can be safely peeled off with a little patience and a lot of spudger.
-
-
-
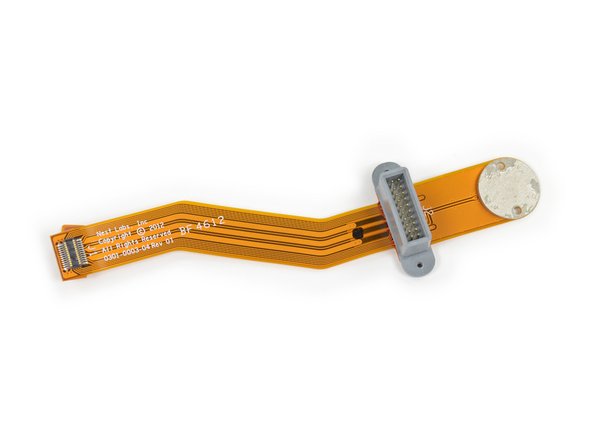
This small board houses the two motion sensors (long and short range) responsible for this feature. These sensors are capable of detecting movement within a 150° field of vision.
-
Through a rather clever design, the sensor board has no cable connecting it to the motherboard. Instead, it rests on four screw posts that make up its contacts.
-
-
-
We took a break from our headlong rush into the Nest's innards to sneak a peek under the large EMI shield that was covering the back of the motherboard. Unfortunately, there wasn't much to be seen.
-
After expelling a few more screws, we disconnect the LCD ribbon cable to free the front panel from the device.
-
-
-
Our first foray into the front panel involves peeling off the small plastic plate adhered below the screen. Mild adhesive holds it securely in place, but is easily dispatched with a little patient spudgering.
-
The plastic plate turns out to actually be a window for infrared light, and is fitted with an array of Fresnel lenses that are used to widen the motion sensors' field of view and increase their range.
-
-
-
The LCD is sandwiched between the front glass and a plastic frame. Adhesive secures the glass to the frame and the LCD to the glass.
-
It may look like the folks at Nest cut a couple of corners on the LCD, but in fact it's a rather remarkable round display, with only the visible portion populated with pixels.
-
-
-
By virtue of being a curved piece of glass, the front panel is a lens, capable of magnifying and focusing all of your important documents.
-
From the looks of things, we'd venture to guess that this is a plano-convex lens, designed to wrangle the light of the LCD into a focal point.
-
-
-
With everything else out of the ring, we're able to pull out the motherboard for its closeup.
-
A quick look at the last component hanging off the side of the motherboard reveals an Avago ADBM-A350 optical finger navigation module, responsible for detecting the position of the outer steel ring.
-
-
-
With all of the I/O connections on the back, the main motherboard houses all of its important ICs on the front:
-
Texas Instruments AM3703CUS Sitara ARM Cortex A8 microprocessor
-
Texas Instruments TPS65921B power management and USB single chip
-
Samsung K4X51163PK 512 Mb mobile DRAM
-
Ember EM357 integrated ZigBee/802.15.4 system-on-chip
-
Micron MT29F2G16ABBEAH4 2 Gb NAND flash memory
-
Skyworks 2436L high power 2.4 GHz 802.15.4 front-end module
-
And under that last EMI shield: Texas Instruments WL1270B 802.11 b/g/n Wi-Fi solution, just like the one we found in the Kindle Fire
-
-
-
Nest Learning Thermostat 2nd Generation Repairability Score: 9 out of 10 (10 is easiest to repair)
-
Battery is clearly intended to be user-replaceable (with built-in directions) and can be removed with the included Phillips screwdriver.
-
Solid construction surrounded by a hefty steel ring makes for great durability.
-
Separation of components onto two motherboards increases modularity.
-
Light adhesive holds the front panel assembly together, slightly increasing difficulty of replacing the LCD or glass.
-


21 Comments
You are pointing out that the ring movement is detected visually. Are there any photos of the inner side of the ring that moves past the detector? Does it have a special pattern on it to make motion detection easier, or is it just a plain metal surface?
There are no mechanical parts used inside. The inside of the aluminum ring has what looks like an etched pattern, similar in fashion to a screen. An optic transceiver, like an optical mouse, is located to register the pattern as the ring is turned.