Introduction
The Motorola Droid 3 has landed on our doorstep, and no new gadget would be complete without a proper iFixit teardown.
Follow iFixit on twitter for the latest updates.
What you need
-
-
After various upgrades and special editions of the Droid 2, its successor has finally arrived! The third Droid to hail from the halls of Motorola is appropriately named "Droid3," or more officially, the Droid 3.
-
With almost two years since the launch of the first Droid, Motorola has had plenty of time to load the Droid 3 with some impressive tech specs.
-
Android 2.3 OS (Gingerbread)
-
Dual-Core 1GHz processor
-
5-Row full QWERTY keyboard
-
8 MP Camera with 1080p video capture
-
4" 960 x 540 qHD display with Gorilla Glass
-
-
-
Motorola advertises that the Droid 3 is the "Thinnest Full QWERTY Smartphone Ever."
-
The rear-facing camera on the Droid 3 includes an LED flash and 8x zoom capability.
-
The Droid 3 features both micro USB and micro HDMI ports, allowing for full 1080p output to any compatible device.
-
The port layout on the left side gives the Droid 3 an uncanny resemblance to the Motorola Atrix.
-
-
-
Pulling off the back cover gives us our first glimpse at the user-replaceable battery.
-
Motorola claims that the battery inside the Droid 3 will last for over 9 hours of continuous talk time, or over 300 hours of continuous stand-by time.
-
We suspect, however, that having the phone in standby for 300 hours would be very, very boring.
-
-
-
Whoa! This Droid has a SIM card!
-
A lack of SIM cards severely hampered international use of Verizon's network. This SIM will enable the Droid 3 to be used almost anywhere in the world.
-
-
-
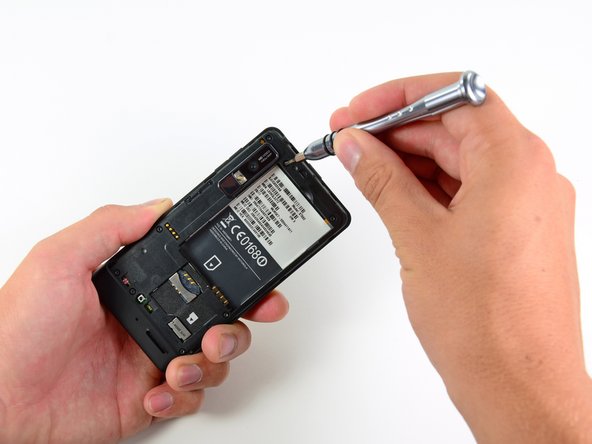
Like its predecessors, the Droid 3's rear case is held in place by a few T5 Torx screws.
-
Motorola likes to hide screws and latches beneath the information label, making opening the phone a rather sticky affair.
-
Of course, these obstacles are of little challenge to our spudgers, 54-piece bit driver kits, and talented fingers.
-
With the screws unscrewed, the clips unclipped, and the stickers unsticked, we get a full-on exposè of the Droid 3's innards.
-
-
-
-
Adiós motherboard screws, we hardly knew you...
-
After removing a few more connectors, the motherboard easily lifts off the phone.
-
In order to strip the motherboard bare, the speaker/antenna assembly must be pried off of the board.
-
The speaker assembly uses pressure contacts to transmit data to both the speaker and the antenna. Interestingly, a hole through the motherboard allows sound to pass through for better transmission to the outside of the phone.
-
-
-
The main ICs on the front side of the motherboard include:
-
Qualcomm MDM6600 supporting HSPA+ speeds of up to 14.4 Mbps
-
SanDisk SDIN4C2 16GB MLC NAND flash
-
Elpida B4064B2PB-8D-F 512MB RAM and TI OMAP 4430 CPU
-
Triquint TQM7M5013 Linear Power Amplifier
-
Avago A2F1106
-
A5005 K1116, A5002 K1118, A5001 K1118 (from bottom to top)
-
Kionix KXTF9 11425 1411 three-axis accelerometer
-
-
-
Big players on the back side of the motherboard:
-
The Qualcomm PM8028 chip works in conjunction with the Qualcomm MDM6600 to provide wireless data connection to the phone.
-
Hynix H8BCS0QG0MMR memory MCP containing Hynix DRAM and STM flash
-
ST Ericsson CPCAP 006556001
-
WL1285C 13M1HH3
-
6792A 1113 T3971
-
-
-
What's this, a secret Mario Kart track? Sadly, no; it's just the headphone jack assembly.
-
The Droid 3 sports a 3.5 mm headphone jack, compatible with just about every headphone set available today.
-
The power/lock button is also found on this squiggly cable, as well as the secondary microphone for noise cancelling and clarity during phone calls.
-
-
-
Some careful prying with a spudger easily removes the Wi-fi antenna.
-
Droid 3 supports b, g, and n Wi-Fi signals. Wow!
-
We politely evict the vibration motor from its home with some "convincing" from a plastic opening tool.
-
More prying with a spudger gives us unbridled access to the sliding plate of the Droid 3.
-
-
-
One of the most important features on the Droid 3 is its 5-row slide-out full QWERTY keyboard.
-
We like the offset keys on the Droid 3, a feature that was frustratingly absent in the original Droid, but added in the Droid 2.
-
As with its predecessors, the display assembly in this Droid is very difficult to access.
-
Peeling off the keyboard reveals a handful of teeny tiny T3 Torx screws that secure the display assembly to the slider mechanism and keyboard.
-
After some cringe-inducing maneuvering of the display data cable, we can separate the two pieces.
-
-
-
With a little encouragement, the qHD LCD lifts out of the Gorilla Glass-equipped front panel.
-
The screen in the Droid 3 is 0.3" larger than the screens in both of its predecessors, measuring in at a total of 4". It also has a higher resolution, at 960 x 540 pixels.
-
The ribbon cable attached to the rear of the LCD holds the earpiece speaker, the front-facing camera, the ambient light sensor, and the notification LED. Phew!
-
All of these components on one ribbon cable makes disassembly easy, but repair costly.
-
An Atmel MXT224E capacitive touchscreen controller can be found within the front panel.
-
-
-
The Motorola Droid 3 (Droid3) earns itself a repairability score of 6 out of 10.
-
There were no security screws in the entire device.
-
The battery was not soldered to anything and was easy to replace.
-
Many components are mounted to a single ribbon cable, meaning that replacing one requires replacing them all.
-
There is a lot of adhesive holding things together, making disassembly and reassembly difficult.
-
To get to the LCD, the entire device has to be taken apart.
-


2 Comments
Does it appear to you that this keyboard could be attached to a newer phone? Does the interface appear to be usb or does it look proprietary to you? I would love to assemble a slider for my s7
I recently acquired one of these phones and whenever i try to install an apk it says "there was an error parsing this package" and i need help