Introduction
The Kinect is a horizontal bar of sensors connected to a small base with a motorized pivot, and is designed to be positioned lengthwise below the video display.
We picked up and tore down our Kinect on launch day -- November 4, 2010.
What you need
Video Overview
-
-
We finally have Microsoft's entrant into the realm of motion gaming, the Kinect. Microsoft's code name for Kinect was Project Natal.
-
This isn't just another Wiimote knockoff. Kinect is the result of hundreds of millions of dollars of research Microsoft has invested in speech and motion recognition.
-
The Kinect is not a handheld game controller like the Wiimote or the Playstation Move—rather, it is a sophisticated sensor suite that detects your position and movements in 3D space.
-
There are several great stories already out there explaining how Kinect detects motion. We aren't going to repeat all the basics here, so if you are interested in that sort of thing check out the above articles.
-
-
-
Controller evolution, game console style.
-
Top to bottom:
-
Original Sony PlayStation controller, PlayStation Move.
-
We love that the world is at the point where we're not upgrading our computers as often. Instead, we're upgrading sensors so the computer understands more about us.
-
Adding Kinect to an Xbox is like adding sonar to a submarine—sure, you could drive it around before, but now it can see where it's going. OK, that's a rather stretched analogy. You get the idea.
-
-
-
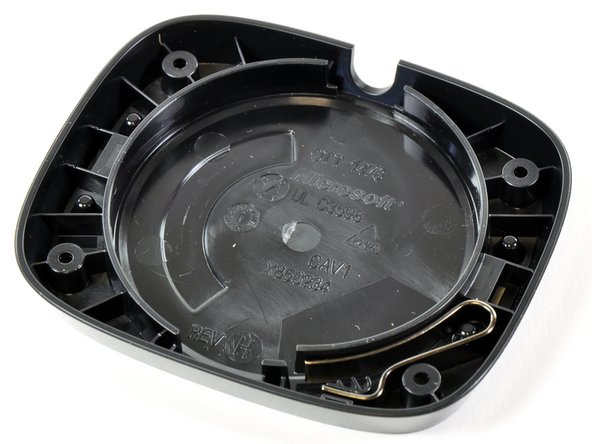
The plastic base is secured with a quartet of T6 Torx screws.
-
After removing the plastic base, there are another four Phillips #0 screws to remove.
-
-
-
With a metal spudger and some pretty serious prying, we were able to remove the bottom grille. This is not easy, as Microsoft applied adhesive quite liberally.
-
The Microsoft team built the Kinect around PrimeSense's Reference Design.
-
Microsoft hasn't acquired Primesense yet. This indicates to us that as impressive as the hardware is, Microsoft's software is doing the heavy lifting, turning the sensor bar's array of data into a 3D mesh of your spatial position.
-
-
-
Microsoft used T10 Torx security screws. That's not very nice. We're up to three types of screws already, and we haven't even got this open yet.
-
-
-
-
We've finally found the Kinect's eyes.
-
Two cameras and an IR projector.
-
Left: (IR CMOS) Microsoft / X853750001 / VCA379C7130
-
Center: (Color CMOS) VNA38209015
-
Right: (IR Projector) OG12 / 0956 / D306 / JG05A
-
These are not tiny, cell-phone cameras— they're closer to the camera you might find in a webcam, with large lenses and autofocus.
-
We can't independently confirm the resolution of the cameras yet, but Microsoft claims that the infrared cam is 320x240 and the RGB cam is 640x480.
-
-
-
This is a Prime Sense diagram explaining how their reference platform works. The Kinect is the first (and only) implementation of this platform.
-
One camera (and one IR transmitter) provide input for the depth map (rumored to be just 320x240), while the third camera detects the human visual spectrum at 640x480 resolution.
-
We have heard claims that the system can measure distance within 1cm of accuracy at two meters. While that's great in concept, early reviews are showing that you don't get anywhere near that accuracy in the real world—yet.
-
-
-
The brains of the Kinect. The folks at UBM TechInsights helped us identify many of these chips. You can see a high resolution scan of this board here.
-
Wolfson Microelectronics WM8737G - Stereo ADC with microphone preamp
-
Fairchild Semiconductor FDS8984 - N-Channel PowerTrench MOSFET
-
NEC uPD720114 - USB 2.0 hub controller
-
H1026567 XBOX1001 X851716-005 GEPP (Help us identify this 6 mm x 4.9 mm SAP package. Possibly SPI flash, maybe Atmel?)
-
Marvell AP102 – SoC with Camera interface controller
-
Hynix H5PS5162FF 512 megabit DDR2 SDRAM
-
-
-
Analog Devices AD8694 – Quad, Low Cost, Low Noise, CMOS Rail-to-Rail Output Operational Amplifier
-
TI ADS7830I - 8-Bit, 8-Channel Sampling A/D Converter with I2C Interface
-
Allegro Microsystems A3906 - Low Voltage Stepper and Single/Dual DC Motor Driver
-
ST Microelectronics M29W800DB - 8 Mbit (1Mb x8 or 512Kb x16) NV Flash Memory
-
PrimeSense PS1080-A2 - SoC image sensor processor
-
-
-
This board features a TI TAS1020B USB audio controller front and center.
-
A Kionix MEMS KXSD9 accelerometer is probably used for inclination and tilt sensing, and possibly image stabilization. The Kinect also uses this to know if the sensor has been moved externally
-
-
-
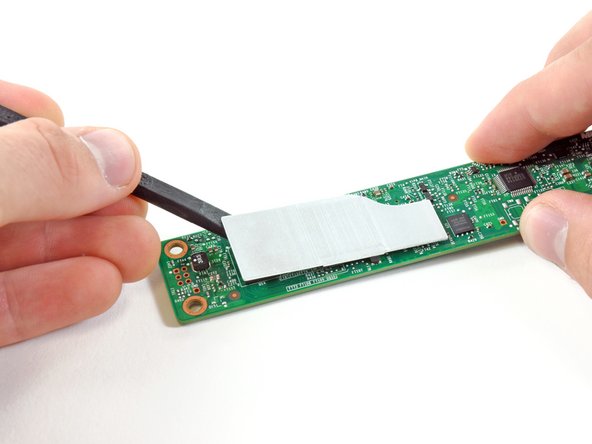
Here we discovered three of the four microphones inside of the Kinect.
-
There are a total of four downward facing microphones: three on the right side and one on the left side.
-
Microsoft determined that the best orientation for optimal sound gathering would be downward facing.
-
In order to properly recognize voice commands, the Kinect must perform an audio calibration for the room that its in. However, if you alter the arrangement of the furniture in your room, you must re-calibrate.
-
-
-
This board is held in place by four standoffs. We used needle-nosed pliers, but a 5 mm nut driver would be the right tool for the job.
-
Our friends at Adafruit have posted a $2,000 bounty for the first team to write an open source driver for Kinect. The Wiimote has been tremendously useful for our hobby robotics projects, and the Kinect's advanced sensors could really jump-start robotics research.
-
-
-
Finally! We're able to remove the power/data cord from the shell of the Kinect.
-
Microsoft is using a USB-like connector for the Kinect. The Kinect uses 12 watts, which is quite a bit more than 2.5 watts of power provided by a standard USB port.
-
In the midst of an array of complex sensors and transducers, we remove the status indicator LED.
-
-
-
After removing several more screws, the two cameras and the IR transmitter easily lift off the metal backing bar.
-
Another component is sandwiched between the IR Projector and the metal backing bar. This is likely a Peltier Device used for cooling the IR projector.
-
-
-
The two cameras and the IR Projector, side by side.
-
By having the depth-of-field camera and the RGB camera a calculated distance apart, the Kinect is able to perform immediate, 3D incorporation of real objects into on-screen images.
-
Having no form of user input other than voice commands and gestures, the crux of the Kinect's input system is the sensor system, comprised of the microphones and cameras.
-
-
-
Our Kinect is now fully disassembled.
-
Shameless plug: We now sell parts for game consoles! Our Xbox 360 RROD fix kit or PS3 YLOD fix kit can breathe new life into your dead or dying console.
-
Microsoft Kinect Repairability: 5 out of 10 (10 is easiest to repair).
-
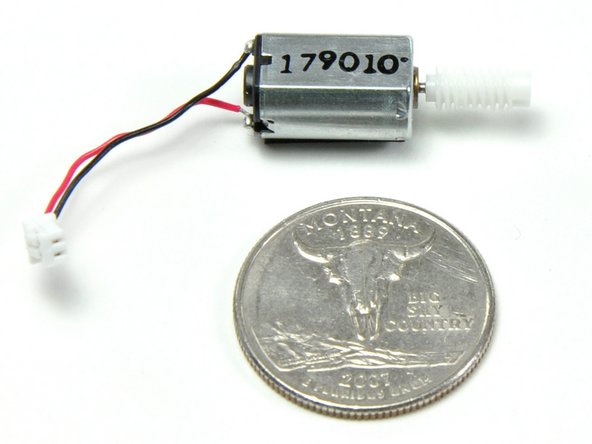
The design is very modular, and replacing individual components (like the motor) when they fail shouldn't be a problem.
-
No soldering required to disassemble.
-
Although modular, disassembling one of these can be difficult due to the sheer number of bits and pieces.
-
Microsoft used four kinds of screws, including some hated security bits: T6, T10, T10 security, and Phillips #0.
-
Without a service manual, repair will be quite a challenge. Microsoft has not made a service manual available. If we get enough demand, we'll do their work for them and publish one.
-


8 Comments
Who makes the cameras?
I wish there was a service manual ! Bought my Kinect more than a year ago, used it 3-4 times. Today I took it out from the dust, and it doesn't work anymore, error 2c, and nothing seems to come out of the rgb cam :(
**********************************************************************
BEWARE of the 3 tiny washers/spacers in the base of the Kinect, that are not mentioned in the breakdown anywhere. I'm still trying to figure out which side of the gearsets they actually go on. Best practice to avoid the situation I'm in would be to unscrew the 4 philips screws and take the base off with the Kinect in the upright position, maybe you'll have better luck!
**********************************************************************
actually there are 4 tiny washers