Introduction
We were curious to see why Apple thought the MacBook Polycarbonate Unibody was so special, so we took it apart! We got the MacBook from our local Apple store on October 20, 2009.
Want up-to-the-minute updates? Follow @ifixit on twitter. You can also check out the YouTube video slideshow!
Wired and iFixit are hosting a Sony Teardown contest. Take apart anything made by Sony, take photos, and use our editor to post a teardown. You could win a PS3 or PSP Go!
What you need
-
-
Oh, plastic MacBook, how we've missed you...
-
Apple has made a bunch of changes to their base workhorse, including:
-
A polycarbonate unibody upper case
-
An LED backlit display with the same 1280x800 resolution as previous models
-
A glass multi-touch trackpad
-
An integrated lithium-polymer battery
-
Non-slip coating covering the bottom panel.
-
The case revision also allowed Apple to update the aesthetics on the new Macbook. Its contoured edges fit right in with the rest of the unibody lineup.
-
-
-
Top: New MacBook, Middle: MacBook Pro, Bottom: Old MacBook
-
FireWire is gone! If you need FireWire, now only a MacBook Pro will do.
-
Also gone is an IR port for a remote. As far as we know, that makes the MacBook the only currently shipping Apple laptop that doesn't support a remote.
-
There's also no external battery indicator, a feature borrowed from the MacBook Air.
-
Apple has also replaced Mini-DVI with Mini DisplayPort, and replaced the two audio jacks with a single audio in/out port.
-
-
-
After more than three years, the MacBook finally gets a new model number! A1342.
-
Unfortunately, Apple only allows those with 20/20 vision to find out their model and serial number. That text is incredibly tiny and difficult to read.
-
This new MacBook weighs in at 4.7 lbs. That's .3 lbs less than the old plastic MacBook, but .2 lbs more than the 13" Unibody MacBook Pro.
-
-
-
Removing the lower case...
-
There are no more rubber feet to tear off!
-
Eight Phillips #00 screws hold the lower case in place, two less than the 13" Pro.
-
The lower case is surprisingly heavy, weighing in at 266 grams. The lower case is actually a sheet of aluminum with rubberized coating injection-molded onto one side.
-
In contrast, the lower case on the 13" Pro weighs only 142 grams, so the rubber coating nearly doubles the part's weight.
-
-
-
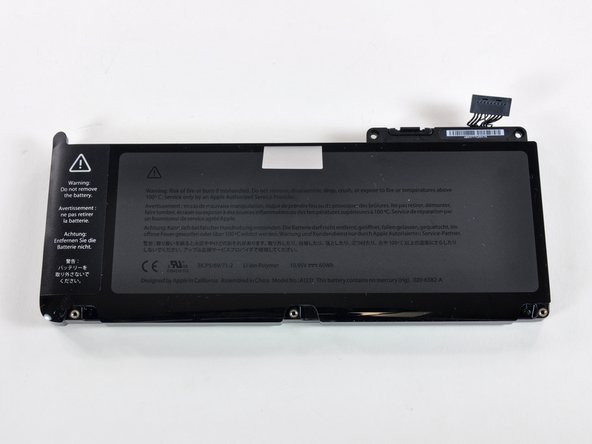
Apple boasts an impressive seven hour battery life from the new MacBook, matching that of the 13" and 15" MacBook Pros.
-
The battery is held in with both tri-wing and Phillips screws, an indication that Apple doesn't want you replacing the battery yourself.
-
One of the three tri-wing screws is beneath a warning label in the top left corner of the battery.
-
For most repairs, removing the battery is not necessary, you just need to disconnect it from the logic board. You can use a spudger or your fingernails to lift battery connector straight up out of its socket on the logic board.
-
-
-
The battery is 60 watt-hours, the same capacity as the 13" MacBook Pro.
-
The previous plastic MacBooks featured a 55 watt-hour battery and claimed a 5-hour run time. Apple has added 5 watt-hours of battery capacity and two hours of run time. Either this machine is substantially more efficient than its predecessor (thanks to the LED backlight?), or Apple's new battery life claims are overly optimistic.
-
Despite its higher capacity, this new battery is actually lighter than the previous MacBook's battery. This battery boasts a power to weight ratio that's 23.5% better than its predecessor.
-
-
-
The MacBook now uses PC3-8500 RAM. Conveniently, all Apple portables with RAM slots as well as the iMacs currently use the same RAM type.
-
Like the Pro models, the RAM chips are stacked vertically, one directly above the other.
-
Our machine came with two 1 GB chips. Apple says the machine will support 4 GB maximum. There are 4 GB PC3-8500 chips available, and users have reported successful installations of 8 GB chips in this model.
-
-
-
-
The hard drive isn't as easy to replace as it used to be, but it can be done. The hard drive is still considered "user replaceable" by Apple. It's strange that the hard drive is "user replaceable", but the battery is not.
-
After removing two Phillips screws and the hard drive bracket they hold down, lift the hard drive out of the MacBook by its pull tab and disconnect the SATA connector.
-
-
-
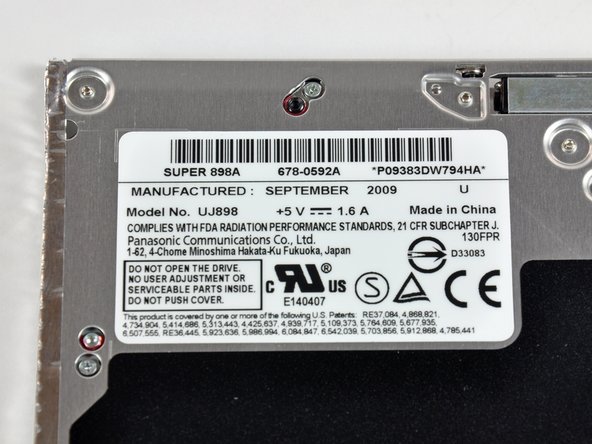
Getting to the optical drive takes a bit more work...
-
The rear vent is held in place by both Phillips #00 and T8 Torx screws.
-
The cast aluminum vent plate is painted with a satin white rubberized paint and probably adds a good amount of rigidity to the device.
-
The lack of structural supports like these in previous plastic MacBooks accounts for their flexibility.
-
-
-
Like other MacBooks, the MagSafe port gets its own board.
-
Even though the new MacBook ships with a new-style MagSafe adapter, older Magsafe adapters should work just fine.
-
Notice the silver grate of a speaker on the right side of this photo. This machine sports two small tweeters beneath the keyboard, one below the caps lock key, and the other below the return key.
-
-
-
The display assembly is secured by two large T8 screws, one on each side.
-
We sell a screwdriver kit that will enable you to remove all these screws.
-
-
-
The display assembly. (We did turn it on briefly, and it looks really nice!) On the right side are the three wireless antennas, and on the left side is the single display data cable.
-
Since the MacBook now uses a LED backlit LCD, there's no inverter cable. All data and power is transmitted through a single cable.
-
Apple has shaved about 50 grams off the weight of the display assembly compared to the one on the previous plastic MacBook.
-
-
-
Success! The new MacBook is quite a nice machine to disassemble.
-
We plan on taking apart Apple's new iMac as soon as we can get our hands on it. Apple's made some major improvements on their new iMac, so it should be interesting to see what's inside. Follow @ifixit on twitter and we'll keep you updated.
-


8 Comments
Im getting one of these in about a week... How do I keep good maintenance of the battery? Do I keep the battery plugged in when its fully charged?
YES! Only use the battery on a macbook when you can't plug it in and at least once every month put it on battery power so it keeps the electrons moving in the battery!
Dear Miroslav,
Do you know how the unibody part is made? Is it welded together, or did Apple perform some magic with injection moulding? Is it possible to post detailed pictures of the sides of the enclosure?
This has been bugging me for several months now... Thanks for the great teardown!
Thanks for the fantastic breakdown, found it really useful before carrying out a few upgrades! (8GB RAM and more recently a new Samsung SSD)
I was wondering though, is it possible to change the entire logic board in the name of upgrading the processor and graphics card? Is it something which would be advisable?
On another note I am also having some trouble with my Macbook getting rather hot, particularly whilst streaming video. It's sat on a flat desk with nothing obstructing the air intakes. I generally have an external display plugged in and the lid closed (using a bluetooth mouse and keyboard). The heat appears to be emanating from the logic board, I was wondering wether it's related to the graphics card being overloaded or something. I don't know much about all this stuff so i was wondering wether you have any potential diagnosis? Is it possible to upgrade the fan maybe? Thanks, Rob.
You are blocking the heat vent which is located at the top of the keyboard (sort of in the hinge). Leave the Macbook open.
Kieran -