Introduction
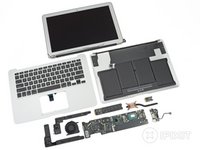
Apple announced the updated MacBook Air yesterday at WWDC, so, naturally, we're taking one apart. Join us as we dig into the new 13" MacBook Air, equipped with USB 3.0 and MagSafe 2.
You like what you see? Want to see more? Follow us on Twitter to stay up-to-date with all the latest teardowns!
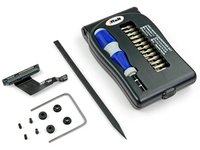
What you need
-
-
It's so light that it almost floats off the table…
-
So, what did Apple manage to pack into its ultra-slim ultrabook this time?
-
Intel Ivy Bridge Core i5 processor with Turbo Boost
-
Intel HD Graphics 4000
-
128 GB flash memory
-
4 GB 1600 MHz DDR3L RAM
-
USB 3.0
-
MagSafe 2
-
-
-
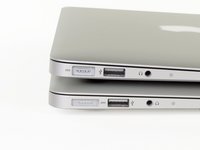
Even with the amazingly slim profile, Apple managed to cram some nifty ports on the new Air.
-
Accompanying the audio jack on the left side of the MacBook are the new MagSafe 2 connector and the first of two USB 3.0 ports.
-
On the opposite side, we find an SD card reader, the second USB 3.0 port, and—of course—Apple and Intel's brainchild: the Thunderbolt I/O.
-
-
-
This is very unlike Apple; even though the MacBook Air is only slightly refreshed, they gave it a new model number: A1466.
-
We get pretty excited about new model numbers because they make it much easier for us to help people ID their Macs for service.
-
-
-
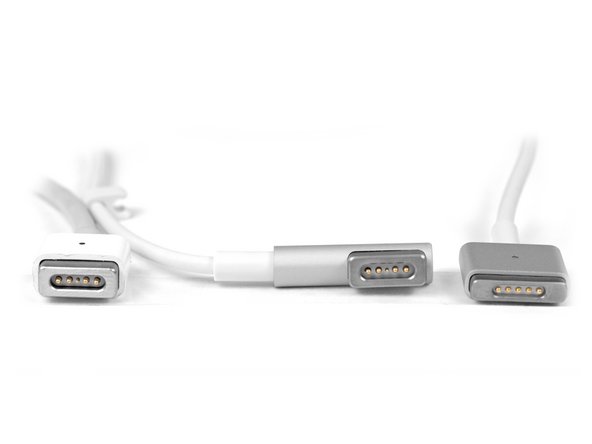
MagSafe 2 is a luxury reserved (so far) for the new MacBook Air and the Retina display-equipped MacBook Pro.
-
As you can see, the new MagSafe 2 connector (bottom) is much thinner and wider than its predecessor. This is pretty significant, because the thickness of Apple's devices seems to be limited only by the size of their ports.
-
Apple sells a $10 MagSafe 2 adapter, so you don't have to throw away your 27" Thunderbolt Display. Phew.
-
Apple never stops tweaking the details; they moved the symbols from the rear side of the ports to the front. If you're in a pinch and have to differentiate a Mid 2012 MacBook Air from a Mid 2011 model, just look at what side of the ports the symbols are on.
-
-
Tool used on this step:P5 Pentalobe Screwdriver Retina MacBook Pro and Air$5.99
-
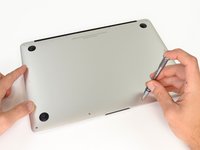
There was tension in the Air as we encountered a few unknown sized, Apple-proprietary, pentalobe screws on the back of the new Air.
-
Fortunately, we have tools for that. Our pentalobe screwdriver made quick work of those pesky proprietary screws.
-
By the way, we don't just make awesome teardowns—we sell parts. And tools! Lots and lots of tools.
-
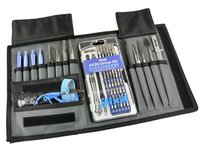
Like this handy-dandy electronics tool kit that we used to take apart the new iPad. You know you want one. It'll pay for itself the first time you use it!
-
We sell Mac parts & upgrades, parts for iPhone screen repair, kits for fixing the infamous Xbox Red Ring of Death, and tons more.
-
We need your support to continue building the free repair manual for everything in the world.
-
-
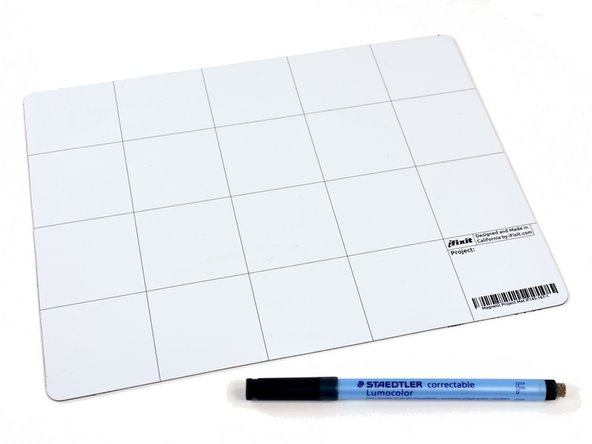
Tool used on this step:Magnetic Project Mat$19.95
-
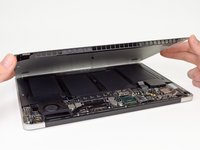
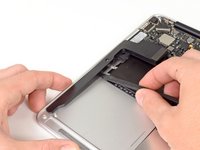
After removing the screws, the back comes off to reveal the internals.
-
Keeping all the screws we removed organized is easy with our Magnetic Project Mat.
-
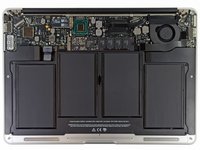
As with most mobile devices, the majority of the space is filled by the battery.
-
The inside of this newly configured Air is very similar to last year, with a few minor layout changes.
-
-
-
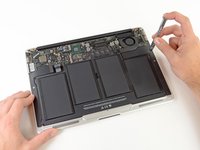
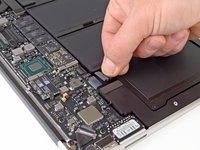
A connector and some T5 screws are all that stand between us and ultimate power—or at least the power source for the Air.
-
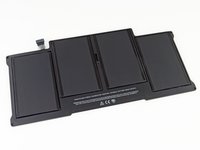
This battery is the exact same model as the one found in the Mid 2011 MacBook Air, so it comes as no surprise that the 13" model has the same 7 hour battery life as its predecessor.
-
-
-
-
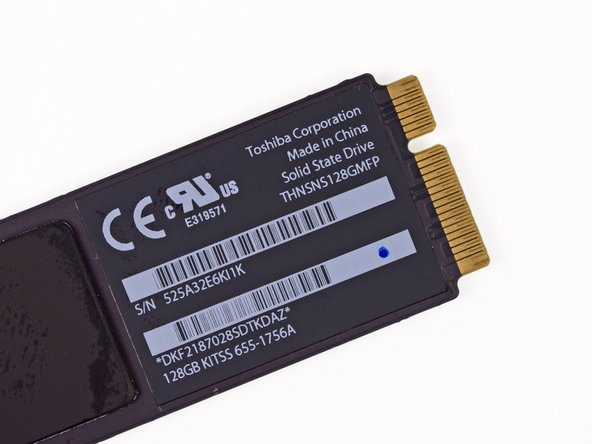
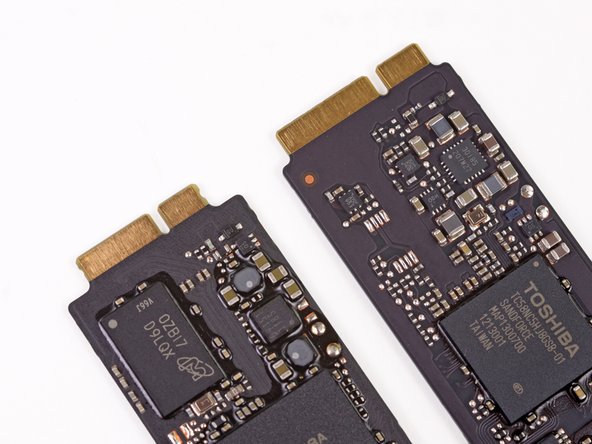
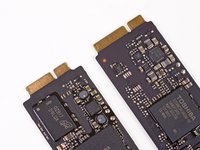
At first glance, the 128 GB SSD is almost exactly the same as last year's.
-
But upon closer inspection, the connector for this model's flash memory module is slightly different than last year!
-
The SSD looks to be a completely new design. The new unit appears to be based on a SandForce controller chip, but stamped with Toshiba markings.
-
-
-
By the way: we also make software for teaching people to do things. Dozuki makes it easy to create vibrant how-to manuals.
-
Dozuki is great for:
-
Standardized work instructions: improve quality by documenting how to get things done, one step at a time.
-
Building product support sites: make your customers love you by teaching them how to do amazing things.
-
Training and e-learning software: we've used Dozuki to teach over ten million people to repair electronics.
-
Online community platform: build a knowledge base of expert knowledge with Answers, the Q&A engine that drives the popular iFixit Answers.
-
-
-
We would tell you that this Broadcom BCM 943224 module looks just like the Mid 2011 MacBook Air's wireless board, but you would accuse us of being repetitive.
-
Instead, let's focus on what's different. Apple rotated the "Assembled in China" sticker 90˚ and flipped the internal code sticker a whopping 180˚!
-
In case you thought we were joking, taking the EMI shield off reveals the same chips as last year:
-
Broadcom BCM4322 Intensi-fi® Single-Chip 802.11n Wi-Fi Transceiver
-
Broadcom BCM20702 Single-Chip Bluetooth 4.0 Processor with Bluetooth Low Energy (BLE) support
-
Murata antenna switch module
-
-
Tool used on this step:Spudger$3.99
-
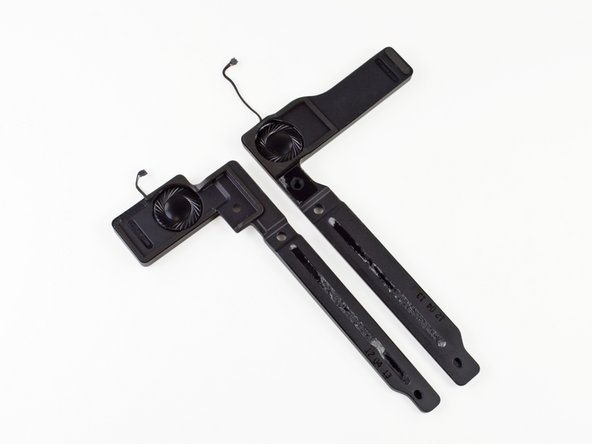
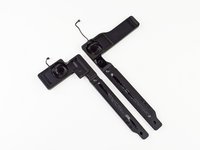
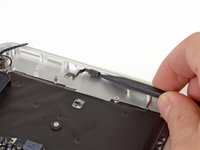
Next up are the speakers.
-
The new Air boasts stereo speakers for all your Apple party needs. Just in case you want to party like it's 2011 or 2010...
-
You may be asking, "What's that black stick being used to remove the speaker?" That is a Spudger. It's ESD safe and heat/solder resistant. It's a must for working with sensitive electronics.
-
-
-
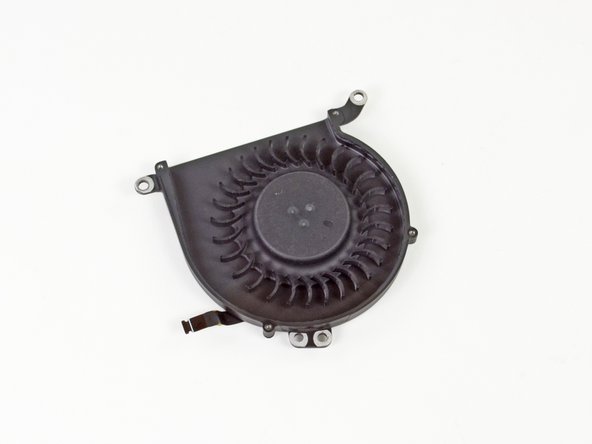
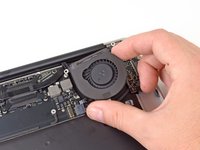
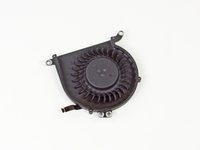
A few more Torx screws hold the lonely fan in place.
-
We were hoping to find a new asymmetrical fan, and we were not disappointed!
-
If you're not familiar with all the hype, the "asymmetrical" design of the fan blades is supposed to disperse sound across a wide range of frequencies, rather than just one, making fan noise "hardly perceivable."
-
-
-
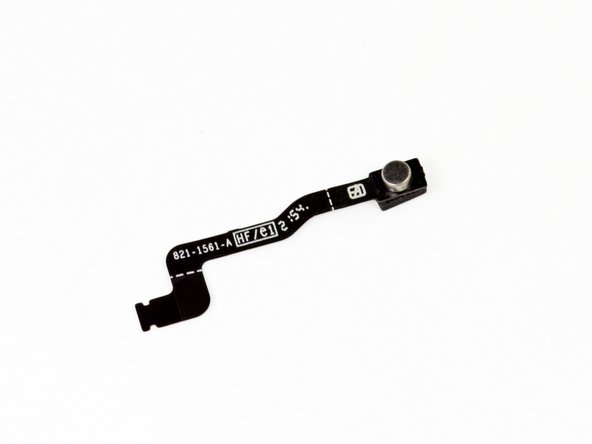
With dictation coming in OSX Mountain Lion, you're going to want to make sure you've got a brand spankin' new microphone.
-
"MacBook, send a message to my iPhone so that I can talk to Siri."
-
-
-
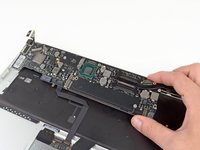
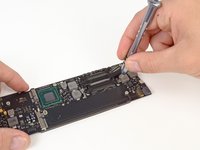
Boom! There goes the logic board.
-
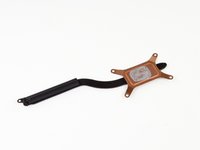
Bam! There goes the heat sink.
-
Even with a new processor lineup, the thermal management system looks pretty much the same as last year. It truly is a testament to modern processor efficiency to see such a small heat sink on a dual-core processor that can crank out up to 2.8 GHz.
-
-
-
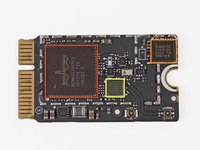
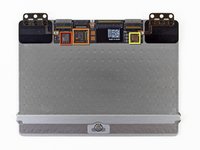
Here's what we found on side A of the logic board:
-
Intel Core i5-3427U 1.8 GHz dual-core processor (Turbo Boost up to 2.80 GHz) with Intel HD Graphics 4000
-
Intel E201B953 SLJ8B Platform Controller Hub
-
Intel DSL3510L Thunderbolt controller
-
Texas Instruments TPS2561 dual channel power switch
-
Linear Technology LT3957 inverting converter
-
-
-
Flipping the logic board to side B we find:
-
SMSC USB25138 USB controller
-
Hynix H5TC2GB3CFR DDR3L SDRAM
-
MAXIM 15120G
-
Texas Instruments Stellaris LM4FS1AH microcontroller
-
Macronics MXIC MX25L6406E serial flash
-
Texas Instruments TPS51980 synchronous buck controller
-
Texas Instruments CD3210
-
-
-
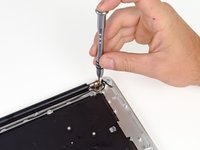
The display assembly is screwed to the upper case with six T8 Torx screws.
-
Because the display assembly is one of the few moving parts in the MacBook Air, these screws have to be pretty staunch.
-
In order to save weight in the MacBook Air, there is no protective front glass covering the LCD like there is on the MacBook Pro. This is also the reason for the aluminum bezel.
-
-
-
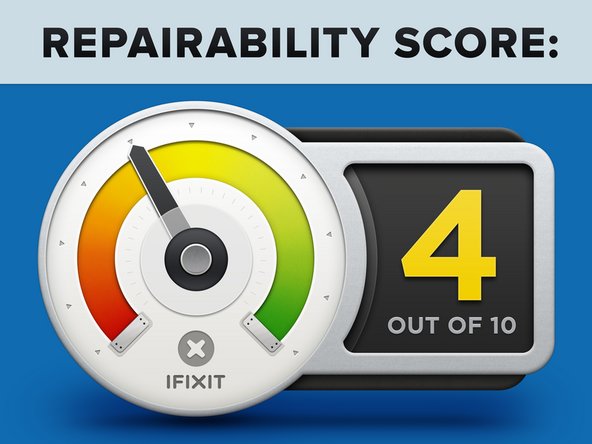
MacBook Air 13" Mid 2012 Repairability Score: 4 out of 10 (10 is easiest to repair).
-
Once you manage to take off the bottom cover, all the parts are pretty easily replaceable.
-
Proprietary screws on the case require the right screwdriver.
-
All the components—including RAM and SSD—are proprietary.
-


11 Guide Comments
Is it true that the Intel DSL3510L Thunderbolt controller is a new introduction to the Macbook Air and is capable of driving two additional displays?
If I recall correctly, the previous generation Macbook Air could only drive one.
Sad to hear, that the SSD-connection port has been changed.
So after i've upgraded my 2010er MBA 11" and my late 13" MBA with OWC 240GB SSD-Bladed (3G & 6G) they will be worthless when i wanna buy a small 11" 2012er MBA and upgrade it ? -> Yes !
I can understand that the Retina MBP got a different SSD-Blade size, but changing the connection port within the MBA-family is nonsense.....
Anyone got the appropriate Apple OEM part numbers for the replaceable 128GB, 256GB, and 512GB SSD drives? Looking to upgrade and want to find the correct part numbers (not interested in the OWC module).
The different connector was probably because the SSDs are electronically incompatible, not just to frustrate DIYers.
If anyone can help!!
13" Apple MacBook Air Year 2012 Model# A1466
I need help with knowing where I am able to find the right schematic diagram for an Apple MacBook Air for the Year 2012 Model# A1466??
I have came across some ones for free but do not match up to my circuity's layout.
PS: I addition, does anyone know where the best place to buy replacement circuits for Apple Macs?? May be needing to replace a few capacitors and a resistor shorted by liquid damaged.
If someone that knows can help, That would be great and Thank you,
Charles
2672753399 or
cremensnyder3rd@gmail.com