Introduction
We find ourselves in possession of a brand new Mac mini with promise of "2x faster everything" and the new Thunderbolt I/O. Naturally, we had to take a look inside, just like we did with the new MacBook Air earlier today.
Follow iFixit on Twitter for the latest updates.
What you need
-
-
We received some big promises with the introduction of this new Mac mini. The most exciting included:
-
Core i5 & i7 Processors
-
500 & 750 GB HDD or 250 GB SSD
-
2GB or 4GB DDR3 SDRAM
-
AMD Radeon HD graphics processor with 256MB of GDDR5 memory (2.5 GHz models only)
-
Thunderbolt and HDMI ports
-
SDXC card slot
-
Apple removed the optical drive from this mini, but would characteristically love to sell you one for an additional $79.
-
-
-
Model Number A1347... This feels a little bit like déjà vu.
-
The mini's port layout seems only slightly different from last year's mini:
-
Built-in 10/100/1000BASE-T Ethernet
-
FireWire 800
-
HDMI
-
Thunderbolt
-
Four USB 2.0 Ports
-
SDXC card slot
-
-
-
-
The big question with this unibody mac Mini: "Can I install a second hard drive myself?" The centimeter and a half of extra space seem to imply so.
-
There is definitely plenty of room for a second hard drive underneath the first. The only deterrent is the availability of a second, longer SATA hard drive-to-logic board cable.
-
Let's get the logic board out so we can get a better look.
-
-
-
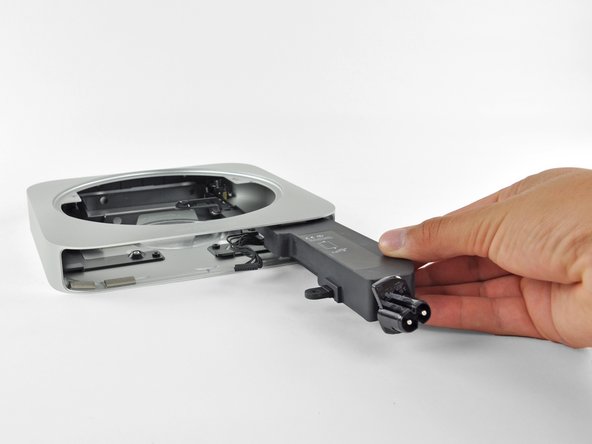
The release of the new Mac mini means the return of our favorite tool: the Mac mini Logic Board Removal Tool! Luckily, we have come prepared this time.
-
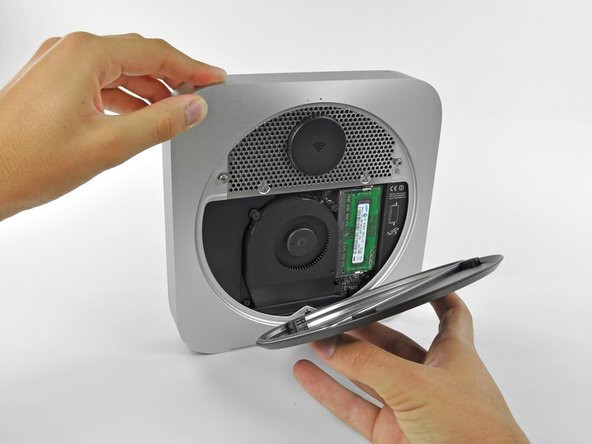
No longer forced to use two screwdrivers, we insert our Mac mini Logic Board Removal tool, and it does the trick. The logic board assembly slides right out of the aluminum unibody.
-
With the logic board removed, we see how a second hard drive could be installed.
-
-
-
Our trusty spudger makes quick work of the Wi-Fi board's cables.
-
More T6 screws hinder our path, but we will not be deterred.
-
802.11n connectivity is possible thanks to a Broadcom BCM4331 "single-chip wireless solution."
-
The Broadcom BCM20702 Single-Chip Bluetooth 4.0 Processor with Bluetooth Low Energy (BLE) support is identical to the chip found in the 13" MacBook Air we just took apart.
-
-
-
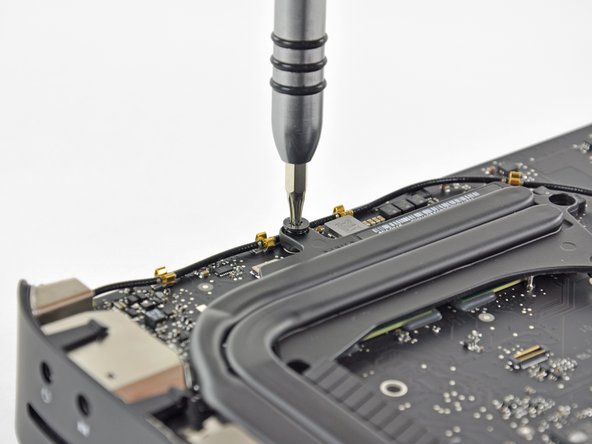
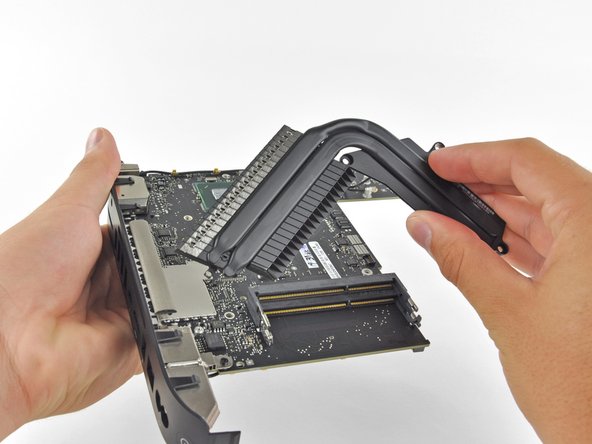
Just like in the previous Mac mini, the heat sink is held in place by a bunch of spring-loaded T8 screws.
-
Some of the screws were a little different, though. We found T6 screws that were screwed into the top of T8 screws. A screw within a screw . . .
-
-
-
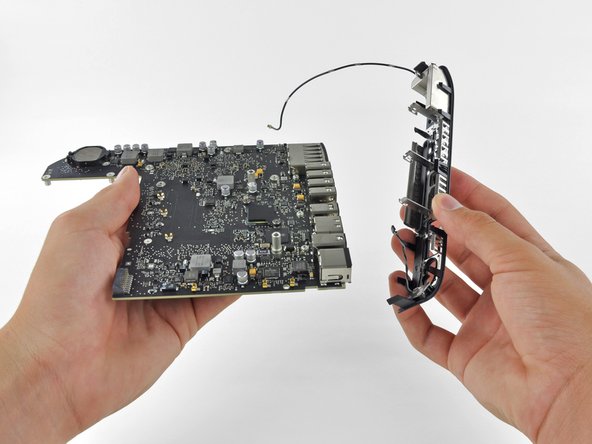
After de-routing a couple cables and unscrewing a few #00 Phillips screws, we were able to remove two antennas and the I/O wall from the logic board.
-
The antennas are attached to the plastic I/O wall since wireless signals don't transmit well through metal.
-
Ah ha, we meet again L-block.
-
-
-
Main ICs on the underside of the logic board:
-
Intel BD82HM65 Platform Controller Hub
-
Intel V116A068 2.3 GHz Dual-Core i5
-
Intersil ISL6364 Dual PWM Controller
-
Parade PS8171 HDMI/DVI Level Shifter
-
SMSC USB2513B USB 2.0 Hub Controller
-
DELTA 8904C-F Filter
-
SMSC 1428-7 System Management Bus temperature sensor
-
-
-
Big players on the top side of the logic board include:
-
Intel L116IA35 Thunderbolt port controller IC, similar to that found on the Early 2011 21.5" iMac
-
Broadcom BCM57765 gigabit ethernet and memory card controller
-
Texas Instruments XIO2211 FireWire Controller
-
Cirrus Logic 4206B Audio Controller
-
-
-
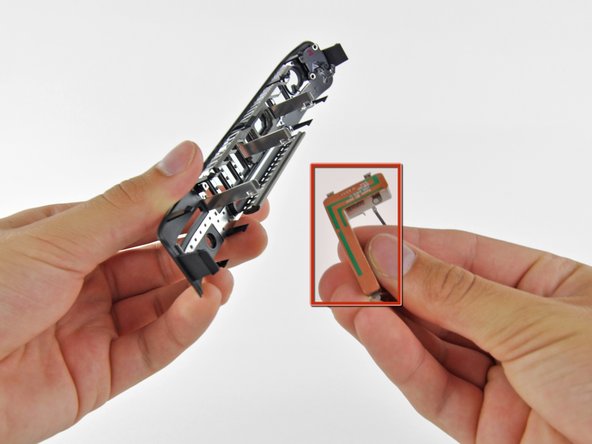
One more T6 screw and we can pull the IR sensor/receiver from the optical drive-- what? No optical drive? To make room for the additional hard drive option, Apple has removed the optical drive from this year's mini and replaced it with some good old-fashioned emptiness.
-
The IR sensor stares straight into the depths of our souls. Sorry buddy, you won't find your lost optical drive here.
-
-
-
Mac mini Mid 2011 Repairability: 8 out of 10 (10 is easiest to repair).
-
No proprietary screws are found within the device.
-
You can easily upgrade your RAM and hard drive, as well as add a secondary drive.
-
There's no glue anywhere inside that needs to be removed while disassembling the mini.
-
The CPU is soldered to the logic board and not user-upgradeable.
-
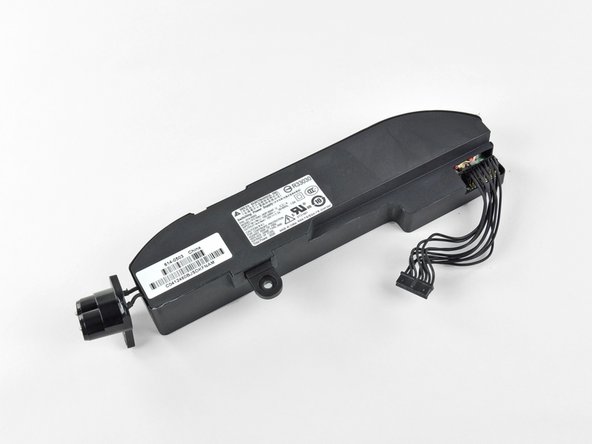
While not difficult to do, you still have to remove almost all the internals in order to replace the power supply.
-


33 Comments
What is the empty socket located about an inch above the CPU and GPU on the motherboard (same side as the SATA sockets)?
Maybe it has something to do with the Radeon 6630m model? I ordered the Core i7/6630m model, I'll check when I get it and report anything different I see.
Francois -
The same socket exists on the 6630M version (I put an SSD in my i5/2.5/500 prior to this take apart.)
Edge -
What sort of cable is recommended for adding a second drive? I would like to buy a bare bones man mini, install a second ssd drive, and then install Lion on the ssd drive and use that as the boot drive.
As we say in Step 7, you'll need an Apple proprietary SATA cable. Maybe someone will get their hands on a server version of the new Mac Mini and reverse engineer both of the cables so that they can start manufacturing ones that will fit perfectly.