Introduction
Looking for the new (considerably less repairable) Kindle Fire HDX 7" teardown? Look no further, we have it right here.
Here at iFixit, there are two things we just can't resist: gutting gadgets and fire (sometimes even gutting gadgets with fire). Lucky for us, today we get both!
This year's Kindle Fire HD has arrived and we're smoking with anticipation to get inside. E-read along as we see what Amazon has in store with this latest iteration of its e-reader gone tablet.
Ready to spark the repair fire in your life? Follow us on Twitter, friend us on Facebook, or get your Instagram on.
What you need
-
-
Here it is, the Kindle Fire HD 2013—and it's bringin' the heat:
-
7" HD display; 1280 x 800 at 216 ppi with IPS technology, polarizing filter, and anti-glare finish
-
1.5 GHz dual-core processor with Imagination PowerVR 3D graphics core
-
Dual-band Wi-Fi antenna
-
Dolby Audio with dual stereo speakers
-
8 or 16 GB internal storage
-
-
-
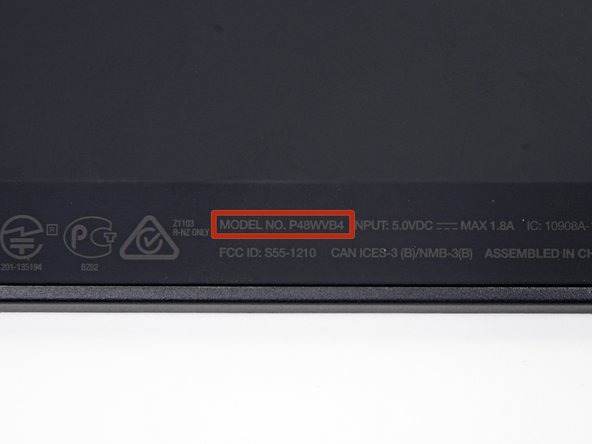
A quick glance at the rear case reveals Amazon's smiling
facelogo and newly prominent power and volume buttons. -
A quick close-up reveals the model number: P48WVB4.
-
Other findings include speaker grilles, power requirements, FCC info, and the standard "Made in China".
-
-
-
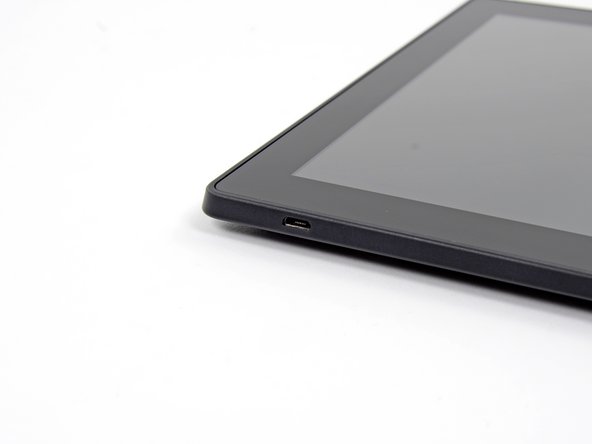
Ports! We've got ports! Get 'em while they're hot.
-
Headphone jack up top, Micro-USB on the bottom. Like the flounder, Amazon seems to be shifting its vitals around.
-
Contrasting last year's Fire HD, which had ports on the side and bottom, this year's port layout was assuredly driven by some internal component shifts. We look forward to finding out what they are!
-
-
-
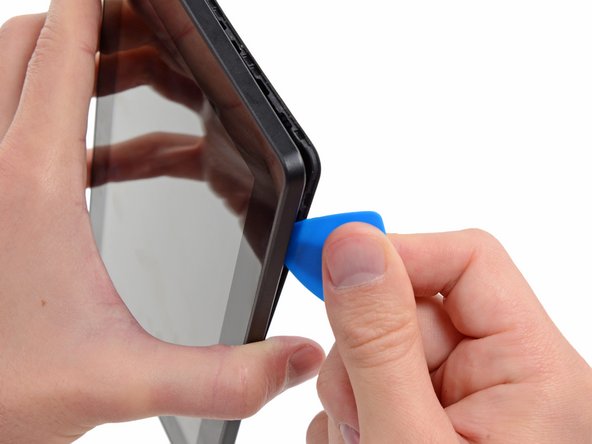
Despite the fiery name, we're happy to find we don't need heat to open this Kindle. So far, a plastic opening tool and an opening pick are all we need.
-
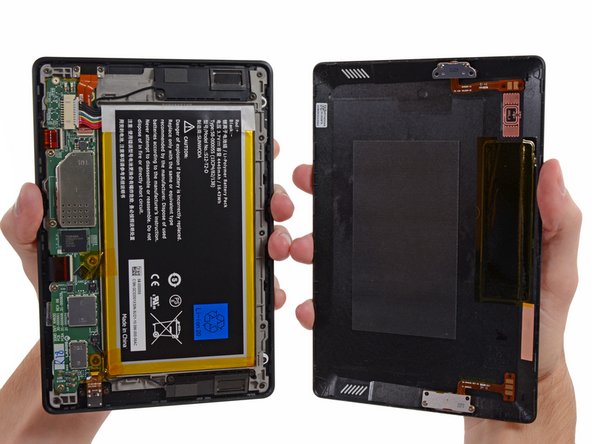
We made it! What do we have here?
-
Big battery: check.
-
Motherboard: check.
-
It looks like every tablet we've opened; let's see if we can find something a bit more interesting…
-
-
-
-
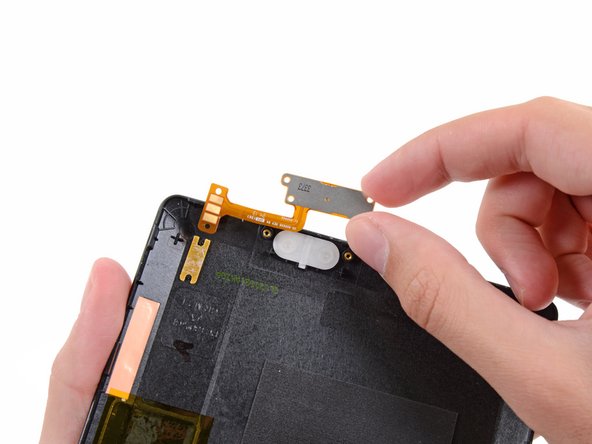
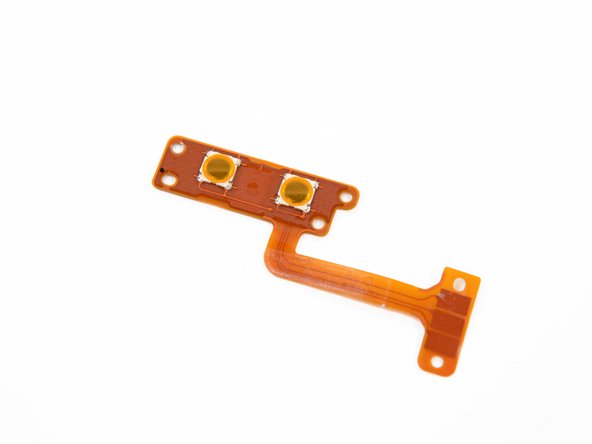
The volume buttons come out easily enough, once we liberate the volume bracket from the rear case.
-
The button assembly is hefty, which means we won't lose it and can replace it, even with our big meaty claws.
-
-
-
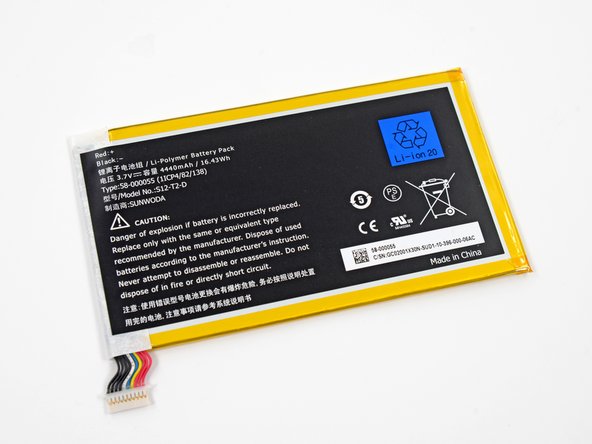
A reasonable amount of adhesive holds the battery in place; we make short work of it with some fancy spudgering.
-
The 3.7 V, 4440 mAh battery boasts 10 hours of power during mixed usage—a decrease from the 2012 HD edition. Amazon calls it an increase in battery life compared to the "previous generation Kindle Fire."
-
-
-
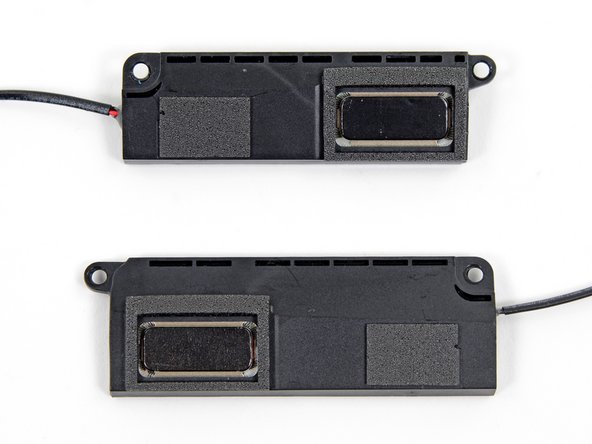
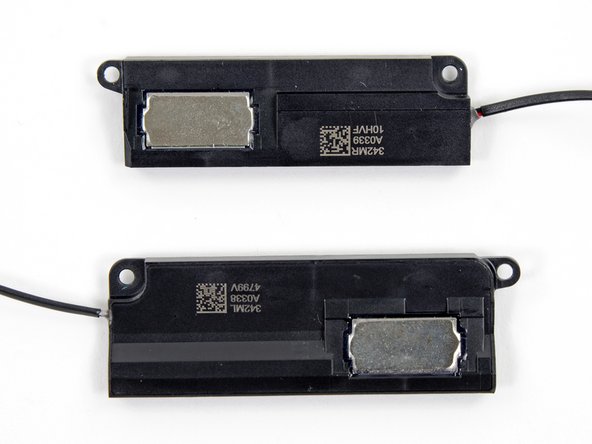
We pop out the dual speakers to see just what this Dolby Digital Plus speaker system is all about.
-
Not only does your tablet have virtual surround sound, but it has clarity-optimized sound, with or without headphones. So you can be creeped out by this barber shop experience even without your beets by Dr. Dre.
-
-
-
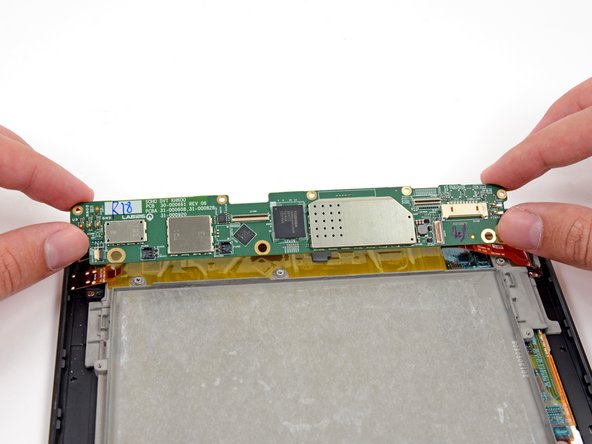
Some dainty spudgering and a few twists of our screwdriver, and the motherboard is free as the wind…
-
…but not free enough. We still need to get under those pesky EMI shields and reveal the secrets nestled in this Kindle's brain.
-
-
-
The front side of the Kindle Fire HD's motherboard is occupied by the following ICs:
-
Toshiba THGBMAG6A2JBAIR 64 Gb (8 GB) e-MMC NAND Flash
-
Micron 3HAI8 D9QQD 8 Gb (1 GB) Mobile LPDDR2 SDRAM
-
Synaptics S7301B Touchscreen Controller
-
Texas Instruments TWL6032 Fully Integrated Power Management with Power Path and Battery Charger
-
InvenSense MPU-6500 6-axis gyroscope
-
347 CB307
-
-
-
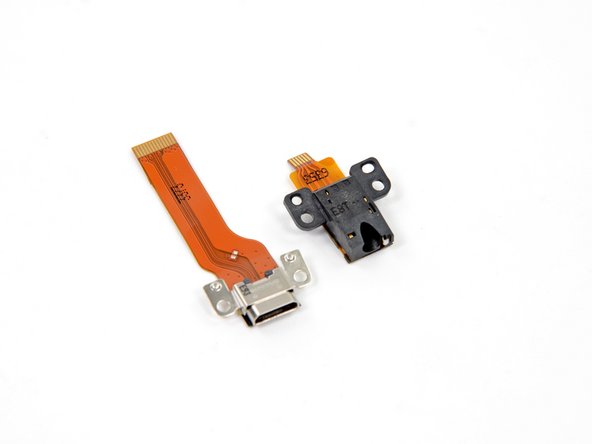
We love modularity. The separate and easily-removable headphone jack and Micro-USB connectors are exciting to find, especially compared to long strings of components that make repair pricier and more difficult.
-
Out comes the midframe. While the material is unconfirmed, the possibility of magnesium kindles the firebug in us.
-
-
-
The display once again comes courtesy of LG. And just like last time, it's a mouthful: the LD070WX6-SM01. Gesundheit!
-
The front glass panel separates easily from the display, a return to the Kindle Fire construction.
-
Yet more evidence that, while the Kindle Fire HDs share the same name, the 2013 model descends from the Kindle Fire lineage. Search your feelings, you know it to be true.
-
The LCD is piloted by a Novatek NT50169D LCD display driver.
-
-
-
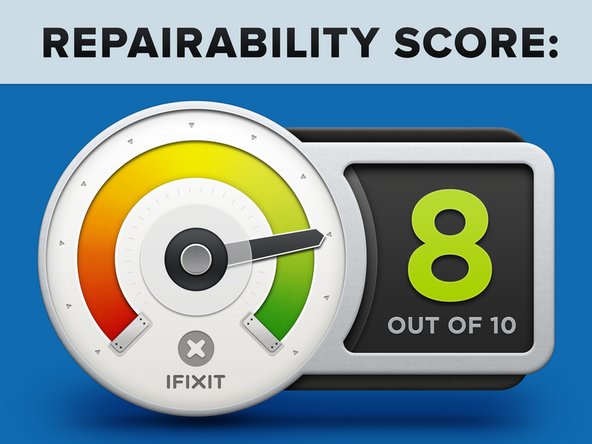
Kindle Fire HD 2013 Repairability Score: 8 out of 10 (10 is easiest to repair).
-
Simple, modular design means the few components that might fail can be easily, inexpensively replaced.
-
All the fasteners found inside are Torx T5 screws—one non-proprietary screwdriver is all you need.
-
The LCD is not fused to the display and can be easily removed.
-
The rear case is a little difficult to open, but it should be easy with directions.
-
A decent amount of adhesive is used on the battery, meaning some prying and gentle working is required for disassembly.
-
The glass panel is glued to the front plastic frame, so a heat gun will be required for replacing cracked glass (or you have to replace both components together).
-


4 Comments
Where is the wifi atenna located?
seem to be missing buttons to switch it on and volume
after replacing battery missing piece to switch power on or off and volume
yes here is the antenna, and if mine isn’t connecting to wifi does it mean its likely broken.?