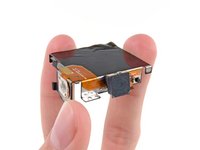
Introduction
What you need
-
-
In addition to a sleeker design with more clearly-labeled buttons than the Hero2, the Hero3 is shredding some sick powder with the following specs:
-
White/Silver/Black Editions with video resolution up to 1080p30 (White/Silver) / 1080p60 (Black) and 4K (!) at 15 frames per second (fps) in the Black Edition.
-
5/11/12 megapixel camera with 30/10/3 fps burst, respectively
-
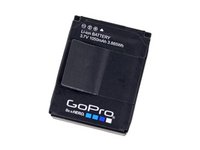
1050 mAh rechargeable lithium-ion battery
-
Up to 64 GB of external microSD storage
-
Built-in Wi-Fi
-
-
-
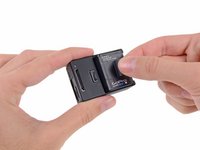
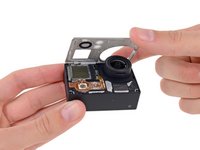
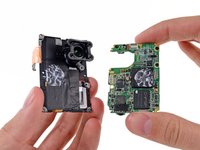
With the simple press of a button, the back cover is free, allowing access to—what's this—a battery pull tab?
-
It's almost as if the folks at GoPro wanted you to be able to take the battery out of your HD Hero3. What a novel idea.
-
The Hero3's 3.7 V battery is rated at 1050 mAh/3.85 Wh, a 50 mAh decrease from previous models, presumably due to the device's smaller size.
-
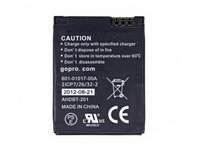
As usual, caution labels on the back of the battery warn us not to store the battery in high temperatures, disassemble it, or dispose of it…with fire.
-
Thanks for the heads up, GoPro.
-
-
-
-
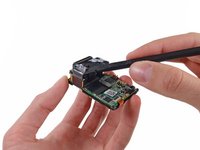
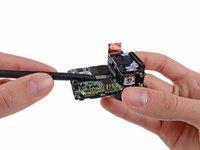
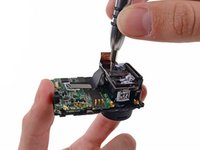
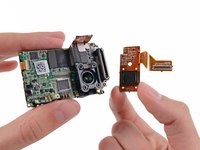
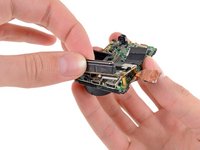
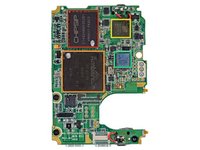
The image sensor pops off the motherboard assembly and can be replaced independently of the rest of the ICs. This Hero is gaining repairability cred left and right.
-
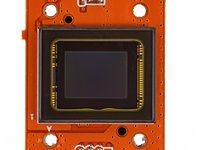
Our Hero3 Black Edition comes with a 12 megapixel image sensor with improved low light capabilities, a step up from the 5 and 11 megapixel modules in its other Hero counterparts.
-
While more resolution is great for stills, the pixel-crunching power that sets the Black Edition's video skills apart from the rest of the pack are in the image processor—more on that later.
-
-
-
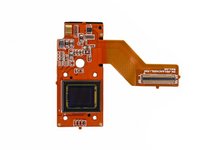
At the heart of the GoPro lies a Sony IMX117 image sensor.
-
According to our pals at Chipworks, the Exmor-R sensor features a "1.55 µm back illuminated design on a ceramic substrate"—cool!
-
The sensor supports 12 MP imaging at up to an impressive 35 fps, even though the camera advertises a burst rate of 30 fps.
-
Check out their teardown for even more info on the Hero3!
-
-
Tool used on this step:iFixit Opening Picks (Set of 6)$4.99
-
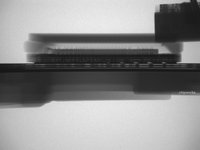
It's time for everyone's favorite segment: Science with iFixit! We decided to have a little bit of fun with the Hero3's lens and one of our iFixit Guitar Picks.
-
For this simple demonstration, we placed a guitar pick in front of the lens upside-down and looked through the glass. As you can see, the upside-down graphic has been flipped right-side up!
-
So, if the lens flips the image, why aren't all of the pictures from our digital cameras inverted?
-
Well, just like the lens of our eyeball, anything viewed through an optical lens appears upside-down until it's fed through a processor of some kind. For a digital camera, that processor is an integrated circuit. Our vision, on the other hand, utilizes the most advanced processor in the world to flip the image around: the human brain.
-
-
-
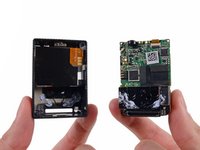
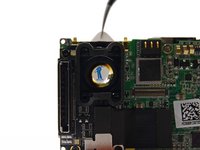
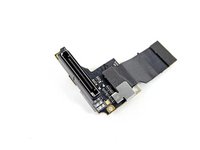
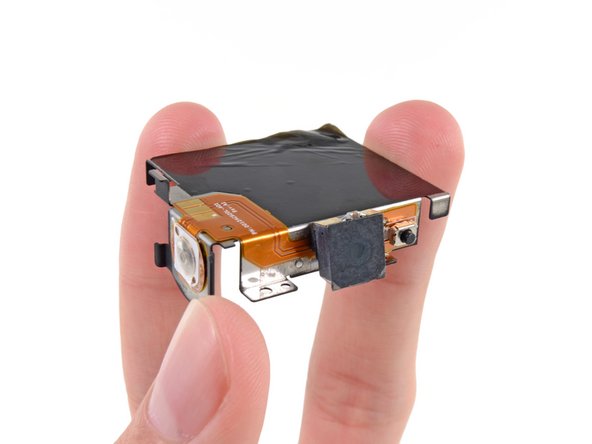
Another daughterboard flies off the main assembly; this time it's the microSD and accessory board.
-
If you've never used a GoPro, this large port might look pretty foreign to you. It's okay, you're not alone. The proprietary port is used for a variety of GoPro accessories, including a fold-out LCD attachment, extended battery, and various A/V adapters.
-
-
-
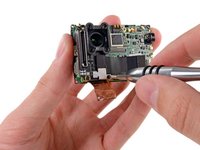
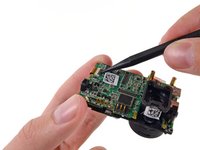
No new tricks here, either. Removing the motherboard requires no more than a spudger and a Phillips #0 screwdriver.
-
Most components in the Hero3 use very little power and generate minimal heat. This light coating of thermal compound on the image processor is the most aggressive cooling feature in the device.
-
-
-
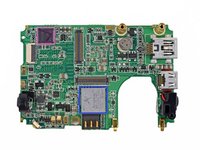
Chips on the motherboard:
-
ChipSiP CT49248NS962D 1 Gb NAND flash + 4 Gb DDR3 SDRAM
-
Ambarella A770 camera system-on-a-chip
-
Austriamicrosystems AS3713 system PMU with backlight driver
-
Freescale Kinetis SCK20DN51Z USB controller
-
Qualcomm Atheros AR6233GEAM2D 802.11n + Bluetooth 4.0 controller
-
AC3029
-
-
-
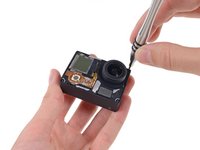
More tape, more screws, moar fun!
-
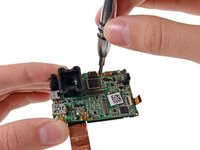
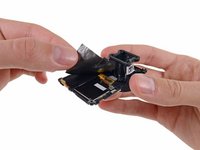
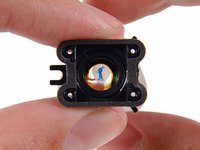
A few more Phillips screws stand in the way of pulling out the "ultra sharp ƒ/2.8 6-element aspherical glass lens."
-
Honestly, we just had a lot of fun looking at our guitar picks through this lens—here's another look through the Hero3's eye now that it's free of the motherboard.
-
-
Tool used on this step:Heat Gun$24.99
-
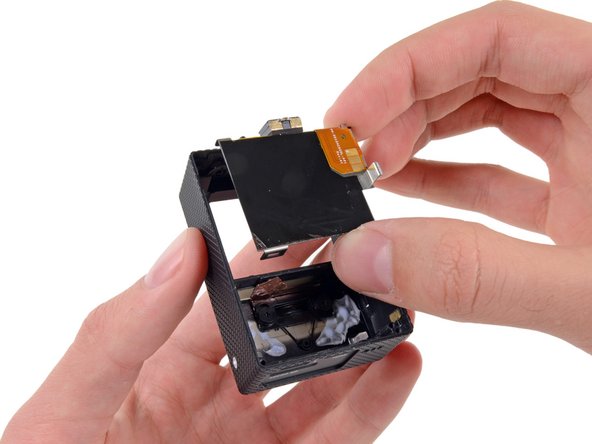
There are only a few components left around the device casing.
-
Last on the midframe is the LCD and its soldered-on cable. Repairability takes a hit here, when we have to pull out a heat gun and metal spudger to loosen the adhesive securing this cable to the midframe.
-
The rear case's last component is the button/speaker assembly which is attached to the backing of the battery compartment. A couple of screws and some tape hold it in place.
-
-
-
GoPro HD Hero3 Repairability Score: 7 out of 10 (10 is easiest to repair)
-
The battery is intended to be easily replaced by the user, and requires no tools to access.
-
The entire device can be disassembled with readily-available tools.
-
Modular design throughout allows replacement of several individual components.
-
Minimal adhesive securing the front cover can be difficult to separate, but poses no real challenge to opening.
-
Fragile copper grounding tape can be difficult to peel and replace.
-
Because the display cable is adhered to the midframe, replacing the LCD requires use of a heat gun.
-


65 Guide Comments
Could you include a slide showing how to extract the lens from the lens housing? I would like to perform a lens mod, and I need to know if the lens comes out willingly or grudgingly.
teardown video of the gopro lens change by RageCams
dennis -
Video of what needs to come apart to replace a lens.
detailed lens change video by ragecams
dennis -