
Sony DualSense Controller Battery Replacement

What you need

  1. Sony DualSense Controller Battery Replacement, Unclip the right end of the middle trim: step 1, image 1 of 2 Sony DualSense Controller Battery Replacement, Unclip the right end of the middle trim: step 1, image 2 of 2
    • Disconnect and power down your controller before you begin.

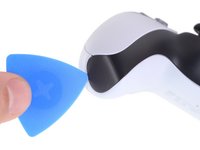
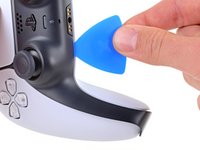
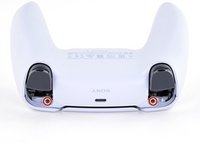
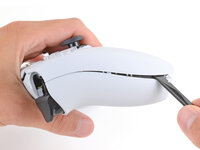
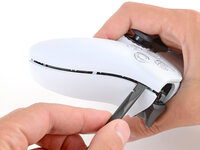
    • Insert an opening pick underneath the middle trim at the bottom-right corner of the controller to release the clips securing it to the case.

  2. Sony DualSense Controller Battery Replacement, Unclip the lower-right edge of the middle trim: step 2, image 1 of 3 Sony DualSense Controller Battery Replacement, Unclip the lower-right edge of the middle trim: step 2, image 2 of 3 Sony DualSense Controller Battery Replacement, Unclip the lower-right edge of the middle trim: step 2, image 3 of 3
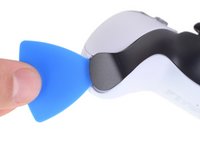
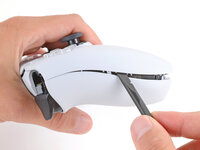
    • Slide the opening pick along the lower-right edge of the middle trim to release the clips securing it to the case.

  3. Sony DualSense Controller Battery Replacement, Unclip the left end of the middle trim: step 3, image 1 of 2 Sony DualSense Controller Battery Replacement, Unclip the left end of the middle trim: step 3, image 2 of 2
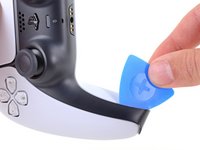
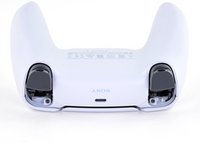
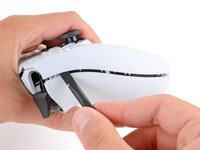
    • Insert an opening pick underneath the middle trim at the bottom-left corner of the controller to release the clips securing it to the case.

  4. Sony DualSense Controller Battery Replacement, Unclip the lower-left edge of the middle trim: step 4, image 1 of 3 Sony DualSense Controller Battery Replacement, Unclip the lower-left edge of the middle trim: step 4, image 2 of 3 Sony DualSense Controller Battery Replacement, Unclip the lower-left edge of the middle trim: step 4, image 3 of 3
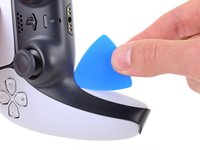
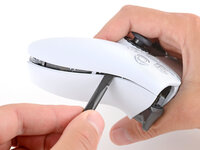
    • Slide the opening pick along the lower-left edge of the middle trim to release the clips securing it to the case.

  5. Sony DualSense Controller Battery Replacement, Remove the middle trim: step 5, image 1 of 3 Sony DualSense Controller Battery Replacement, Remove the middle trim: step 5, image 2 of 3 Sony DualSense Controller Battery Replacement, Remove the middle trim: step 5, image 3 of 3
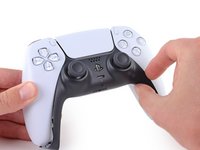
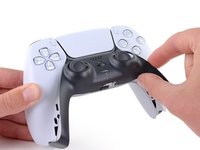
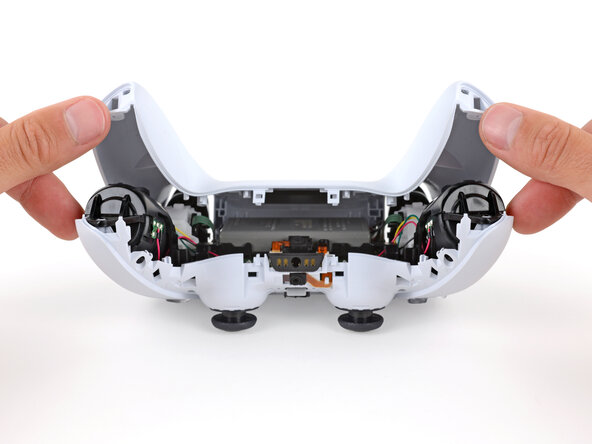
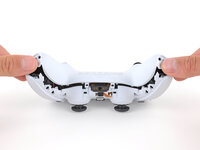
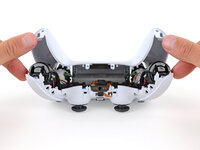
    • Use your fingers to lift up the bottom edge of the middle trim to release the remaining clips.

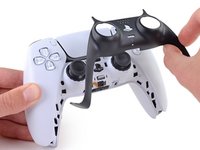
    • Lift the middle trim over the joysticks to remove it.

  6. Sony DualSense Controller Battery Replacement, Remove the L1 button: step 6, image 1 of 3 Sony DualSense Controller Battery Replacement, Remove the L1 button: step 6, image 2 of 3 Sony DualSense Controller Battery Replacement, Remove the L1 button: step 6, image 3 of 3
    • With one hand, grip the controller and use your thumb to hold down the left trigger.

    • With your free hand, insert the flat end of a spudger between the L1 and L2 buttons.

    • Use the spudger to gently pry the L1 button away from the controller and remove it, holding your finger over the button so it doesn't eject.

  7. Sony DualSense Controller Battery Replacement, Remove the R1 button: step 7, image 1 of 3 Sony DualSense Controller Battery Replacement, Remove the R1 button: step 7, image 2 of 3 Sony DualSense Controller Battery Replacement, Remove the R1 button: step 7, image 3 of 3
    • Repeat the previous step to remove the R1 button.

  8. Sony DualSense Controller Battery Replacement, Remove the rear case screws: step 8, image 1 of 2 Sony DualSense Controller Battery Replacement, Remove the rear case screws: step 8, image 2 of 2
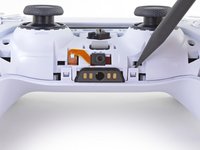
    • Use a Phillips screwdriver to remove the two 6.4 mm screws securing the bottom corners of the lower case.

  9. Sony DualSense Controller Battery Replacement: step 9, image 1 of 2 Sony DualSense Controller Battery Replacement: step 9, image 2 of 2
    • Use a Phillips screwdriver to remove the two 6.4 mm screws behind the L1 and R1 buttons.

  10. Sony DualSense Controller Battery Replacement, Separate the rear case: step 10, image 1 of 3 Sony DualSense Controller Battery Replacement, Separate the rear case: step 10, image 2 of 3 Sony DualSense Controller Battery Replacement, Separate the rear case: step 10, image 3 of 3
    • Be gentle when releasing the rear cover clips—they're delicate and can easily break.

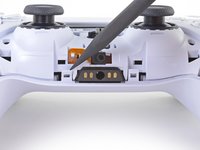
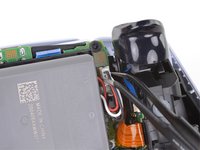
    • Use the point of a spudger to release the two clips on either side of the headset jack.
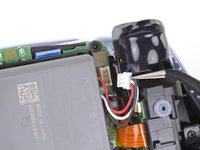
  11. Sony DualSense Controller Battery Replacement: step 11, image 1 of 3 Sony DualSense Controller Battery Replacement: step 11, image 2 of 3 Sony DualSense Controller Battery Replacement: step 11, image 3 of 3
    • Tight plastic clips secure the left and right edges of the rear case.

    • Insert the flat end of a spudger between the front and rear shells near the bottom of the left edge.

    • Slide the spudger along the left edge and gently pry the shells apart to release the clips.

  12. Sony DualSense Controller Battery Replacement: step 12, image 1 of 3 Sony DualSense Controller Battery Replacement: step 12, image 2 of 3 Sony DualSense Controller Battery Replacement: step 12, image 3 of 3
    • Repeat the previous step on the right edge to release its clips.

  13. Sony DualSense Controller Battery Replacement: step 13, image 1 of 2 Sony DualSense Controller Battery Replacement: step 13, image 2 of 2
    • Lay your controller upside down so the joysticks are on your work surface.

    • Hold the controller down with your fingers and use your thumbs to lift the rear case away from the controller to fully separate it.

  14. Sony DualSense Controller Battery Replacement, Remove the rear case: step 14, image 1 of 1
    • Remove the rear case.

  15. Sony DualSense Controller Battery Replacement, Disconnect the battery: step 15, image 1 of 2 Sony DualSense Controller Battery Replacement, Disconnect the battery: step 15, image 2 of 2
    Tool used on this step:
    Tweezers
    $4.99
    Buy
    • Use a pair of tweezers or your fingers to disconnect the battery from the motherboard.

    • Grip the connector, not the wires, when disconnecting.

  16. Sony DualSense Controller Battery Replacement, Remove the battery: step 16, image 1 of 2 Sony DualSense Controller Battery Replacement, Remove the battery: step 16, image 2 of 2
    • Lift the battery straight out of the battery bracket.

Conclusion

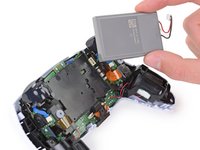
To reassemble your device, follow the above steps in reverse order.

Take your e-waste to an R2 or e-Stewards certified recycler.

Repair didn’t go as planned? Try some basic troubleshooting, or ask our Answers community for help.

90 other people completed this guide.

Sam Omiotek

Member since: 02/25/19

92,194 Reputation

290 Guides authored

18 Guide Comments

Is there a better battery that can be used rather than the standard battery? This controller dies so fast that I don’t bother disconnecting it ever. I’m pretty sure that’s bad, but It’s frustrating having it die midgame in my second game.

Anthony Ramirez - Reply

Yes. You can purchase a 2000mah battery replacement. It’s not much of a difference, but lowering your led settings and controller vibration also works wonders for prolonging the battery life.

John Jevitz - Reply

Any chance you could figure out why the %#*@ thing won't work USB powered with no battery? I shouldn't have to keep replacing a battery when I don't actually want to play wireless.

NoLife - Reply

@NoLife

If you bridge the pins for the red and white battery wires, the controller will power on properly without a battery. This will be easiest with a soldering iron.

Amboy Scout - Reply

I need a new battery for my Dualsense controller, Sony is saying to just buy a new one while I'm not gonna take broken for a answer. So if anyone knows a reliable site where I can get a battery replacement for my dualsense, do recommend

Diaper Fixer 360 - Reply

Add Comment

View Statistics:

Past 24 Hours: 210

Past 7 Days: 1,598

Past 30 Days: 6,525

All Time: 187,384