Introduction
Replace a broken LCD rather than replacing your entire display.
What you need
-
-
Use your fingers to push both battery release tabs away from the battery, and lift the battery out of the computer.
-
-
-
Lift up at the rear of the case and work your fingers along the sides, freeing the case as you go. Once you have freed the sides, you may need to rock the case up and down to free the front of the upper case. This stage can be quite tricky. Over the DVD reader are 4 tabs set back which pull out vertically.
-
Note that the two small tongues on the left hand front of the upper case may bend while you remove the upper case. When re-installing, you may need to bend them back to fit in the grooves in the lower case.
-
-
-
Disconnect the two antenna cables attached to the Airport Extreme card.
-
-
-
-
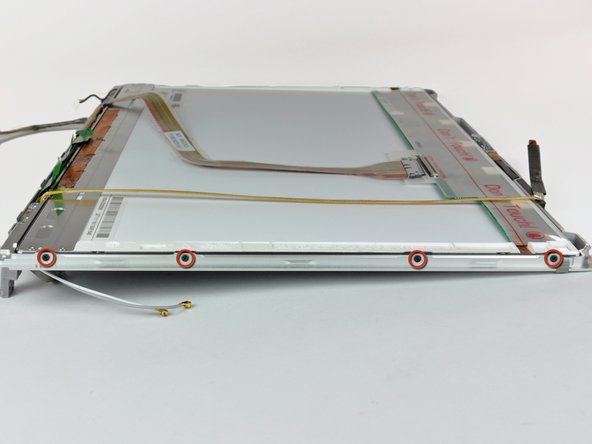
Remove the two 5 mm Phillips screws from the lower left and right corners of the display (two screws total).
-
-
-
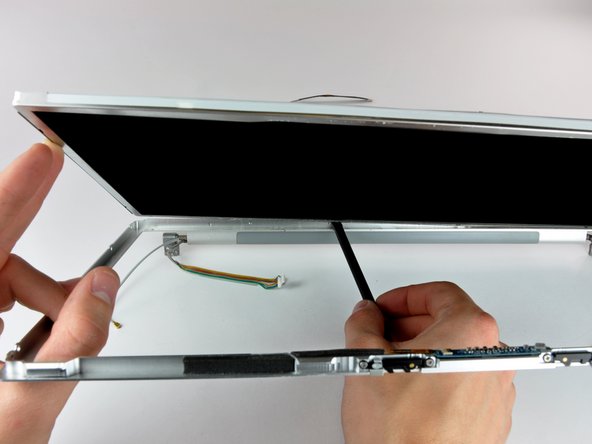
Insert the flat end of a spudger perpendicular to the face of the display between the plastic strip attached to the rear bezel and the front bezel.
-
With the spudger still inserted, rotate it away from the display to separate the front and rear bezels.
-
Work along the left edge of the display until the rear bezel is evenly separated from the front bezel.
-
-
-
Insert the flat end of a spudger perpendicular to the face of the display between the plastic strip attached to the rear bezel and the front bezel.
-
With the spudger still inserted, rotate it away from the display to separate the front and rear bezels.
-
Work along the right edge of the display until the rear bezel is evenly separated from the front bezel.
-
-
-
Insert the flat end of a spudger between the front bezel and the plastic strip attached to the rear bezel near the screw holes at the bottom corners of the display.
-
Rotate your spudger toward the rear bezel to separate it from the front bezel.
-
If necessary, enlarge the gap between the lower edge of the rear bezel and the clutch cover until the two components are completely separated.
-
-
-
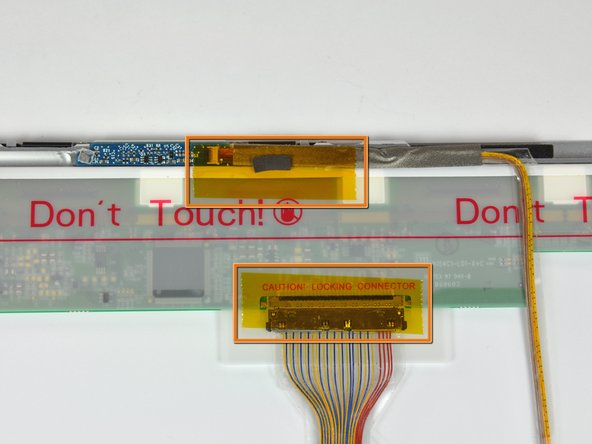
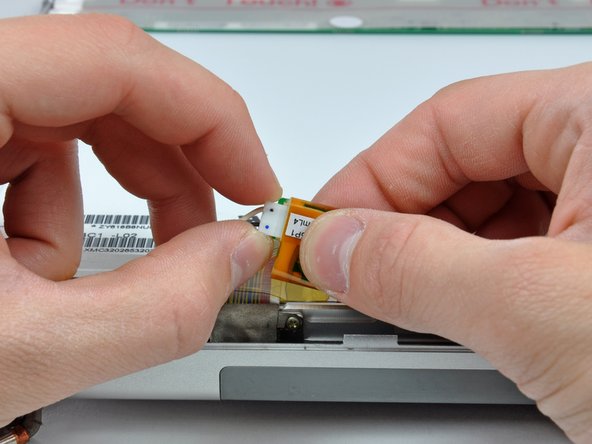
Remove the pieces of yellow kapton tape from the bottom left corner of the display.
-
Remove the pieces of tape securing the display data cable and camera cable to the display.
-
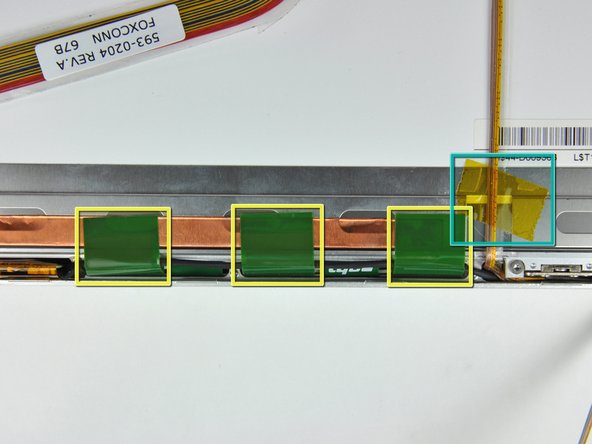
Peel the three green antenna ground straps off the copper tape along the bottom edge of the LCD.
-
Remove the piece of tape securing the camera cable to the LCD.
-


To reassemble your device, follow these instructions in reverse order.
To reassemble your device, follow these instructions in reverse order.
Cancel: I did not complete this guide.
29 other people completed this guide.

4 Comments
Bravo. Worked like a champ. Excellent write up and really appreciate it. I did it twice today hahahah
The screw fixing points on my MBP came away from the back case. They are spot welded to the back case and in the Photo's I have you can see the point's each. You may think that if this happens you lose the ability to use the screws to secure the enclosure but you still can use the screws if you position the fixing points before clipping the front panel in place. Have a needle of small nail to align though the holes before replacing the screws. This is not easy and you need to be practices at this sort of repair.
They sit under the plastic surround and do! add the the string of the completed enclosure.