Introduction
Use this guide to help you replace a damaged motherboard in an Amazon Kindle Fire.
What you need
-
-
Wedge a plastic opening tool into the lower right corner of the Kindle Fire.
-
Pry the case apart and run the plastic opening tool along the perimeter of the Kindle Fire to release the clips securing the case halves to each other.
-
It is helpful to pry the bottom of the Kindle Fire away (and out from the side) from the top part. Exerting too much force attempting to split the two without pulling away can cause the tabs on the inside to crack.
-
-
-
Fit the tip of the plastic opening tool between the right battery cell and the Kindle Fire's frame.
-
Lever the battery up and work the plastic opening tool down along its edge to release the glue securing it to the frame.
-
-
-
-
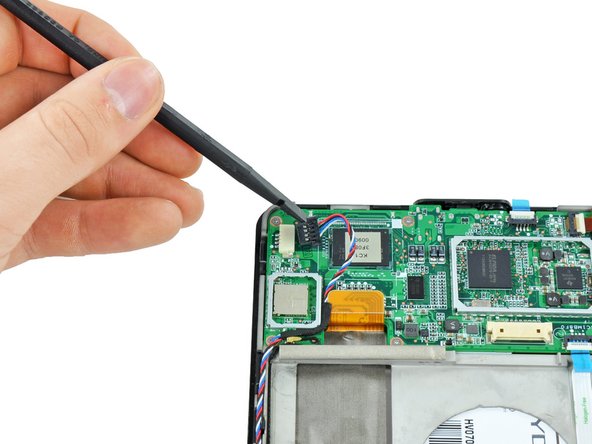
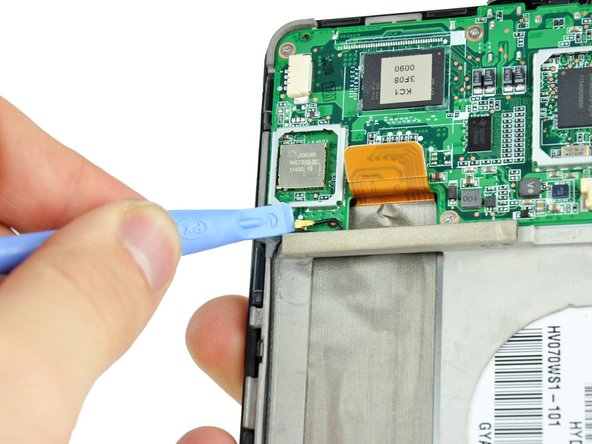
Peel the tape on the upper-left IC that is securing the speaker cable.
-
Use the flat end of a spudger to push the speaker connector out of its socket.
-
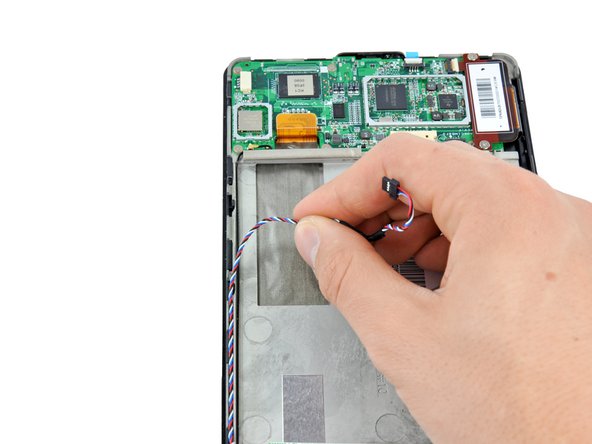
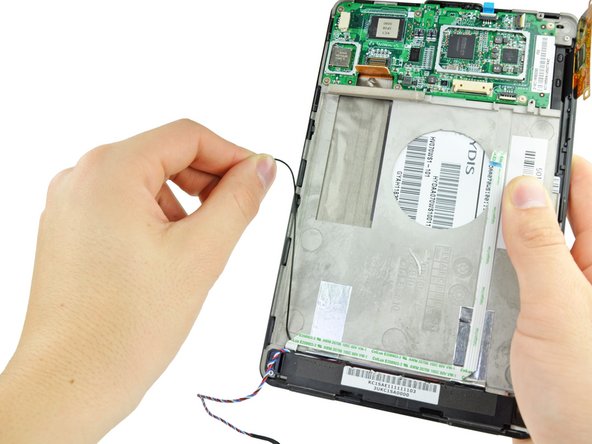
Deroute the speaker cable so that it will not interfere with the motherboard.
-
-
-
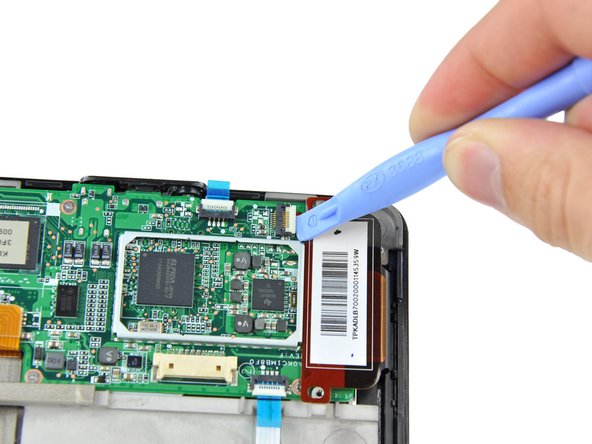
Remove the two 2.3 mm Phillips #00 screws from the touchscreen controller.
-
Use a plastic opening tool to release the touchscreen controller connector.
-
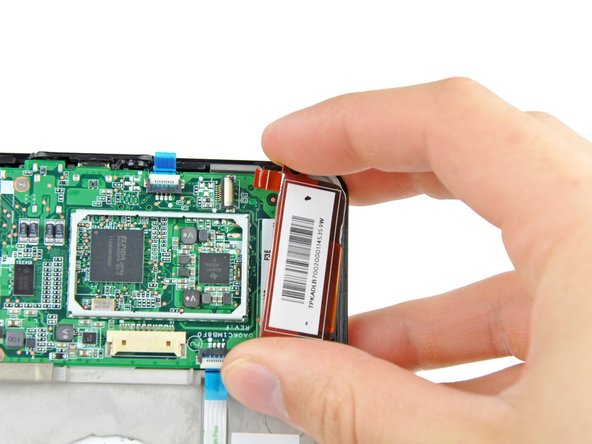
Gently remove the touchscreen controller by lifting it up and to the right.
-
-
-
Use a plastic opening tool to gently lever up the bottom side of the motherboard to free from the adhesive on its underside.
-
Lever the top side of the motherboard up with a plastic opening tool until it comes free.
-
Lift the motherboard out of the Kindle Fire, making sure that the power button cable from step 8 comes free from its connector.
-


To reassemble your device, follow these instructions in reverse order.
To reassemble your device, follow these instructions in reverse order.
Cancel: I did not complete this guide.
64 other people completed this guide.

5 Comments
These are excellent instructions. Unfortunately, it's impossible to find a motherboard for a first generation Kindle KINDLE FIRE 31KC1MB0090 for the D01400. I just spent an hour searching the Internet including, eBay, powerbookmedic.com and Pronto.com. PowerBookmedic advertises the motherboard but they are out of stock. If anyone has any sources, I would greatly appreciated it.
I did it! I removed the Kindle Fire 7" motherboard, replaced the USB connector with one bought from a vendor on eBay, and then reassembled the Kindle with a fully functional USB connector. Your guide made it an easy project for a couple hours on a Sunday afternoon.
Soldering the fine-pitched connector is probably not for the faint of heart, but I have a good temperature controlled soldering station and a lighted magnifier that made the task eminently do-able.
I would not have tackled this project without your step-by-step guide and Plastic Opening Tools.
Thanks!
/john
Where did you get the connector. If you can send me a link for the connector. I have the same issue.
Kevin
I didn’t rip the sensor ribbon but the touch screen isnt working. It’s all connected as should be