Introduction
Use this guide to remove the power button from your iPhone 5.
What you need
Video Overview
-
-
Lay overlapping strips of clear packing tape over the iPhone's display until the whole face is covered.
-
-
-
Power off your iPhone before beginning disassembly.
-
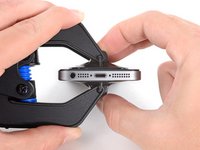
Remove the two 3.6 mm Pentalobe screws next to the Lightning connector.
-
-
-
Regardless of the tool you use, you need to be sure you pull up the entire display.
-
If the glass begins to separate from the plastic, as shown in the first image, slide a plastic opening tool between the plastic frame and the metal phone body to pry the metal clips out of the case.
-
-
Tool used on this step:Clampy - Anti-Clamp$24.95
-
Pull the blue handle backwards to unlock the Anti-Clamp's arms.
-
Slide the arms over either the left or right edge of your iPhone.
-
Position the suction cups near the bottom edge of the iPhone just above the home button—one on the front, and one on the back.
-
Squeeze the cups together to apply suction to the desired area.
-
-
-
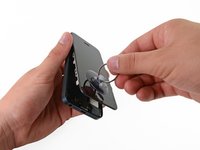
Press a suction cup onto the screen, just above the home button.
-
-
-
While holding the iPhone down with one hand, pull up on the suction cup to slightly separate the front panel assembly from the rear case.
-
With a plastic opening tool, begin to gently pry the rear case down, away from the screen, while you pull up with the suction cup.
-
-
-
Continue to pry up around the sides of the front panel assembly, detaching the clips along the left and right side.
-
-
-
Once the clips have been released on the bottom and sides of the front panel assembly, pull the bottom of the assembly away from the rear case.
-
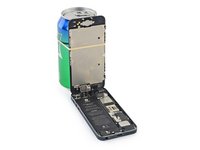
Open the display to about a 90º angle, and lean it against something to keep it propped up while you're working on the phone.
-
Add a rubber band to keep the display securely in place while you work. This prevents undue strain on the display cables.
-
-
-
Remove the following two screws securing the metal battery connector bracket to the logic board:
-
One 1.8 mm Phillips screw
-
One 1.6 mm Phillips screw
-
-
-
Remove the metal battery connector bracket from the iPhone.
-
-
-
Use a plastic opening tool to gently pry the battery connector up from its socket on the logic board.
-
-
-
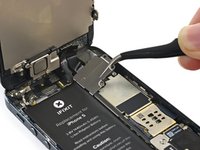
Remove the following screws securing the front panel assembly cable bracket to the logic board:
-
Two 1.2 mm Phillips screws
-
One 1.6 mm Phillips screw
-
-
-
-
Lift the display cable bracket toward the battery to unhook it, and remove it from the iPhone.
-
-
-
Use a plastic opening tool or a fingernail to disconnect the three front panel assembly cables:
-
Front-facing camera and sensor cable
-
LCD cable
-
Digitizer cable
-
-
-
Remove the front panel assembly from the rear case.
-
-
-
Use the exposed clear plastic pull tab to peel the battery off the adhesive securing it to the iPhone.
-
Wait about one minute for the alcohol solution to weaken the adhesive. Use an opening tool to gently lift the battery by its edge.
-
-
-
Do not pry at the top portion of the battery, you risk severing the volume control cables.
-
-
-
Remove the battery.
-
Adhere the battery, disconnect it, and continue reassembling your device.
-
-
-
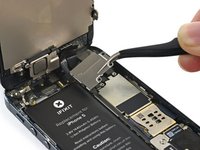
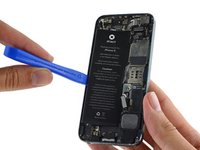
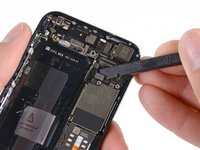
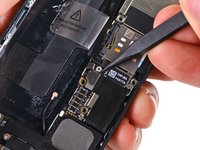
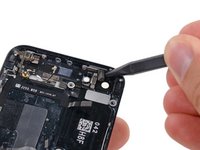
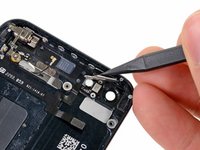
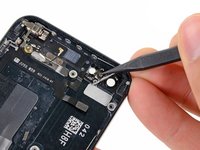
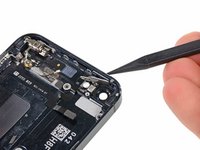
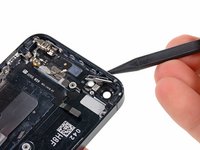
Use the tip of a spudger to pry the cellular data antenna cable connector up from its socket on the logic board, just above the speaker enclosure.
-
-
Tool used on this step:Tweezers$4.99
-
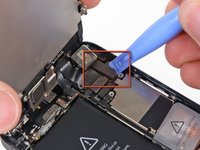
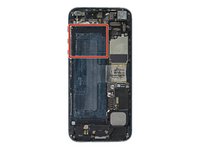
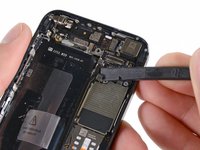
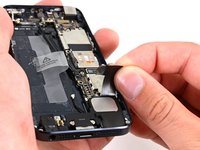
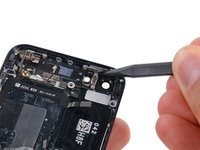
Rotate the logic board assembly toward the battery side of the rear case.
-
The flash surround is adhered to the flash unit and the rear case. If it stays on the rear case remove with tweezers and mount it back on the flash unit.
-
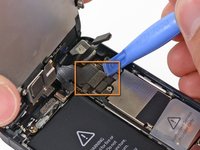
Note: when reassembling your device, be sure that the lower interconnect cable is not tucked underneath the logic board.
-
-
-
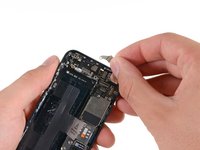
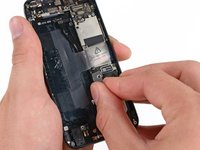
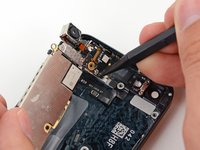
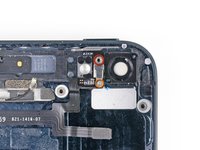
Remove the logic board assembly from the rear case.
-
While your logic board is out of your phone, keep it on a grounded anti-static mat to prevent any damage to the circuitry.
-
-
-
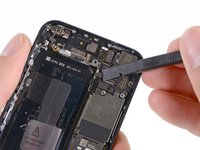
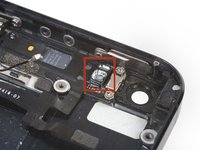
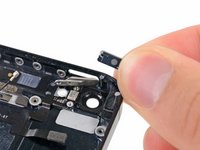
Use the tip of a spudger to remove the rubber bumper from below the power button.
-


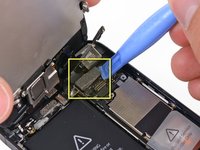


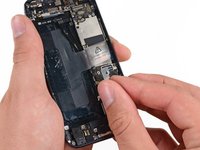


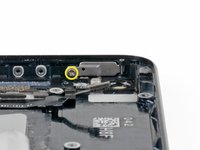


To reassemble your device, follow these instructions in reverse order.
Cancel: I did not complete this guide.
292 other people completed this guide.
Attached Documents

40 Guide Comments
Hi! Great step by step guide. I did it twice today and my iphones 5 are working great. Just thing. In my opinion there is no need to remove the battery. It is how I did it without any complication. Keep it up.
This is an extremely helpful guide. I was quite surprised when I opened my iPhone 5 that there were 2 screws lose inside it. I bought it new and have never taken it apart or had it serviced before. Never heard any rattling either so who knows. haha
I noticed that needed the smaller Phillips head screwdriver than the one recommended in the guide.
The only advice I can give is to take your time and go slow slow slow. There were many small heart attacks when prying the screen off and taking out the battery.
I was skeptical that replacing the tiny power button alone would fix my issue of turning my phone on and off and putting it to sleep, but it did the trick to my great surprise. You'll need a steady hand (ie. no caffeine) to complete this repair because of all of the small screws. Thanks iFixit for a great guide!
My volume and silent toggle switch works great but I'm having issues only with the power button. Does this mean I just have to replace the power button or do I have to replace the flex cable also?
Thanks!