Introduction
One year ago, we tore down Apple's radical new iPhone 6—and it didn't do half bad. Now, Apple say they've crammed a boatload of new technology into a phone that's imperceptibly thicker, just a few grams heavier, and several shades pinker: iPhone 6s. What does that mean, and how will it affect the repairability of our favorite fruit-based phone? Join us LIVE to find out—it's teardown time!
Is a 6s teardown just not big enough for you? Then you'll want our iPhone 6s Plus teardown.
A big and hearty mega-thanks to our pals at Chipworks for helping us ID all of this tech. We couldn’t have done it without them. Check out their teardown blog. Chipworks is also releasing a comprehensive product teardown report, sign up here to get it for free!
Gear up for more teardown! Follow us on Facebook, Instagram, or Twitter for the latest teardown news.
What you need
Video Overview
-
-
The 6s may look the same as last year's iPhone, but there are plenty of new features in this phone:
-
Apple A9 processor with embedded M9 motion coprocessor
-
16, 64, or 128 GB of storage
-
4.7-inch 1334 × 750 pixels (326 ppi) Retina HD display with 3D Touch
-
12 MP iSight camera supporting 4K video recording with 1.22 µ pixels, and a 5 MP FaceTime HD camera
-
7000 Series aluminum enclosure and Ion-X Glass
-
802.11a/b/g/n/ac Wi‑Fi with MIMO + Bluetooth 4.2 + NFC + 23-band LTE
-
Taptic Engine
-
-
-
It’s finally time to see what this revolutionary new iPhone has in store for us.
-
At a glance, the 6s is the spitting image of its older sibling, but there's a lot more to it than meets the eye. Here's some of what's under the hood:
-
Improved Touch ID home button
-
5 MP FaceTime HD Camera
-
Retina HD Display with 3D Touch
-
Upon closer inspection, the 6s is a hair larger than the 6 (138.3 x 67.1 x 7.1 mm vs. 138.1 x 67.0 x 6.9 mm), and it's stamped with a new model number: A1688.
-
The 6s has also packed on a bit of weight when compared to its older sibling, weighing in at 143 grams vs. the 6's 129 grams.
-
-
-
Roll your mouse over for superpowers—we've got X-rays on tap, thanks to our plucky cohorts at Creative Electron.
-
Together we trekked all the way to Australia to bring you the first-ever glimpse of the latest iPhone innards.
-
Our teardown is coming to you live from Macfixit and Circuitwise. Kudos to them for their hospitality and their 17-hour timezone advantage!
-
It's just a taste of what's to come! Let the teardowning begin.
-
-
-
We've said it before and we'll say it again: Apple is all about the little things. The color of the Pentalobe screws at the bottom of the case match the color of the case. Oh, Apple.
-
It seems the iPhone display assembly has toughened up a bit since we last met. It now features four adhesive strips lining the perimeter of the phone.
-
Still, this strong adhesive is no match for our handy-dandy iSclack.
-
iPhone displays of yore weren't exactly in danger of falling out of the phone, so why the need for adhesive—or could this be a waterproof gasket?
-
-
-
With the display assembly popped up, we can already spot some internal differences between the 6s and its predecessor.
-
The all-new Taptic Engine takes up a large chunk of space below the battery, which might explain the slight reduction in battery size.
-
Apple has also condensed the display assembly connections into three cables, as opposed to the four seen in the iPhone 6.
-
-
-
A quick twist and the battery connector is disconnectored.
-
Despite the Coriolis effect, for screwdrivers it is still righty tighty and lefty loosy—even down under. So for those who were wondering—yes, we still twisted to the left.
-
Once inside, we find, as we hoped, Phillips screws. We're glad Apple limits the inclusion of Pentalobe screws solely to the bottom of the rear case.
-
-
-
After some careful spudgering, the display assembly comes free without much of a fight.
-
The display assembly weighs in at a whopping 60 grams—a 15 gram increase over the one found in the iPhone 6. In fact, that's the same weight as the much larger display on last year's 6 Plus! The additional capacitive sensors that Apple integrated into the display backlight have really beefed this thing up.
-
Save for the reduction in cables, and a slightly different LCD shield plate design, the old and new display assemblies seem pretty visually similar.
-
-
-
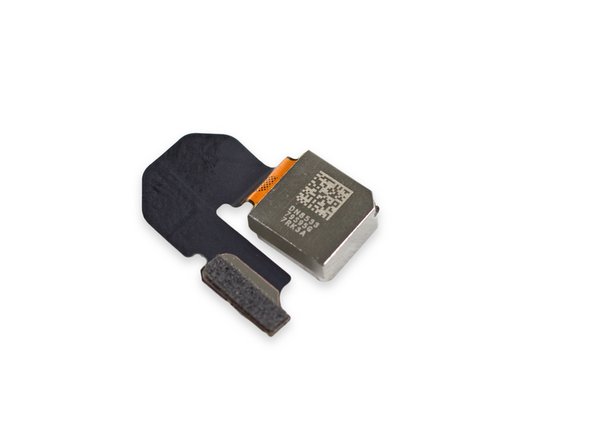
In order to take out the shield plate we first have to remove a bracket, speaker, and the FaceTime camera.
-
While the FaceTime camera has jumped from 1.2 MP all the way up to 5 MP, its overall form factor remains surprisingly similar.
-
We have to take a moment to calm down as we get closer to unearthing the secrets of the new 3D Touch display assembly.
-
-
-
With the LCD shield plate removed, we get our first glance at what we believe is the 3D Touch IC:
-
343S00014 (Naming scheme is very similar to other Apple ICs, but the jury is still out on the manufacturer)
-
By the way, we want to (again!) send out a big thanks to our good friends at MacFixit Australia for letting us use their office in Melbourne for the teardown. They stock Mac and iPhone upgrades/accessories, and also carry our iFixit toolkits. Thanks MacFixit Australia!
-
-
-
-
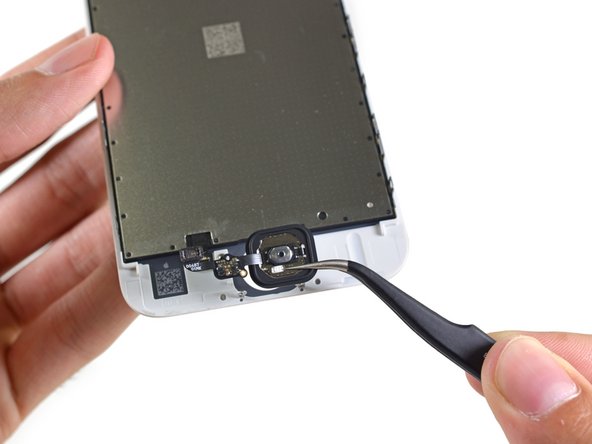
Removing the shield plate allows access to the home button.
-
Extracting the home button from its cozy cutout is a breeze. If issues develop with the home button, the absence of solder or adhesive will make it an easy fix.
-
So far, no real evidence of any chip responsible for the "faster and better than ever" Touch ID, but hey, if Apple said so it must be true.
-
-
-
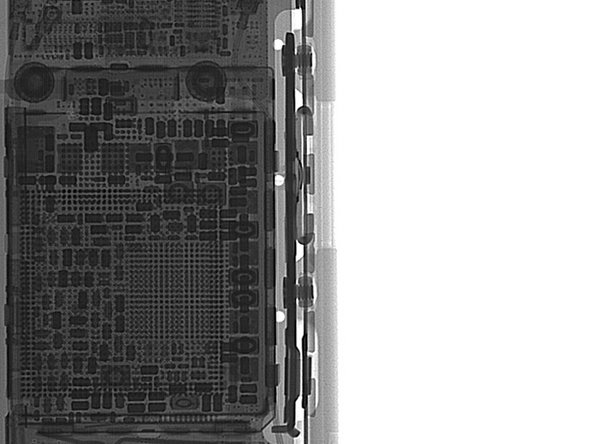
Back to rose gold tacks... It's time to take out the iPhone's new Taptic Engine.
-
A blast of X-ray radiation reveals a peek at the linear oscillating mechanism underlying Apple's latest mechanical wonder, said to reach peak output after just one oscillation.
-
Once removed, there is not much showing what is going on inside—just a couple spring contacts, some cryptic markings, and big label complete with the Apple logo mark.
-
-
-
It turns out the rumors were true—battery capacity is down a bit, likely in order to make room for new features like the Taptic Engine and slightly thicker display.
-
This iPhone's battery still has the same identity issues as last year's. It seems to think it's from Apple South Asia (Thailand) Limited, Apple Japan, and is made in Changsu, China.
-
Nevertheless, Apple says battery life holds steady at up to 14 hours of 3G talk time and 10 days of standby—the same as in the iPhone 6. A lot of this is likely due to more efficient silicon, which we're eager to get a look at...
-
-
-
Next out, the iPhone's 12 MP peeper!
-
This year's camera offers a substantial spec bump from the 6, including the first resolution increase since the iPhone 4s.
-
50% more focus pixels means faster, more accurate autofocus without a drop in quality.
-
The new iSight camera also brings the iPhone into the arena of 4K video recording, which has previously been dominated by Android phones.
-
Increased pixel density often comes at the cost of a decrease in individual pixel quality, due to crosstalk from competing photodiodes, but this new iSight camera includes some cool technologies that mitigate that issue.
-
-
-
And now, for a trip into the Twilight Zone...
-
We find a strange 2.5 mm hex head in the place of the more standard stand-off screw. Add a new tool to your smartphone arsenal...
-
And out comes the Lovecraftian antenna unit seen in previous models.
-
-
-
And now, for the moment we've all been waiting for... It's time to reveal some ICs on the front of the logic board:
-
Apple A9 APL0898 SoC + Samsung 2 GB LPDDR4 RAM (as denoted by the markings K3RG1G10BM-BGCH)
-
Qualcomm MDM9635M LTE Cat. 6 Modem (vs. the MDM9625M found in the iPhone 6)
-
InvenSense MP67B 6-axis Gyroscope and Accelerometer Combo (also found in iPhone 6)
-
Bosch Sensortec 3P7 LA 3-axis Accelerometer (likely BMA280)
-
TriQuint TQF6405 Power Amplifier Module
-
Skyworks SKY77812 Power Amplifier Module
-
Avago AFEM-8030 Power Amplifier Module
-
-
-
But wait, there's more! We'll double your order of chips absolutely free!
-
Toshiba THGBX5G7D2KLFXG 16 GB 19 nm NAND Flash
-
Universal Scientific Industrial 339S00043 Wi-Fi Module
-
NXP 66V10 NFC Controller (vs. 65V10 found in iPhone 6)
-
Apple/Dialog 338S00120 Power Management IC
-
Apple/Cirrus Logic 338S00105 Audio IC
-
Qualcomm PMD9635 Power Management IC
-
Skyworks SKY77357 Power Amplifier Module (likely an iteration of the SKY77354)
-
-
-
More ICs on the back of the logic board:
-
Murata 240 Front-End Module
-
RF Micro Devices RF5150 Antenna Switch
-
NXP 1610A3 (likely an iteration of the 1610A1 found in the iPhone 5s and 5c)
-
Apple/Cirrus Logic 338S1285 Audio IC (likely an iteration of the 338S1202 audio codec found in the iPhone 5s)
-
Texas Instruments 65730AOP Power Management IC
-
Qualcomm WTR3925 Radio Frequency Transceiver
-
Possibly a Bosch Sensortec Barometric Pressure Sensor (BMP280)
-
-
-
Teardown update! It turns out this logic board has a secret weapon: tiny seals surround each of the cable connectors. (They look like black foam hedges surrounding each of the gold connectors.) What can it mean?
-
Answer: we think those are waterproof silicone seals. They appear to match a patent Apple filed back in March for waterproofing board-to-board connectors.
-
This would seem to explain recent tests showing the 6s and 6s Plus to be dramatically more resistant to liquid damage.
-
-
-
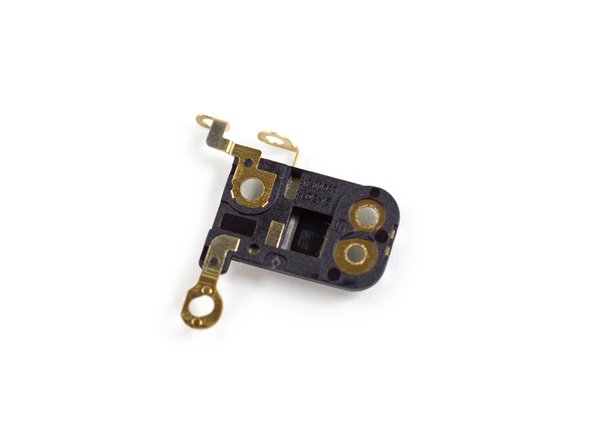
Time to pick out the last goodies. The first to drop: the
bassspeaker. -
A closer look at the speaker reveals... not much, actually.
-
The 6s speaker appears to be a very close cousin to the speaker from the iPhone 6. We suspect the difference in shape can be attributed to the addition of the Taptic Engine.
-
-
-
And now, the famous "everything cable" (a.k.a. the Lightning cable assembly), featuring not one, but two microphones!
-
Beyond the two microphones, the Lightning cable assembly plays host to an impressive array of components:
-
Lightning port to meet your charging/data transfer needs.
-
Headphone jack for your audio needs.
-
Cell antenna cables for all your cellular needs.
-
While the Lightning cable assembly is a fine example of engineering efficiency, it doesn't bode well for repairs. A single broken component means the whole cable will need to be replaced.
-
-
-
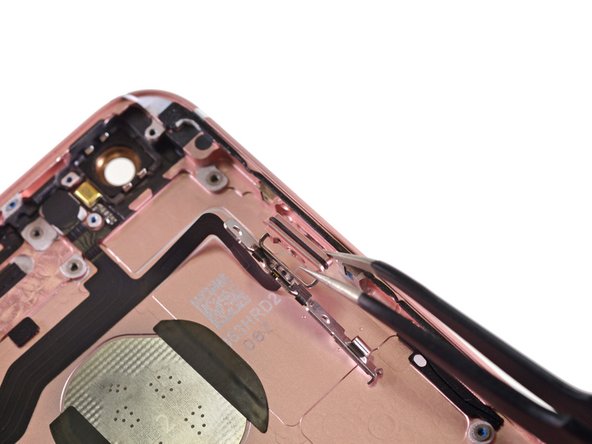
This teardown opens at the close: The final step is the Sleep/Wake button!
-
The large gasket of yore is gone, but there's still some waterproofing going on.
-
That said, this device doesn't come with a water resistance rating, and we do not recommend getting your 6s wet. Water and smartphones are not the best of friends.
-
-
-
The iPhone 6s keeps up the decent work, earning a 7 out of 10 on the Repairability scale:
-
The display assembly continues to be the first component out, simplifying screen repairs.
-
The battery is straightforward to access. Removing it requires a proprietary pentalobe screwdriver and knowledge of the adhesive removal technique, but is not difficult.
-
The Touch ID cable is still tucked out of the way, but is paired to the logic board, complicating repairs.
-
The iPhone 6s still uses proprietary Pentalobe screws on the exterior, requiring a specialty screwdriver to remove.
-


53 Comments
No mention of touch screen controller?
is that not it in step 9?