
What you need

This teardown is not a repair guide. To repair your Samsung Galaxy Note5, use our service manual.

  1. Samsung Galaxy Note5 Teardown, Samsung Galaxy Note5 Teardown: step 1, image 1 of 3 Samsung Galaxy Note5 Teardown, Samsung Galaxy Note5 Teardown: step 1, image 2 of 3 Samsung Galaxy Note5 Teardown, Samsung Galaxy Note5 Teardown: step 1, image 3 of 3
    • Remove SIM card tray at first. It's Samsung Galaxy Note 5 Duos, so there are two slots.

  2. Samsung Galaxy Note5 Teardown: step 2, image 1 of 3 Samsung Galaxy Note5 Teardown: step 2, image 2 of 3 Samsung Galaxy Note5 Teardown: step 2, image 3 of 3
    • Remove S pen.

  3. Samsung Galaxy Note5 Teardown: step 3, image 1 of 3 Samsung Galaxy Note5 Teardown: step 3, image 2 of 3 Samsung Galaxy Note5 Teardown: step 3, image 3 of 3
    • Heat the back cover and cut it sticker underneath. Really strong adhesive. Please be careful with the glass and edged back cover.

  4. Samsung Galaxy Note5 Teardown: step 4, image 1 of 1
    • Remove the back cover. And the white strip is adhesive sticker.

  5. Samsung Galaxy Note5 Teardown: step 5, image 1 of 2 Samsung Galaxy Note5 Teardown: step 5, image 2 of 2
    • Twist off all 20 screws together.

  6. Samsung Galaxy Note5 Teardown: step 6, image 1 of 3 Samsung Galaxy Note5 Teardown: step 6, image 2 of 3 Samsung Galaxy Note5 Teardown: step 6, image 3 of 3
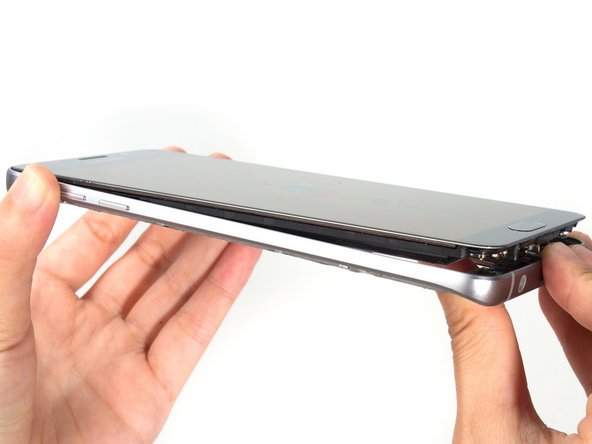
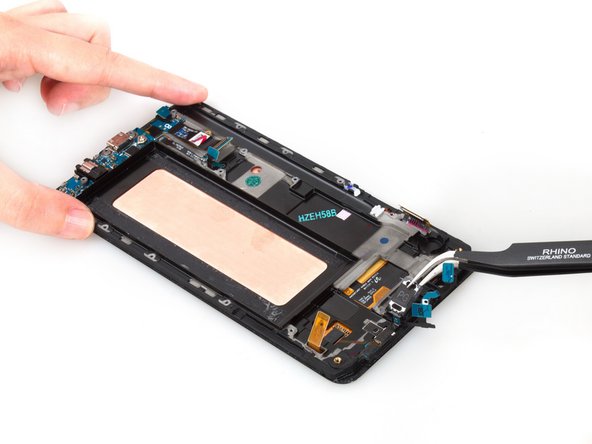
    • Push the front assembly out from middle housing. There are a little black adhesive sticker on every corners.

  7. Samsung Galaxy Note5 Teardown: step 7, image 1 of 3 Samsung Galaxy Note5 Teardown: step 7, image 2 of 3 Samsung Galaxy Note5 Teardown: step 7, image 3 of 3
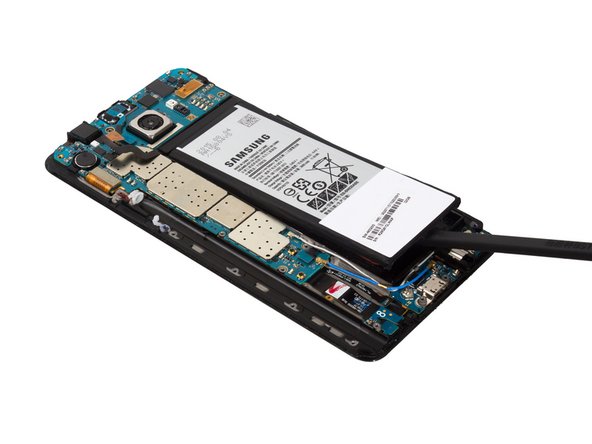
    • Release battery connector from motherboard and pry the battery up. Yes, there is also some adhesive underneath.

  8. Samsung Galaxy Note5 Teardown: step 8, image 1 of 2 Samsung Galaxy Note5 Teardown: step 8, image 2 of 2
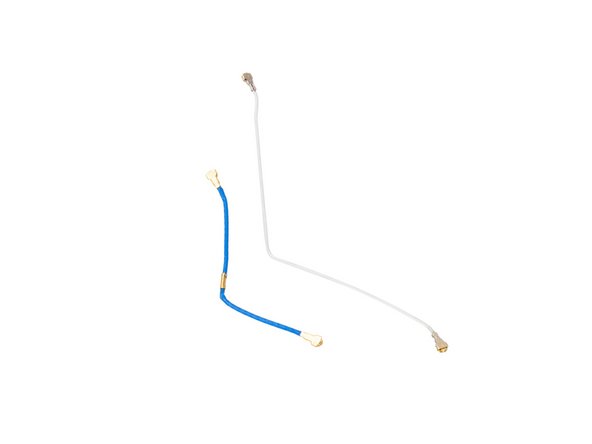
    • Remove two pieces of signal flex cables. And different versions Samsung Galaxy Note 5 may have only one piece signal cable.

  9. Samsung Galaxy Note5 Teardown: step 9, image 1 of 2 Samsung Galaxy Note5 Teardown: step 9, image 2 of 2
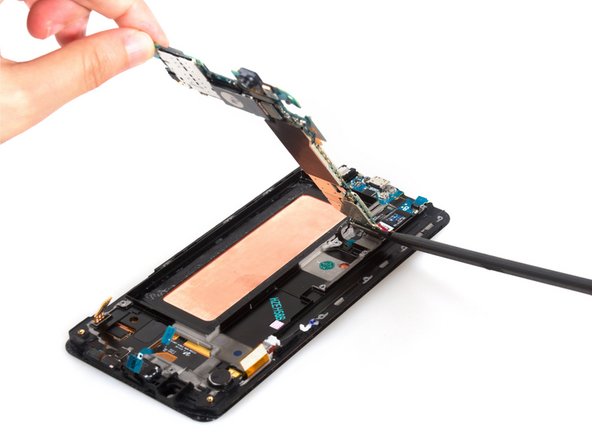
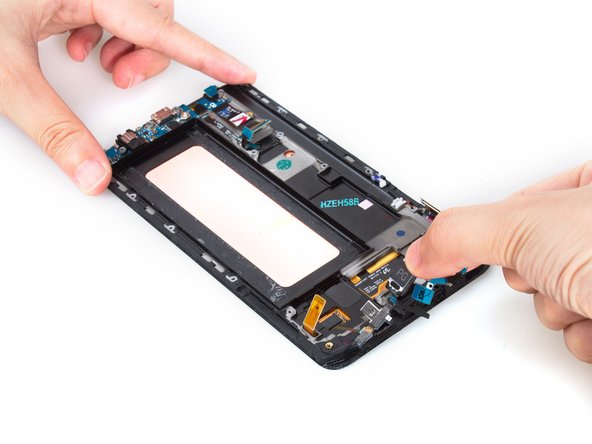
    • Release LCD connector, digitizer connector, earpiece assembly connector, home button connector on the motherboard.

  10. Samsung Galaxy Note5 Teardown: step 10, image 1 of 3 Samsung Galaxy Note5 Teardown: step 10, image 2 of 3 Samsung Galaxy Note5 Teardown: step 10, image 3 of 3
    • Release USB board connector on the back and remove the whole motherboard.

  11. Samsung Galaxy Note5 Teardown: step 11, image 1 of 3 Samsung Galaxy Note5 Teardown: step 11, image 2 of 3 Samsung Galaxy Note5 Teardown: step 11, image 3 of 3
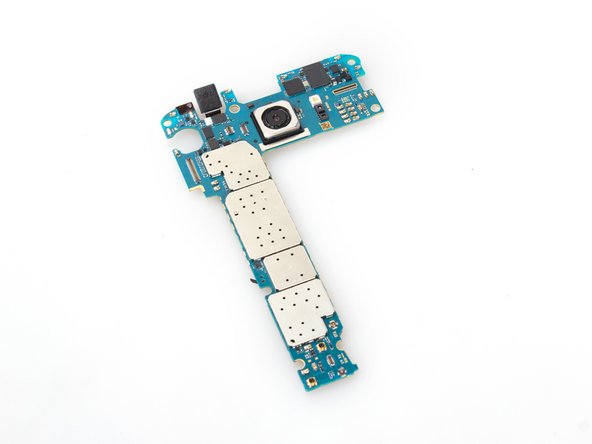
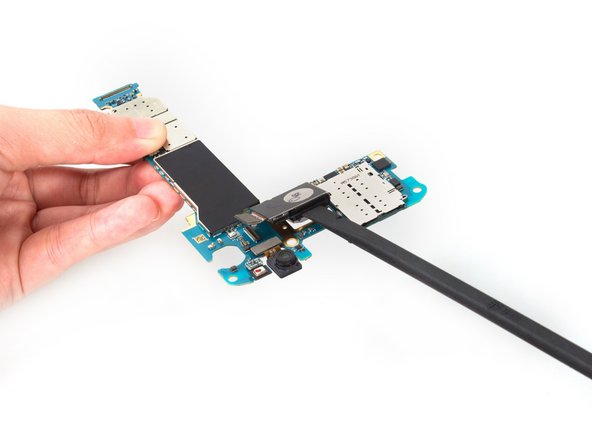
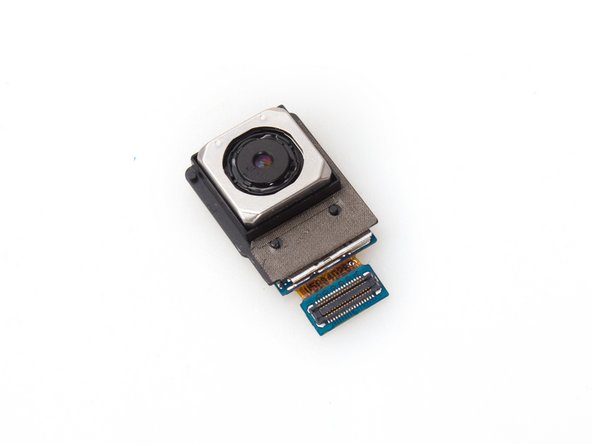
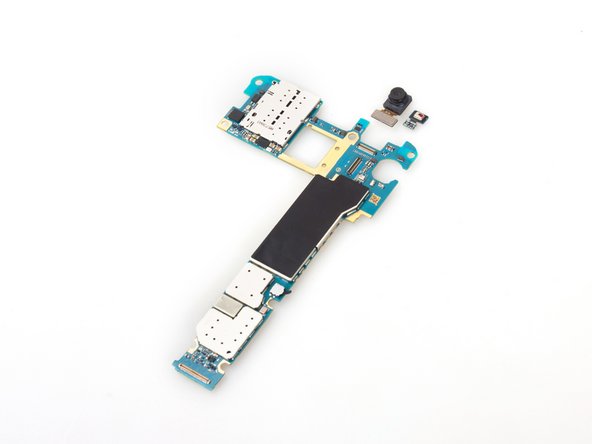
    • Remove the rear camera. There is a black plastic bracket around camera. So we have to remove them together. And there is a little adhesive underlying.

  12. Samsung Galaxy Note5 Teardown: step 12, image 1 of 2 Samsung Galaxy Note5 Teardown: step 12, image 2 of 2
    • Remove front camera and noise-canceling mic.

  13. Samsung Galaxy Note5 Teardown: step 13, image 1 of 2 Samsung Galaxy Note5 Teardown: step 13, image 2 of 2
    • Remove motor vibrator easily.

  14. Samsung Galaxy Note5 Teardown: step 14, image 1 of 3 Samsung Galaxy Note5 Teardown: step 14, image 2 of 3 Samsung Galaxy Note5 Teardown: step 14, image 3 of 3
    • Remove earpiece speaker assembly.

  15. Samsung Galaxy Note5 Teardown: step 15, image 1 of 1
    • That's Samsung Galaxy Note 5 earpiece assembly. It's integrated by speaker and sensors.

  16. Samsung Galaxy Note5 Teardown: step 16, image 1 of 2 Samsung Galaxy Note5 Teardown: step 16, image 2 of 2
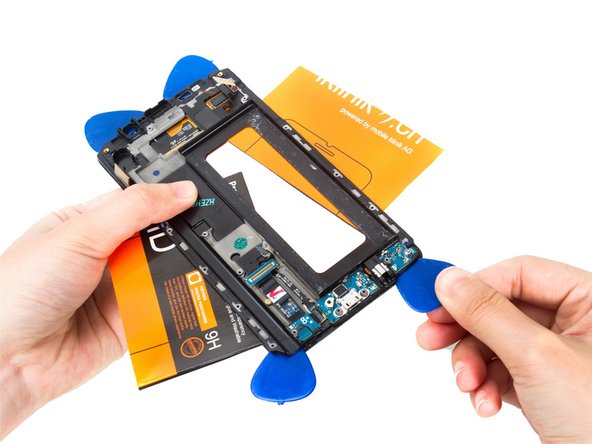
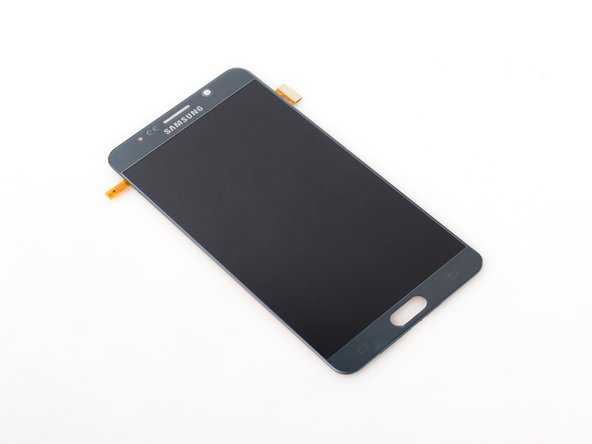
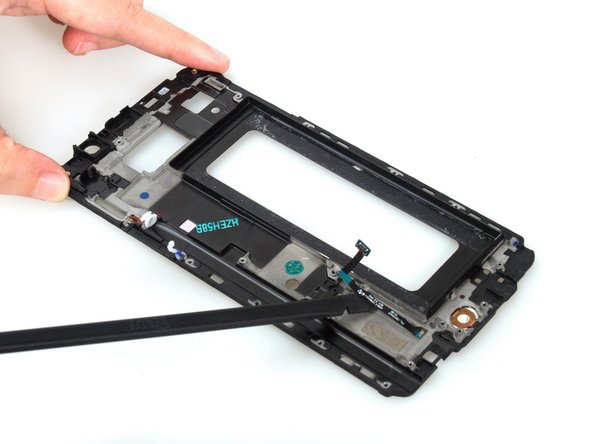
    • Now try to separate LCD screen from frame. The difficulty and risk to remove screen alone are getting nearly 5 stars (5 scores all together)respectively. The screen is weak and the adhesive are strong as well too much.

  17. Samsung Galaxy Note5 Teardown: step 17, image 1 of 2 Samsung Galaxy Note5 Teardown: step 17, image 2 of 2
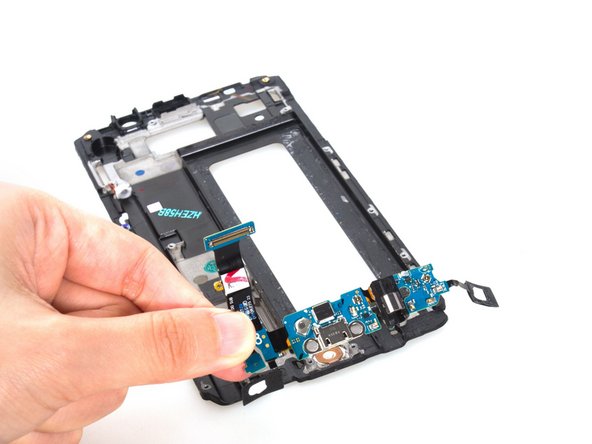
    • Since Samsung applied the design that the USB board come with soft keys together, DIY replace USB board and LCD screen alone become much more difficult.

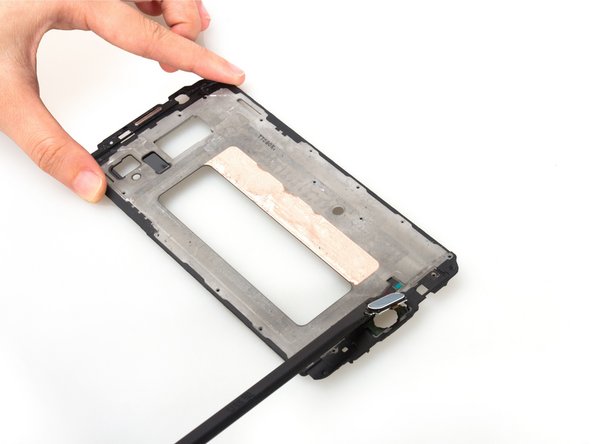
    • Be careful with the soft sensor keys on the bottom especially the flex.

    • In fact, the replacement of Samsung Galaxy Note 5 LCD screen, USB board or home button nearly the same with that teardown.

  18. Samsung Galaxy Note5 Teardown: step 18, image 1 of 2 Samsung Galaxy Note5 Teardown: step 18, image 2 of 2
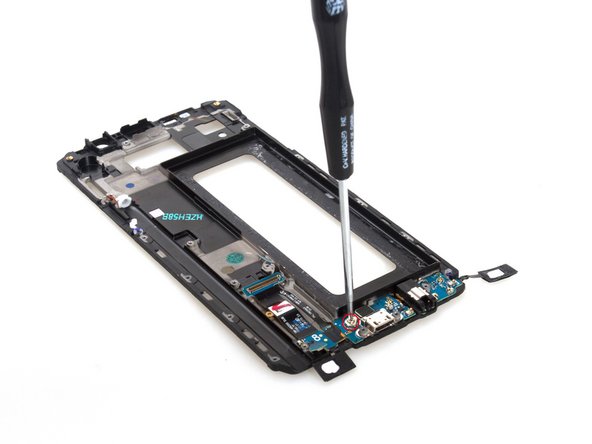
    • Loosen two soft sensor keys from frame carefully. And remove the last securing screw on USB board.

  19. Samsung Galaxy Note5 Teardown: step 19, image 1 of 2 Samsung Galaxy Note5 Teardown: step 19, image 2 of 2
    • Remove the USB board finally.

  20. Samsung Galaxy Note5 Teardown: step 20, image 1 of 3 Samsung Galaxy Note5 Teardown: step 20, image 2 of 3 Samsung Galaxy Note5 Teardown: step 20, image 3 of 3
    • Could you see the mark on the right of the home button? Push the button as its direction and can loosen it from securing slot easily. And then cut the adhesive sticker under the flex.

  21. Samsung Galaxy Note5 Teardown: step 21, image 1 of 2 Samsung Galaxy Note5 Teardown: step 21, image 2 of 2
    • Remove home button flex. Though it's a small component, it's really complicated and difficult to replace, even at the risk to break the screen.

  22. Samsung Galaxy Note5 Teardown: step 22, image 1 of 1
    • Done.

Sophia

Member since: 03/25/14

43,810 Reputation

62 Guides authored

View Statistics:

Past 24 Hours: 2

Past 7 Days: 28

Past 30 Days: 97

All Time: 148,742