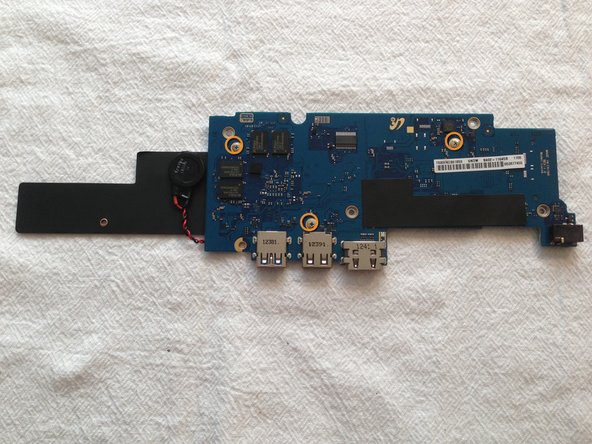
What you need

This teardown is not a repair guide. To repair your Samsung Chromebook Series 3, use our service manual.

  1. Samsung Chromebook Series 3 Teardown, Samsung Chromebook Series 3 Teardown: step 1, image 1 of 3 Samsung Chromebook Series 3 Teardown, Samsung Chromebook Series 3 Teardown: step 1, image 2 of 3 Samsung Chromebook Series 3 Teardown, Samsung Chromebook Series 3 Teardown: step 1, image 3 of 3
    • Ports on the side:

    • Headphone Jack

    • SD/SDHC/SDXC card slot

    • Ports on the Back:

    • USB 3.0

    • USB 2.0

    • HDMI

    • 40W DC in charging port

  2. Samsung Chromebook Series 3 Teardown: step 2, image 1 of 2 Samsung Chromebook Series 3 Teardown: step 2, image 2 of 2
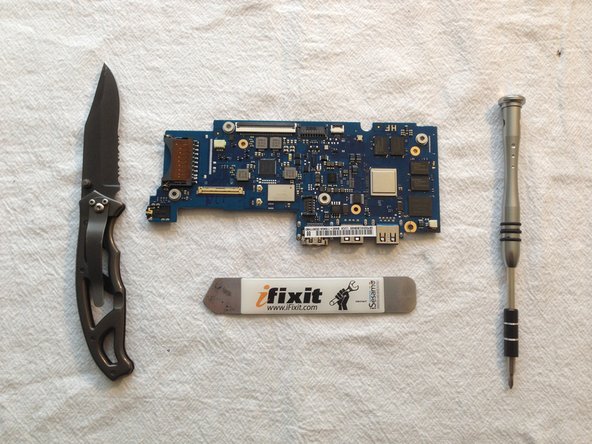
    • Time to grab the tools and open the case. Nothing fancy needed here, just a simple phillips screwdriver, a knife and a spudger.

    • Remove the 5 visible Phillips #0 screws.

    • Remove the 4 hidden screws under the rubber feet (one under each rubber foot). If you only partially pry up each foot enough to get to the screws, you can reuse the feet without having to re-glue them.

  3. Samsung Chromebook Series 3 Teardown: step 3, image 1 of 3 Samsung Chromebook Series 3 Teardown: step 3, image 2 of 3 Samsung Chromebook Series 3 Teardown: step 3, image 3 of 3
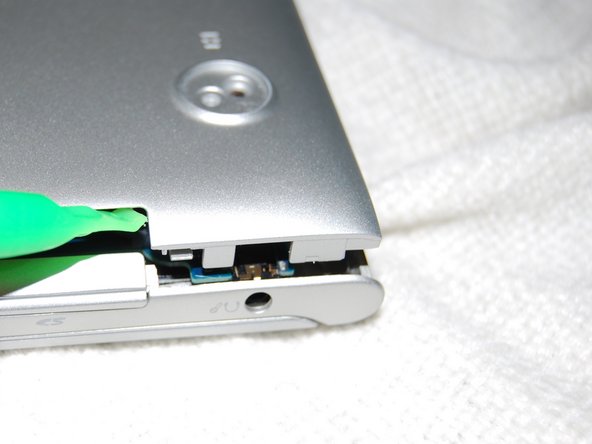
    • Disassemble this back piece, since it will ease a lot the prying of the bottom part

    • By doing this, you will avoid ending with couple of "clicks" broken, specially during the tear up

    • If you have the 3G model, be sure to remove the SIM card from this slot before going any further.

  4. Samsung Chromebook Series 3 Teardown: step 4, image 1 of 3 Samsung Chromebook Series 3 Teardown: step 4, image 2 of 3 Samsung Chromebook Series 3 Teardown: step 4, image 3 of 3
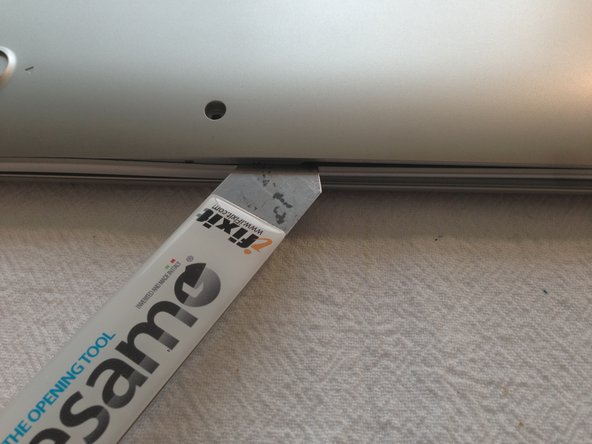
    • Time for some spudger love

    • Start with all the clicks in the back part, the rest will come out almost without force

  5. Samsung Chromebook Series 3 Teardown: step 5, image 1 of 2 Samsung Chromebook Series 3 Teardown: step 5, image 2 of 2
    • With the under case set aside, we now have an open case and a preview of the components to come

    • Remove the 6 battery screws then carefully pry the battery connector straight up to remove it.

  6. Samsung Chromebook Series 3 Teardown: step 6, image 1 of 3 Samsung Chromebook Series 3 Teardown: step 6, image 2 of 3 Samsung Chromebook Series 3 Teardown: step 6, image 3 of 3
    • Battery removed, it's now time to remove the screen and pull the main board

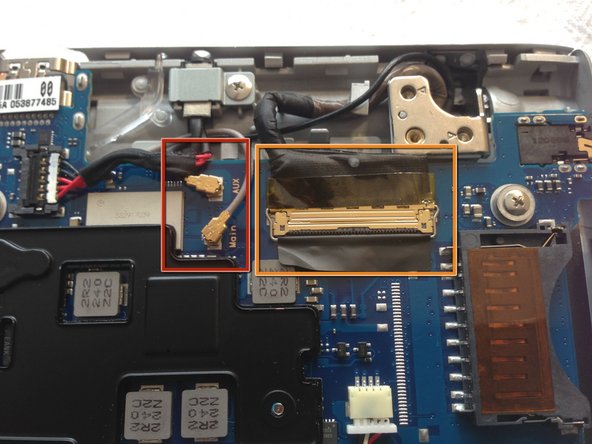
    • Disconnect the 2 antennae lines from the main board

    • Disconnect the screen cable

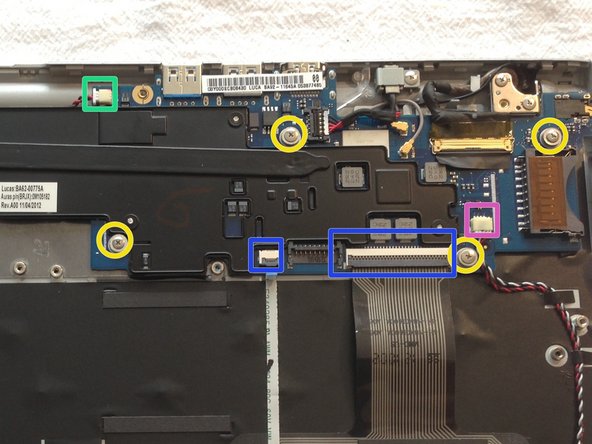
    • Remove the 5 screws holding the main board

    • Probably a good idea to disconnect the remaining 4 cables as well

    • Keyboard and trackpad ribbon cables

    • Audio cable

    • CMOS Battery Cable

  7. Samsung Chromebook Series 3 Teardown: step 7, image 1 of 3 Samsung Chromebook Series 3 Teardown: step 7, image 2 of 3 Samsung Chromebook Series 3 Teardown: step 7, image 3 of 3
    • We now have a main board with the heatsink attached

    • Remove the 3 screws and tape

    • Done!

  8. Samsung Chromebook Series 3 Teardown: step 8, image 1 of 2 Samsung Chromebook Series 3 Teardown: step 8, image 2 of 2
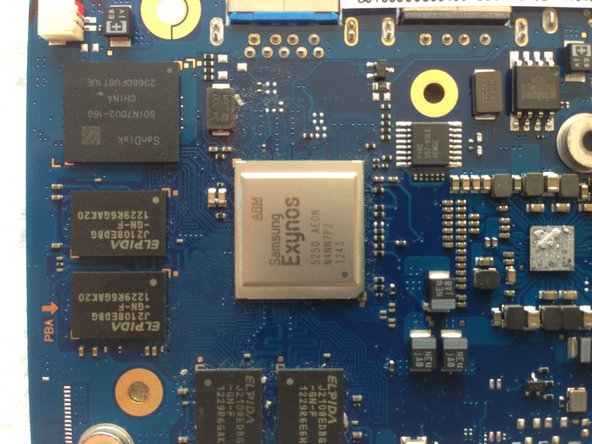
    • Top of the main board

    • Samsung Exynos 5250 AEON main proc

    • SanDisk SDIN7DU2-16G NAND Flash

    • 4 x ELPIDA J2108EDBG-GN-F (4 more on the rear)

    • MAX 77686 EWE 1237

    • TPS65090 TI 291

    • "Servo" dev/debug interface.

    • Connector for 3G daughterboard.

  9. Samsung Chromebook Series 3 Teardown: step 9, image 1 of 2 Samsung Chromebook Series 3 Teardown: step 9, image 2 of 2
    • The Embedded Controller, according to Google's documentation is STM32F100R8, although it is marked as "32F100B6"

    • Trusted Platform Module, Infineon SLB9635

    • Not much more on the rear but the rest of RAM

  10. Samsung Chromebook Series 3 Teardown: step 10, image 1 of 2 Samsung Chromebook Series 3 Teardown: step 10, image 2 of 2
    • Not teardown relevant per se, but these are beautiful traces

  11. Samsung Chromebook Series 3 Teardown: step 11, image 1 of 1
    • By removing this flexible metal ring sticker, you disable the Write Protect of the bootloader's flash.

    • This risks making the device unbootable, therefore bricking the device beyond repair. Of course, there are basically no other modifications that can be made to the interior of a Samsung Chromeboook 3 anyways.

Josh Thomas

Member since: 12/29/12

951 Reputation

3 Guides authored

View Statistics:

Past 24 Hours: 7

Past 7 Days: 42

Past 30 Days: 169

All Time: 123,511