
What you need

This teardown is not a repair guide. To repair your Pebble Time Round, use our service manual.

  1. Pebble Time Round Teardown, Pebble Time Round Teardown: step 1, image 1 of 2 Pebble Time Round Teardown, Pebble Time Round Teardown: step 1, image 2 of 2
    • The Pebble Time Round was last manufactured in 2015, and yet has a loyal following and afterlife.

    • Follow along to dissect your favorite e-paper smartwatch.

  2. Pebble Time Round Teardown, Open the case: step 2, image 1 of 1
    • Use a guitar pick and push on the left or right side, above the buttons to separate the case from the glass front.

    • Don’t push too far in, or you may hit some key internal components.

    • A heat gun will make this easier, but it’s not required.

  3. Pebble Time Round Teardown, Internal Springs: step 3, image 1 of 1
    • There are three small springsthat are embedded in the casing, just waiting to pop out. Once you separate the case enough to see inside, look and make sure they don’t come loose.

    • You can see in the picture where they are located. The screws are in green, and the holes for them are in red.

    • These are part of the bluetooth antenna, be careful not to lose them.

  4. Pebble Time Round Teardown, Separate the screens: step 4, image 1 of 3 Pebble Time Round Teardown, Separate the screens: step 4, image 2 of 3 Pebble Time Round Teardown, Separate the screens: step 4, image 3 of 3
    • The glass face should come off with a little coaxing from a pick.

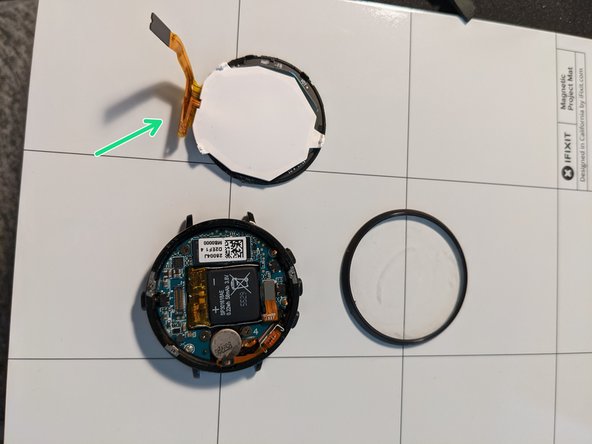
    • Gently separate the white touch panel from the e-paper screen. These fall apart easily but are held together by two cables.

    • Use a spudger to detach the small cable from the white touch panel. This cable is for the microphone and vibration motor.

    • Use a spudger to detach the second cable. This cable is for the display. The second picture shows it already detached.

    • Be extremely careful with the display cable. It is attached to the display at an extremely thin glass piece that breaks easily. If the glass breaks, it cannot be repaired.

  5. Pebble Time Round Teardown, Separate the e-paper screen from the bezel ring: step 5, image 1 of 1
    • Insert a pick between the e-paper screen and the bezel ring. Slide the pick all the way around the screen, separating the two pieces.

  6. Pebble Time Round Teardown, Separate the touch panel from the screen: step 6, image 1 of 1
    • There is a small amount of tape holding together the two cables that are attached to the epaper screen and the white touch panel. Pull this off with tweezers.

    • Gently pull apart the cables. They are only glued together and can be pulled apart easily.

  7. Pebble Time Round Teardown, You now have all the pieces of the screen apart: step 7, image 1 of 1
    • The glass face

    • The bezel ring

    • The e-paper screen

    • The touch panel

  8. Pebble Time Round Teardown, Remove the motherboard: step 8, image 1 of 3 Pebble Time Round Teardown, Remove the motherboard: step 8, image 2 of 3 Pebble Time Round Teardown, Remove the motherboard: step 8, image 3 of 3
    • Make sure you've fully discharged the battery before attempting any of this.

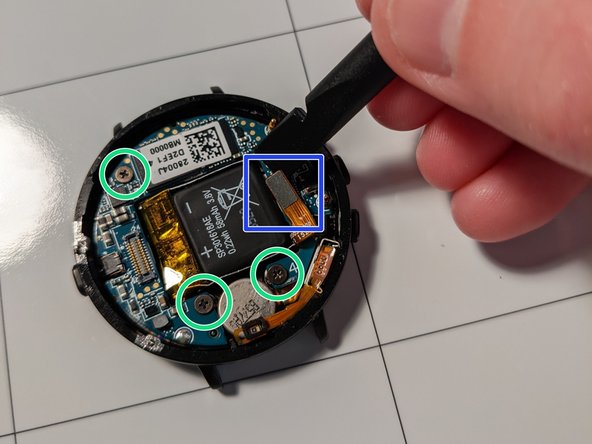
    • Use a spudger to disconnect the battery cable from the motherboard.

    • Use a small phillips screwdriver (PH000) to remove the screws.

    • The motherboard can now be lifted out of the case.

  9. Pebble Time Round Teardown, Examine the motherboard: step 9, image 1 of 1
    • After removing the motherboard, you can peel off the sticker with the QR code and attempt to read the tiny writing on the chip.

    • All I can see is that it is a Spansion chip, and Google tells me the company is now called Cypress Semiconductor.

    • Someone with better eyes can comment and tell me what theirs says.

  10. Pebble Time Round Teardown, Remove a metal clip: step 10, image 1 of 2 Pebble Time Round Teardown, Remove a metal clip: step 10, image 2 of 2
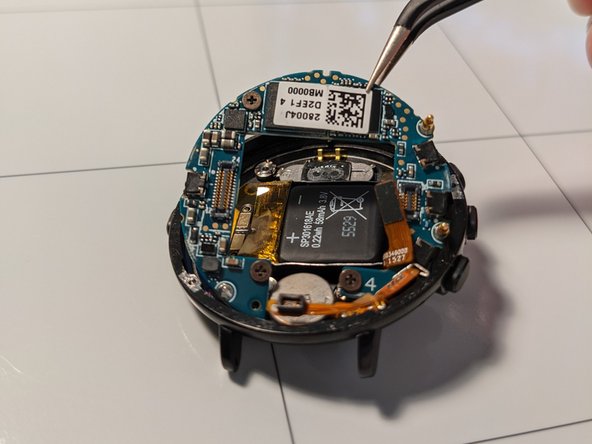
    • Use tweezers to pull the metal bracket that holds the microphone and vibration motor cable to the rear case. It should slide up and out of the case.

  11. Pebble Time Round Teardown, Remove the vibration motor: step 11, image 1 of 2 Pebble Time Round Teardown, Remove the vibration motor: step 11, image 2 of 2
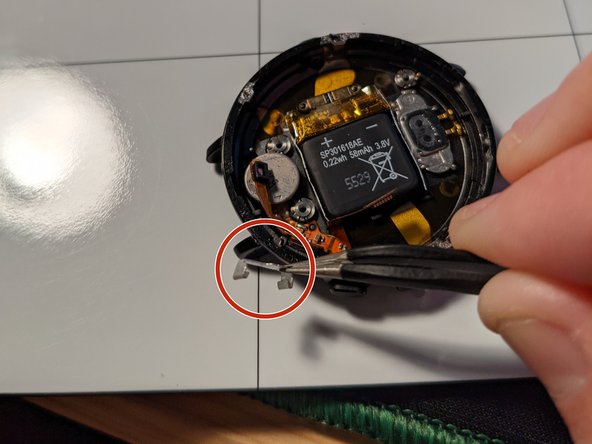
    • The vibration motor is glued to the case, use a spudger to pry it out

    • The rest of the cable assembly is glued to the case, but not as strongly. Once the vibration motor glue has been separated from the case, the rest of the cable assembly can be gently pulled out, too.

  12. Pebble Time Round Teardown, Remove the battery: step 12, image 1 of 1
    • All that is left is the battery, and it is also glued to the case.

    • Slide a thin tool under the contacts at the top of the battery. Now carefully slide a plastic pick under the battery and separate it from the case.

    • Take great care to not bend or puncture the battery, as this can cause a dangerous thermal event. Never use metal tools on a battery.

  13. Pebble Time Round Teardown, Take a look at your handiwork: step 13, image 1 of 1
    • The front glass, made of 2.5d gorilla glass.

    • The bezel ring. It comes in two colors (white and black) and three styles (numbers, plain, plain with ribs)

    • The e-paper screen, which has the ability to show 64 colors.

    • The touch panel

    • The vibration motor and mic cable assembly

    • The 58-mAh battery that somehow provides over 24 hours of use on a single 15 minute charge.

    • The motherboard, with a Spansion chip.

    • The full case. Congrats!

Emily Boda

Member since: 01/08/21

217 Reputation

1 Guide authored

View Statistics:

Past 24 Hours: 4

Past 7 Days: 13

Past 30 Days: 30

All Time: 2,391