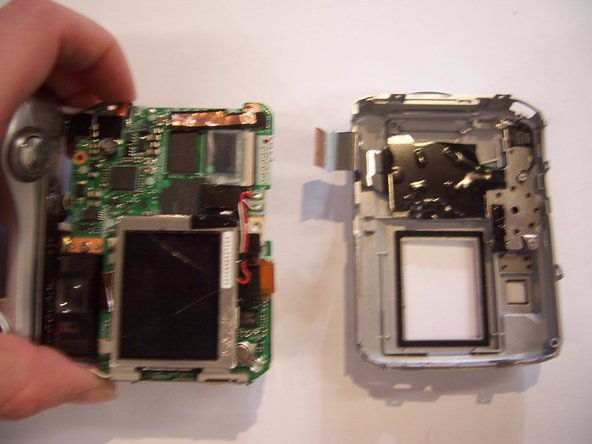
What you need

This teardown is not a repair guide. To repair your Nikon Coolpix 3200, use our service manual.

  1. Nikon Coolpix 3200 Teardown, Nikon Coolpix 3200 Teardown: step 1, image 1 of 1
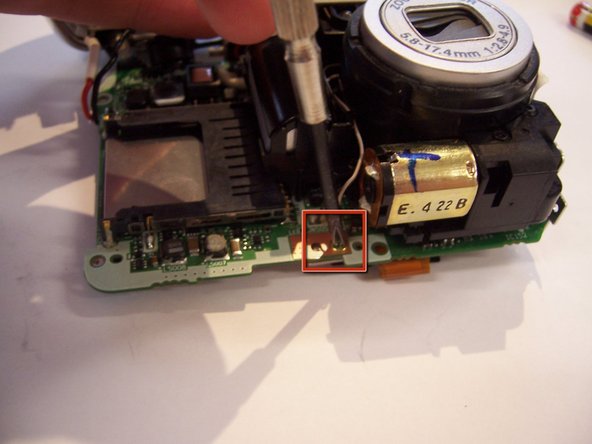
    • Use a small Philips screwdriver to remove the screws from the base of the camera.
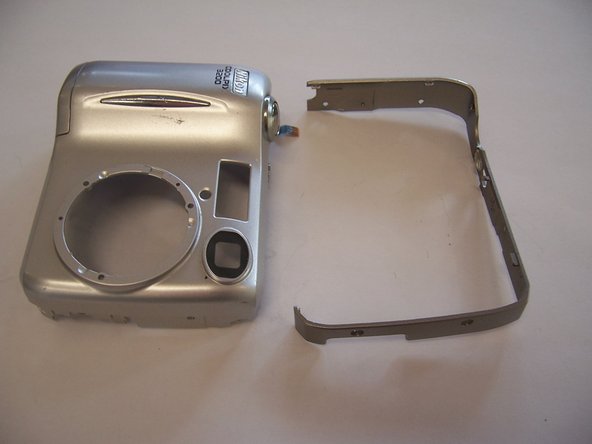
  2. Nikon Coolpix 3200 Teardown: step 2, image 1 of 1
    • Use a small Philips screwdriver to remove the screws from the side of the camera where the computer lead is.

  3. Nikon Coolpix 3200 Teardown: step 3, image 1 of 1
    • Use a small Philips screwdriver to remove the two screws from the side of the camera where the card reader is.

  4. Nikon Coolpix 3200 Teardown: step 4, image 1 of 1
    • Pry apart the outer casing. A gray plastic threaded piece (used to attach camera to a tripod) will fall out.

  5. Nikon Coolpix 3200 Teardown: step 5, image 1 of 1
    • Use a Phillips screwdriver to remove the two silver screws that connect the circuit board to the outer front casing.

  6. Nikon Coolpix 3200 Teardown: step 6, image 1 of 1
    • Pry apart the front outer casing from the circuit board. The camera will now be in three pieces.

  7. Nikon Coolpix 3200 Teardown: step 7, image 1 of 2 Nikon Coolpix 3200 Teardown: step 7, image 2 of 2
    • Pull the connecting strip on the circuit board which connects it to the back outer casing.

  8. Nikon Coolpix 3200 Teardown: step 8, image 1 of 2 Nikon Coolpix 3200 Teardown: step 8, image 2 of 2
    • Use a Philips screwdriver to remove the two screws next to the computer port and the brass screw on the circuit board.

  9. Nikon Coolpix 3200 Teardown: step 9, image 1 of 2 Nikon Coolpix 3200 Teardown: step 9, image 2 of 2
    • Use a Phillips screwdriver to unscrew the three screws that connect the outer lens rim to the front casing.

  10. Nikon Coolpix 3200 Teardown: step 10, image 1 of 2 Nikon Coolpix 3200 Teardown: step 10, image 2 of 2
    • Use a Philips screwdriver to remove the three screws that hold the flash cover to the outer front casing.

  11. Nikon Coolpix 3200 Teardown: step 11, image 1 of 1
    • Open the lid of the battery compartment and use a Philips screwdriver to remove the two screws at the bottom.

  12. Nikon Coolpix 3200 Teardown: step 12, image 1 of 1
    • Use a Phillips screwdriver to unscrew the two screws that connect the inside battery casing to the front of the outer casing.

  13. Nikon Coolpix 3200 Teardown: step 13, image 1 of 1
    • Pull off the battery casing from the inside of the outer front casing. The circuit board, battery casing, and front outer casing will be attached by a connecting strip along with red and black wires.

  14. Nikon Coolpix 3200 Teardown: step 14, image 1 of 1
    • Use scissors to cut the red and black wires away from the battery points of contact.

  15. Nikon Coolpix 3200 Teardown: step 15, image 1 of 1
    • Pull the connecting strip away from the circuit board to separate it from the front casing.

  16. Nikon Coolpix 3200 Teardown: step 16, image 1 of 1
    • Use a Philips screwdriver to unscrew the two screws that connect the photo button to the outer front casing.

  17. Nikon Coolpix 3200 Teardown: step 17, image 1 of 1
    • Firmly press on the photo button and this component will pop out.

  18. Nikon Coolpix 3200 Teardown: step 18, image 1 of 2 Nikon Coolpix 3200 Teardown: step 18, image 2 of 2
    • Use a scalpel to pry apart the metal inner part of the button from the plastic outer piece.

  19. Nikon Coolpix 3200 Teardown: step 19, image 1 of 2 Nikon Coolpix 3200 Teardown: step 19, image 2 of 2
    • Use your fingernails to peel the outer rim from the front casing.

    • Pull the connecting strip out of the circuit board to separate it from the LCD screen.

    • Use your fingernails to pry apart the back metal piece of the screen (covered by a black plastic film) from the front section of the screen.

  20. Nikon Coolpix 3200 Teardown: step 22, image 1 of 1
    • Pry apart the back black piece and front white piece of the screen. Inside the screen there are four sheets of plastic: one opaque, two mirrored, and one thicker plastic sheet which has a foil piece attached to it.

    • Use a hammer and chisel to separate the lens piece of the camera from the circuit board.

    • Use your fingernails to pry off the motor, motor cover, and flash piece from the lens piece of the camera.

Milly Whitehead

Member since: 03/09/10

47 Reputation

1 Guide authored

One Comment

Oh, and then just do everything in reverse to put it back together again? That hammer and chisel bit bothers me a bit.

mrs_prolo - Reply

Add Comment

View Statistics:

Past 24 Hours: 1

Past 7 Days: 3

Past 30 Days: 22

All Time: 5,916