
Motorola Moto X Style (Moto X Pure Edition) Teardown

What you need

Video Overview

  1. Motorola Moto X Style (Moto X Pure Edition) Teardown, Motorola Moto X Style (Moto X Pure Edition) Teardown: step 1, image 1 of 1
    • Remove SIM card tray

  2. Motorola Moto X Style (Moto X Pure Edition) Teardown: step 2, image 1 of 3 Motorola Moto X Style (Moto X Pure Edition) Teardown: step 2, image 2 of 3 Motorola Moto X Style (Moto X Pure Edition) Teardown: step 2, image 3 of 3
    • Insert eject pin to the small hole to open a gap.

    • You can use heat gun/hair dryer to heat up the rear cover and help adhesive melting.

    • Use guitar picks to cut the strong adhesive underneath this rear cover.

    • Remove back cover.

  3. Motorola Moto X Style (Moto X Pure Edition) Teardown: step 3, image 1 of 3 Motorola Moto X Style (Moto X Pure Edition) Teardown: step 3, image 2 of 3 Motorola Moto X Style (Moto X Pure Edition) Teardown: step 3, image 3 of 3
    • Use T3 Torx screwdriver to twist off all 21 screws.

    • You don't need to remove the silver screw holding the volume buttons down for most tasks, such as replacing the screen, battery, or USB port.

    • Remove 2 protective rubbers securing the flashlight flex and battery flex connector.

  4. Motorola Moto X Style (Moto X Pure Edition) Teardown: step 4, image 1 of 2 Motorola Moto X Style (Moto X Pure Edition) Teardown: step 4, image 2 of 2
    • Release the flashlight flex and battery flex connector.

  5. Motorola Moto X Style (Moto X Pure Edition) Teardown: step 5, image 1 of 3 Motorola Moto X Style (Moto X Pure Edition) Teardown: step 5, image 2 of 3 Motorola Moto X Style (Moto X Pure Edition) Teardown: step 5, image 3 of 3
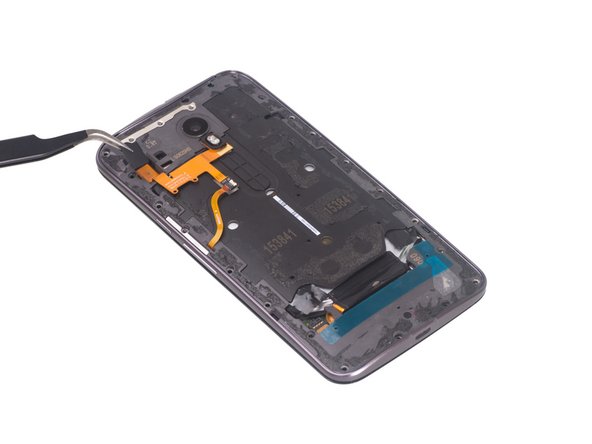
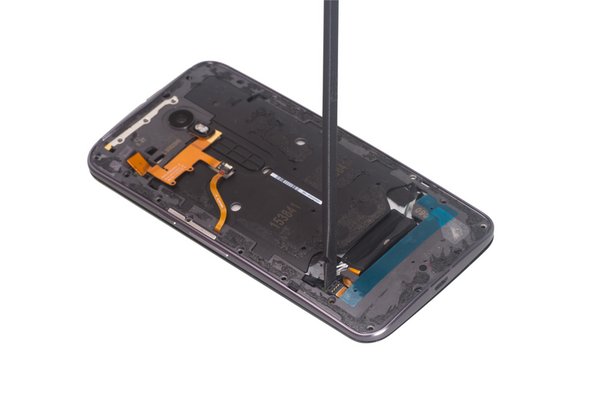
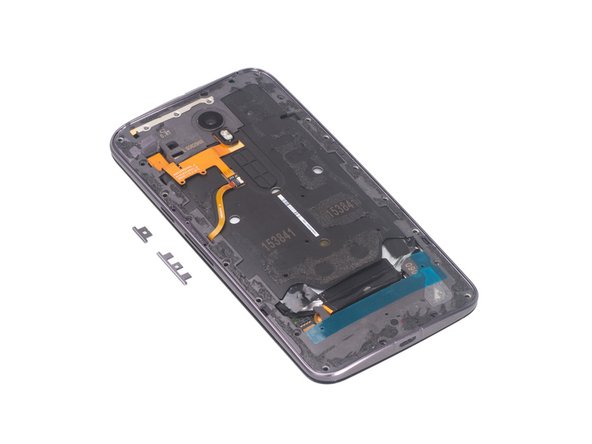
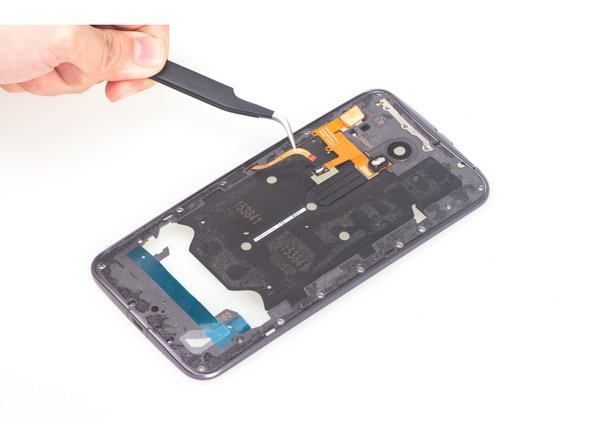
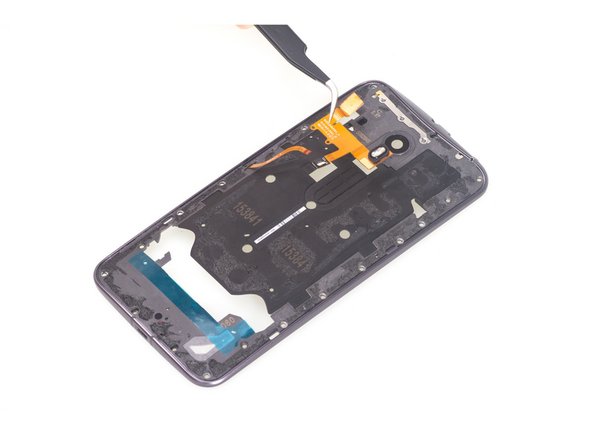
    • Remove metal bar securing side buttons, careful of the extremely tiny springs that provide pressure from the frame to the buttons, then be free to remove side buttons.

    • Remove middle frame bezel.

  6. Motorola Moto X Style (Moto X Pure Edition) Teardown: step 6, image 1 of 3 Motorola Moto X Style (Moto X Pure Edition) Teardown: step 6, image 2 of 3 Motorola Moto X Style (Moto X Pure Edition) Teardown: step 6, image 3 of 3
    • Pull out 2 battery sticker strips.

    • Loosen the NFC flex connector attached to the battery.

    • Pry up and remove battery.

  7. Motorola Moto X Style (Moto X Pure Edition) Teardown: step 7, image 1 of 3 Motorola Moto X Style (Moto X Pure Edition) Teardown: step 7, image 2 of 3 Motorola Moto X Style (Moto X Pure Edition) Teardown: step 7, image 3 of 3
    • There is no adhesive sticking headphone jack, just use tweezers to remove it.

    • Then peel off the NFC antenna.

  8. Motorola Moto X Style (Moto X Pure Edition) Teardown: step 8, image 1 of 3 Motorola Moto X Style (Moto X Pure Edition) Teardown: step 8, image 2 of 3 Motorola Moto X Style (Moto X Pure Edition) Teardown: step 8, image 3 of 3
    • Release flashlight flex connector connecting side button flex.

    • Take away flashlight flex.

  9. Motorola Moto X Style (Moto X Pure Edition) Teardown: step 9, image 1 of 2 Motorola Moto X Style (Moto X Pure Edition) Teardown: step 9, image 2 of 2
    • Pry up and remove power&volume button flex.

  10. Motorola Moto X Style (Moto X Pure Edition) Teardown: step 10, image 1 of 3 Motorola Moto X Style (Moto X Pure Edition) Teardown: step 10, image 2 of 3 Motorola Moto X Style (Moto X Pure Edition) Teardown: step 10, image 3 of 3
    • Twist off one Torx T3 screw securing motherboard.

    • Release the LCD screen connector here.

  11. Motorola Moto X Style (Moto X Pure Edition) Teardown: step 11, image 1 of 2 Motorola Moto X Style (Moto X Pure Edition) Teardown: step 11, image 2 of 2
    • Release this connector.

    • Separate motherboard assembly from LCD screen assembly.

  12. Motorola Moto X Style (Moto X Pure Edition) Teardown: step 12, image 1 of 2 Motorola Moto X Style (Moto X Pure Edition) Teardown: step 12, image 2 of 2
    • Release front camera flex and remove it.

  13. Motorola Moto X Style (Moto X Pure Edition) Teardown: step 13, image 1 of 2 Motorola Moto X Style (Moto X Pure Edition) Teardown: step 13, image 2 of 2
    • There is adhesive underneath. Pry up and then remove top speaker.

  14. Motorola Moto X Style (Moto X Pure Edition) Teardown: step 14, image 1 of 3 Motorola Moto X Style (Moto X Pure Edition) Teardown: step 14, image 2 of 3 Motorola Moto X Style (Moto X Pure Edition) Teardown: step 14, image 3 of 3
    • Peel off protective tape on the rear camera.

    • Release rear camera flex and then remove the camera.

  15. Motorola Moto X Style (Moto X Pure Edition) Teardown: step 15, image 1 of 3 Motorola Moto X Style (Moto X Pure Edition) Teardown: step 15, image 2 of 3 Motorola Moto X Style (Moto X Pure Edition) Teardown: step 15, image 3 of 3
    • Pry up and remove loudspeaker.

    • Now it leaves the motherboard assembly with some parts like charing port and vibration motor.

  16. Motorola Moto X Style (Moto X Pure Edition) Teardown: step 16, image 1 of 3 Motorola Moto X Style (Moto X Pure Edition) Teardown: step 16, image 2 of 3 Motorola Moto X Style (Moto X Pure Edition) Teardown: step 16, image 3 of 3
    • Remove the LCD shield easily.

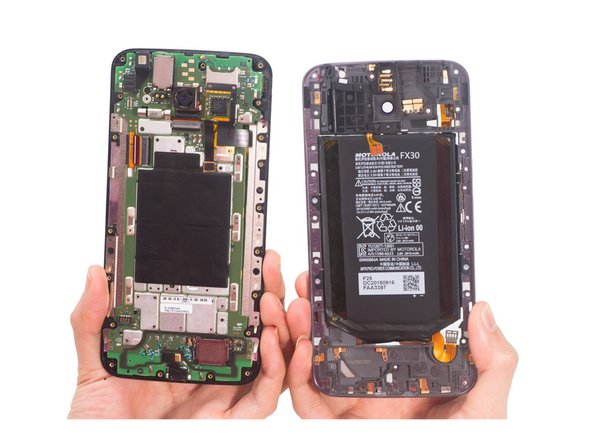
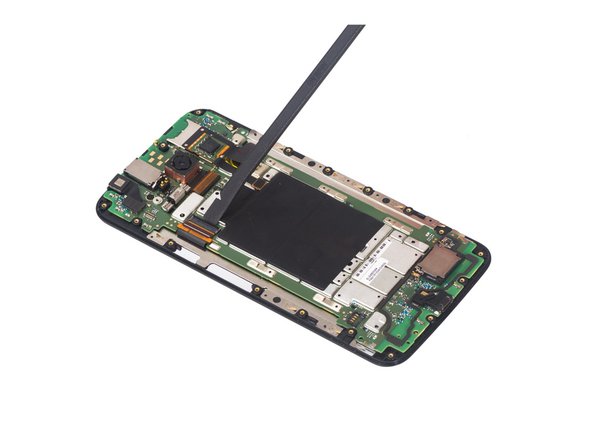
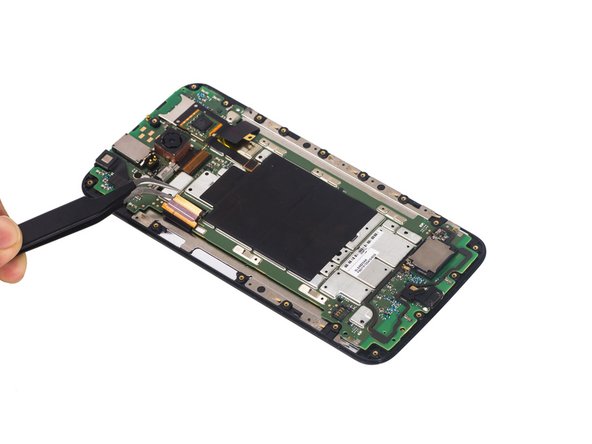
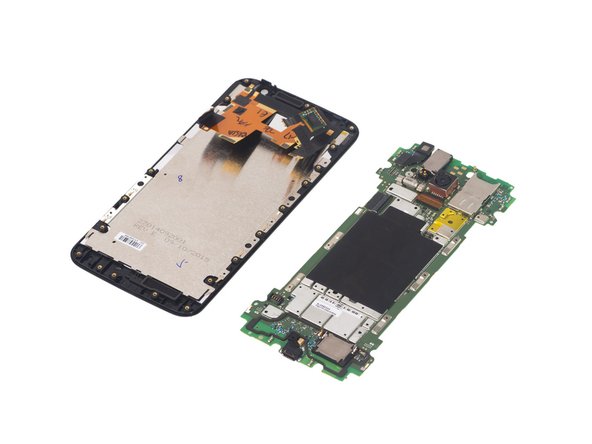
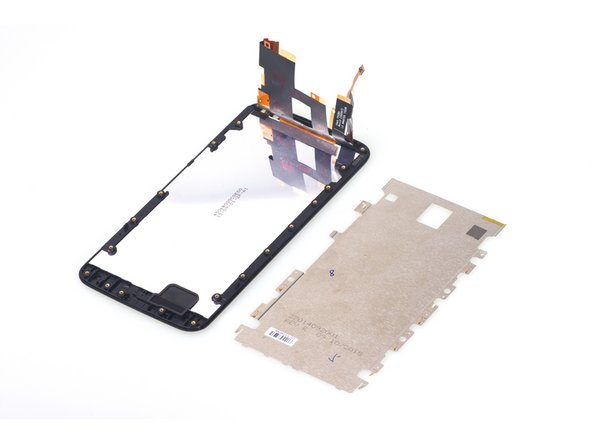
    • Finally it leaves the LCD screen with digitizer and front housing.

    • It is better to replace Moto X Style LCD screen and digitizer assembly and front housing together, if you have no confidence to remove it without breaking the screen during the repair work.

Finish Line

36 other people completed this guide.

Witrigs

Member since: 11/24/15

69,454 Reputation

378 Guides authored

78 Comments

Can anybody help with how you replace the speaker grills? As it is not included in the replacement assembly screens?

kirstenrossouw - Reply

I believe they are underneath the 'housing frame' which is the piece of plastic around the edge of the glass.

Philip Clarke -

Hi just take them off with tweezers

George Fernandez -

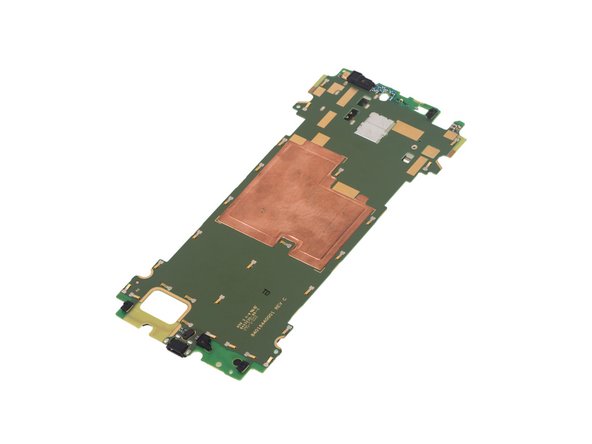
Can anyone tell by looking at the board if the X Pure has a FM chip that is wired? Currently all anyone is saying on forums is that the phone isn't FM enabled (which could only mean it isn't turned on), not that is is missing the chip or that the chip hasn't been wired to allow the FM to be enabled.

nataku1245 - Reply

Does anybody know what lengths the 21 screws are?

Robert Petitpas - Reply

Add Comment

View Statistics:

Past 24 Hours: 2

Past 7 Days: 14

Past 30 Days: 39

All Time: 80,693