
What you need

This teardown is not a repair guide. To repair your Motorola Moto X Force, use our service manual.

  1. Motorola Moto X Force Teardown, Remove SIM card tray.: step 1, image 1 of 2 Motorola Moto X Force Teardown, Remove SIM card tray.: step 1, image 2 of 2
    • Remove it or it will be a barrier to remove motherboard.

  2. Motorola Moto X Force Teardown, Remove back cover.: step 2, image 1 of 3 Motorola Moto X Force Teardown, Remove back cover.: step 2, image 2 of 3 Motorola Moto X Force Teardown, Remove back cover.: step 2, image 3 of 3
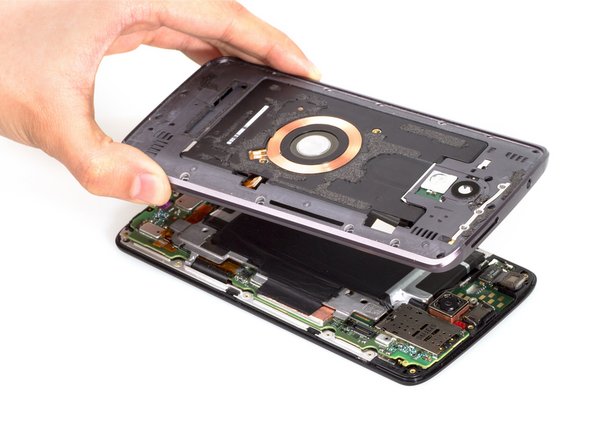
    • Use heat gun to heat up back cover firstly.

    • Insert metal opening tool to open a gap and cut adhesives around.

    • Take care when sliding tool under the back cover, there are delicate antenna and other components that could be damaged by your glue slicing tool

  3. Motorola Moto X Force Teardown, Remove metal logo cover.: step 3, image 1 of 2 Motorola Moto X Force Teardown, Remove metal logo cover.: step 3, image 2 of 2
    • Use tweezers to cut adhesives underneath.

  4. Motorola Moto X Force Teardown, Remove middle frame.: step 4, image 1 of 3 Motorola Moto X Force Teardown, Remove middle frame.: step 4, image 2 of 3 Motorola Moto X Force Teardown, Remove middle frame.: step 4, image 3 of 3
    • Twist off 17 screws by T3 Torx screwdriver.

    • Take away rubber bracket securing NFC antenna and release NFC antenna connector.

  5. Motorola Moto X Force Teardown: step 5, image 1 of 3 Motorola Moto X Force Teardown: step 5, image 2 of 3 Motorola Moto X Force Teardown: step 5, image 3 of 3
    • Take away rubber bracket securing MIC flex and release microphone flex cable connector.

  6. Motorola Moto X Force Teardown, Remove side button.: step 6, image 1 of 1
    • After middle frame's separating from the rest of parts, side buttons are loose and easy to remove.

  7. Motorola Moto X Force Teardown, Remove microphone flex cable ribbon.: step 7, image 1 of 3 Motorola Moto X Force Teardown, Remove microphone flex cable ribbon.: step 7, image 2 of 3 Motorola Moto X Force Teardown, Remove microphone flex cable ribbon.: step 7, image 3 of 3
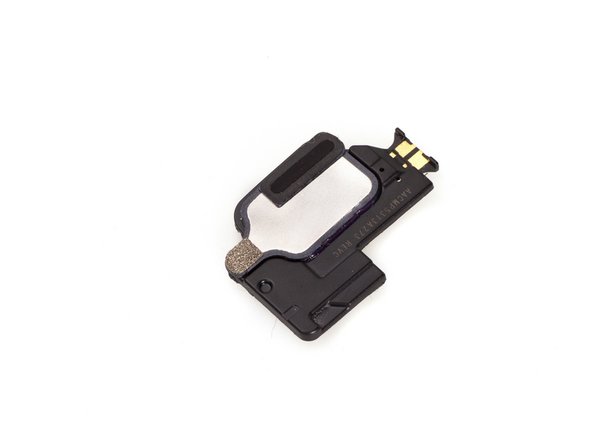
    • Release MIC connector.

    • There are adhesives existed underneath.

  8. Motorola Moto X Force Teardown, Remove headphone jack.: step 8, image 1 of 2 Motorola Moto X Force Teardown, Remove headphone jack.: step 8, image 2 of 2
    • Use tweezers to pry this part up.

  9. Motorola Moto X Force Teardown, Remove vibration motor.: step 9, image 1 of 2 Motorola Moto X Force Teardown, Remove vibration motor.: step 9, image 2 of 2
    • The vibrator is only fastened by the plastic bracket.

  10. Motorola Moto X Force Teardown, Remove NFC antenna along with  plastic board attached.: step 10, image 1 of 2 Motorola Moto X Force Teardown, Remove NFC antenna along with  plastic board attached.: step 10, image 2 of 2
    • There are a little bit adhesives around, but you can peel this part easily.

  11. Motorola Moto X Force Teardown, Remove metal bracket securing on motherboard.: step 12, image 1 of 3 Motorola Moto X Force Teardown, Remove metal bracket securing on motherboard.: step 12, image 2 of 3 Motorola Moto X Force Teardown, Remove metal bracket securing on motherboard.: step 12, image 3 of 3
    • Peel off the tape.

    • Twist off 2 screws.

    • Take care not to apply any lateral force to the motherboard to metal bracket electrical connector when removing the motherboard bracket. If abused, the tiny spring could break off at a later date and causing short circuits within the phone. The connector is to the right of the side button connector and above the copper film screened component.

  12. Motorola Moto X Force Teardown, Release touch digitizer connector.: step 14, image 1 of 2 Motorola Moto X Force Teardown, Release touch digitizer connector.: step 14, image 2 of 2
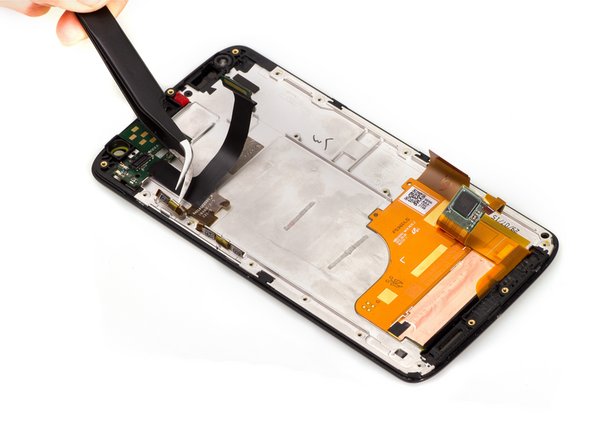
    • The LCD assembly has two connectors, here is touchscreen connector.

  13. Motorola Moto X Force Teardown, ReleaseLCD display connector.: step 15, image 1 of 2 Motorola Moto X Force Teardown, ReleaseLCD display connector.: step 15, image 2 of 2
    • This one is display connector.

  14. Motorola Moto X Force Teardown, Release motherboard assembly.: step 16, image 1 of 3 Motorola Moto X Force Teardown, Release motherboard assembly.: step 16, image 2 of 3 Motorola Moto X Force Teardown, Release motherboard assembly.: step 16, image 3 of 3
    • Release signal cable connector.

    • Pry the motherboard assembly up.

  15. Motorola Moto X Force Teardown, Remove rear camera.: step 17, image 1 of 2 Motorola Moto X Force Teardown, Remove rear camera.: step 17, image 2 of 2
    • Moto X Force packs a 21-megapixel primary camera on the rear.

  16. Motorola Moto X Force Teardown, Release signal cable connector and remove it.: step 18, image 1 of 2 Motorola Moto X Force Teardown, Release signal cable connector and remove it.: step 18, image 2 of 2
    • Use tweezers to release the connector.

  17. Motorola Moto X Force Teardown, Remove proximity sensor flex.: step 19, image 1 of 2 Motorola Moto X Force Teardown, Remove proximity sensor flex.: step 19, image 2 of 2
    • With this sensor flex, you can wave your hand on the top of the screen to wake up the screen.

  18. Motorola Moto X Force Teardown, Pry up and remove battery.: step 20, image 1 of 2 Motorola Moto X Force Teardown, Pry up and remove battery.: step 20, image 2 of 2
    • Non-removable Li-Ion 3760 mAh battery.

  19. Motorola Moto X Force Teardown, Remove front-facing camera.: step 21, image 1 of 2 Motorola Moto X Force Teardown, Remove front-facing camera.: step 21, image 2 of 2
    • A 5-megapixel front shooter for selfies.

  20. Motorola Moto X Force Teardown, Remove earpiece.: step 22, image 1 of 2 Motorola Moto X Force Teardown, Remove earpiece.: step 22, image 2 of 2
    • Be careful to pry this part up, because it tends to fall apart easily.

  21. Motorola Moto X Force Teardown, Remove side button flex.: step 23, image 1 of 3 Motorola Moto X Force Teardown, Remove side button flex.: step 23, image 2 of 3 Motorola Moto X Force Teardown, Remove side button flex.: step 23, image 3 of 3
    • Use tweezers to cut adhesives underneath.

  22. Motorola Moto X Force Teardown: step 24, image 1 of 2 Motorola Moto X Force Teardown: step 24, image 2 of 2
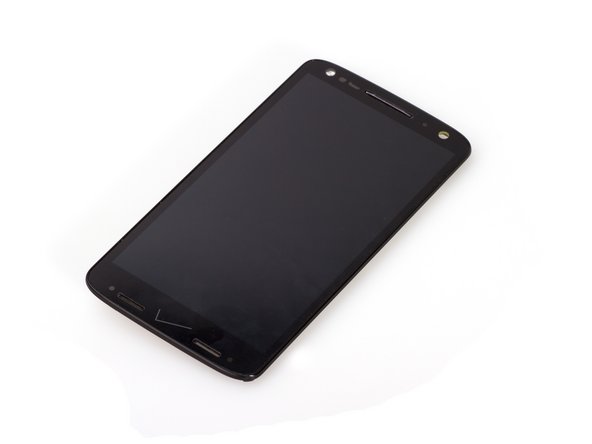
    • Here is LCD screen with LCD supporting frame. They are attached tightly, so we haven't separate them.

  23. Motorola Moto X Force Teardown: step 25, image 1 of 1
    • Done.

Witrigs

Member since: 11/24/15

69,454 Reputation

378 Guides authored

View Statistics:

Past 24 Hours: 1

Past 7 Days: 2

Past 30 Days: 6

All Time: 18,789