Introduction
We got our hands on a MacBook Pro 13" Unibody and decided to compare it to a MacBook Unibody -- from the inside! Follow us on Twitter to get all the latest updates as we're doing the teardown!
What you need
-
-
This just in: the new MacBook Pro 13" Unibody!
-
We'll be comparing it to the MacBook Unibody throughout the teardown.
-
We have a feeling it will be very similar in most regards.
-
Check out our MacBook Unibody repair guides if you'd like to answer any of your repair-related questions!
-
-
-
Some comparisons to the MacBook Unibody:
-
No access door for the battery on the bottom.
-
The addition of an SD card slot (and the omission of digital/mic port) is readily apparent.
-
FireWire is back!
-
Computer lock is now on the other side.
-
The SD card sticks out almost .5"! This is a cheeseball design for a MacBook "Pro" if you ask us.
-
-
-
Let's get down to business.
-
There's no door latch, going along with the "not user-serviceable battery" theme.
-
We had to dig out a Phillips screwdriver for this step.
-
A quick flip of the lid and...
-
-
-
...It's almost exactly the same as our old, "lesser" MacBook Unibody.
-
The battery compartment is identical to the one we uncovered in the MacBook Pro 17" Teardown. We'll venture a guess that it looks the same in the updated 15" Pro as well.
-
Remove two tri-wing screws and the battery is suddenly replaceable. The sticker comes right off, just as in the 17" Pro -- because it's adhered to just the battery and midwall, not to the optical drive.
-
-
-
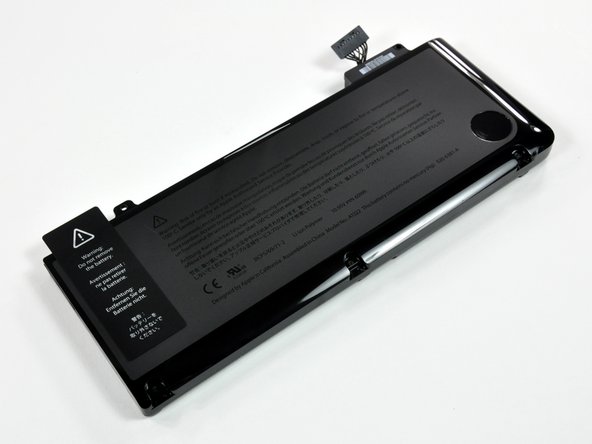
7-hour battery specifications:
-
Model A1322
-
10.95V
-
60Wh
-
"This battery contains no mercury (Hg)."
-
Although the batteries look similar, they're definitely not interchangeable. The MacBook Pro's battery is too large (and different in shape) to fit into the older MacBook Unibody.
-
-
-
-
Removing the hard drive...
-
It's still considered user-replaceable by Apple, but replacement does require removing 10 more screws than on the MacBook Unibody.
-
First thing we'd do is replace the 160 GB Hitachi with something more meaty.
-
-
-
The optical drive is attached via three Phillips screws.
-
The brackets and screw layout are identical to the older MacBook Unibody.
-
-
-
Removing the optical drive exposes the right speaker.
-
It's held in place by adhesive. A quick pry with the spudger will loosen it.
-
-
-
Disconnect the LVDS connector.
-
Remove 7 motherboard screws.
-
Remove 2 DC-in screws.
-
Disconnect trackpad, keyboard, and battery level indicator cables.
-
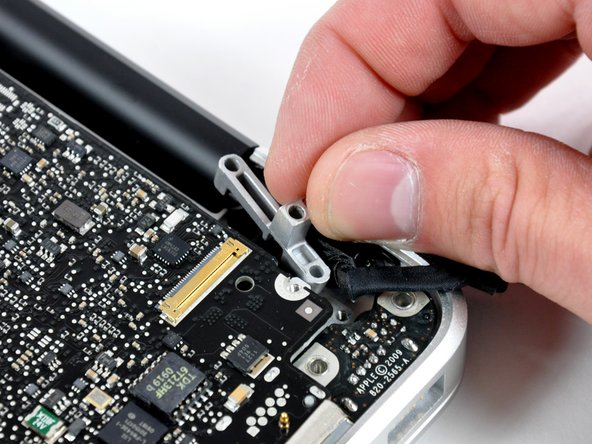
Remove LVDS cable retaining bracket.
-
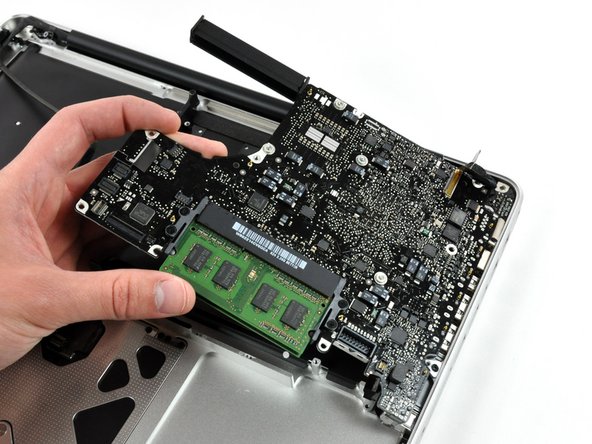
And the logic board is almost out...
-
-
-
A couple of images of the logic board, before we strip it naked...
-
Like the MacBook Unibody, the heat sink comes out along with the logic board.
-